Vanda orchids are some of the most stunning and unique orchids out there, known for their vibrant colours and distinctive flower shapes. However, caring for them requires a little extra attention, especially when it comes to repotting. Repotting a Vanda orchid isn’t overly complicated, but following a few essential dos and don’ts will help you keep your orchid healthy and encourage it to bloom beautifully. In this guide, we’ll walk through 20 critical tips for repotting your Vanda orchid successfully!
- 1 The Dos of Repotting Vanda Orchids
- 2 1. Do Repot Only When Necessary
- 3 2. Do Choose the Right Season
- 4 3. Do Use a Suitable Potting Mix
- 5 4. Do inspect the roots carefully.
- 6 5. Do Soak Roots Before Repotting
- 7 6. Do Use a Container with Good Air Circulation
- 8 7. Do Sterilise Your Tools
- 9 8. Do use a larger container only if necessary.
- 10 9. Do ensure adequate drainage.
- 11 10. Do Use a Root-Stimulating Solution
- 12 The Don’ts of Repotting Vanda Orchids
- 13 11. Don’t repot when the orchid is blooming.
- 14 12. Don’t Overpack the Potting Medium
- 15 13. Don’t Use Regular Potting Soil
- 16 14. Don’t ignore warning signs.
- 17 15. Don’t Trim Healthy Roots
- 18 16. Don’t Use Contaminated Pots
- 19 17. Don’t Forget to Water After Repotting
- 20 18. Don’t Place the Orchid in Direct Sunlight Right Away
- 21 19. Don’t Rush the Process
- 22 20. Don’t forget to monitor regularly.
- 23 Final Thoughts
- 24 FAQs
The Dos of Repotting Vanda Orchids

1. Do Repot Only When Necessary
Vandas don’t require frequent repotting like some other orchids. Only repot them when they’ve noticeably outgrown their current pot, when the potting medium has broken down, or when there are clear issues with the roots. Repotting too often can stress the plant and interrupt its growth.
2. Do Choose the Right Season
The best time to repot Vanda orchids is usually in early spring or late summer. These times of year allow the plant to adjust without impacting its blooming cycle too heavily. Repotting during the right season can make a huge difference in how quickly the plant recovers.
3. Do Use a Suitable Potting Mix
Vandas need an airy, well-draining potting mix. A mix that includes large bark chunks, charcoal, and perlite works well. This provides the orchid with the right environment for its roots to breathe, which is essential for its health. The potting mix should mimic the orchid’s natural growing conditions in the wild.
4. Do inspect the roots carefully.
Before repotting, take time to inspect the roots carefully. Trim away any dead, damaged, or rotting roots, as these can lead to infection or hinder the growth of new, healthy roots. Healthy roots are usually firm and green or white, while unhealthy ones are soft, blackened, or mushy.
5. Do Soak Roots Before Repotting
Vanda roots can be quite stiff and brittle, making them harder to handle. Soaking them in lukewarm water for about 20-30 minutes before repotting will make them more pliable and easier to arrange in the new pot. This step helps avoid root breakage during the repotting process.
6. Do Use a Container with Good Air Circulation
Vandas love airflow, and their roots need to breathe. Choose an open basket or slotted pot that allows air to flow freely. This setup mimics their natural growing environment and helps reduce the risk of root rot by preventing excess moisture from accumulating.
7. Do Sterilise Your Tools
Always sterilise your scissors, pruning shears, or any tools before trimming roots. This simple step prevents the spread of bacteria, fungi, or viruses to your orchid, which could cause diseases that harm your plant.
8. Do use a larger container only if necessary.
When selecting a new pot, don’t go too big. Only move up one pot size if the roots are very cramped. Vandas actually do well when they are slightly snug in their pots, which can help with stability and prevent overwatering issues.
9. Do ensure adequate drainage.
Vandas do not like soggy roots, so make sure your container has plenty of drainage holes. Good drainage prevents water from sitting in the pot, reducing the risk of root rot. If you’re using a basket, ensure that it allows excess water to escape easily.
10. Do Use a Root-Stimulating Solution
After repotting, applying a gentle root-stimulating solution can encourage faster root growth. This helps the plant settle in its new environment and reduces transplant shock, giving it a strong start in its new pot.
The Don’ts of Repotting Vanda Orchids
11. Don’t repot when the orchid is blooming.
Repotting during bloom can stress the orchid and cause its flowers to drop prematurely. Avoid repotting if your Vanda is currently flowering, as it’s best to wait until the bloom period has passed.
12. Don’t Overpack the Potting Medium
Avoid packing the potting medium too tightly around the roots, as Vanda roots need room to breathe. A densely packed medium can suffocate the roots, restricting airflow and increasing the chance of root rot.
13. Don’t Use Regular Potting Soil
Vandas are epiphytes, which means they naturally grow on trees and don’t need soil. Regular potting soil retains too much moisture, which can easily lead to root rot. Always use a specialised orchid mix to give your Vanda the best environment for growth.
14. Don’t ignore warning signs.
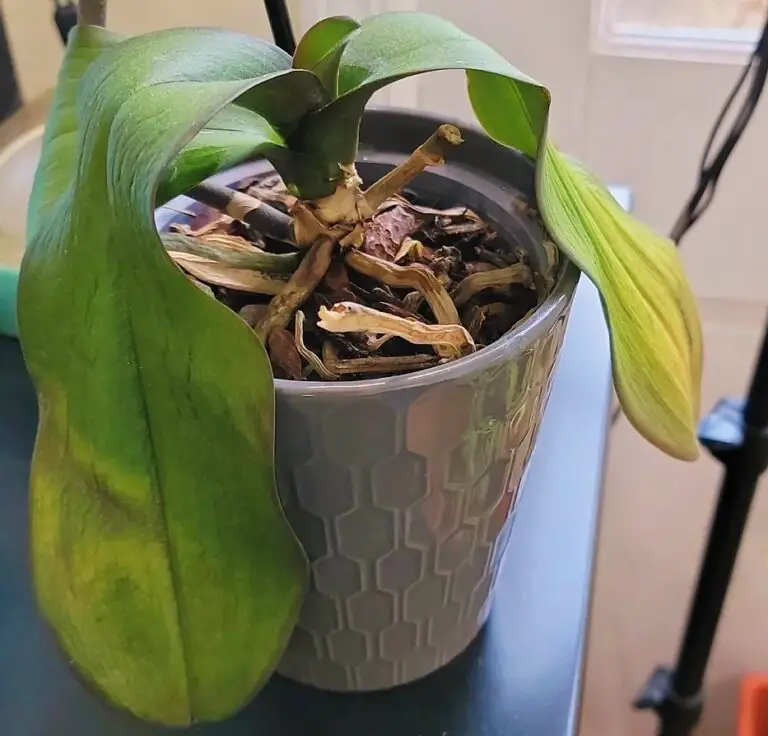
If your Vanda shows signs of yellowing leaves, mushy roots, or a lack of growth, it may need repotting sooner rather than later. Ignoring these signs can lead to larger health issues, so take action quickly if you notice any of these indicators.
15. Don’t Trim Healthy Roots
It might seem tempting to trim some of the longer roots to fit the orchid better into the pot, but avoid trimming any healthy roots. These roots are vital for absorbing water and nutrients, and cutting them can hinder your orchid’s growth.
16. Don’t Use Contaminated Pots
If you’re reusing a pot, make sure it’s thoroughly cleaned and sterilized. Reusing a pot without cleaning can introduce bacteria, fungi, or pests to your Vanda, which can harm the orchid’s health over time.
17. Don’t Forget to Water After Repotting
After repotting, give your Vanda orchid a gentle watering. This helps the plant settle into its new potting medium and reduces the stress of repotting. Be careful not to overwater, but a light initial watering can be beneficial.
18. Don’t Place the Orchid in Direct Sunlight Right Away
After repotting, Vandas need a recovery period. Place them in a bright but indirect light spot for a few weeks before moving them back to their usual sunny location. This allows them to adjust to their new pot without added stress.
19. Don’t Rush the Process
Repotting a Vanda orchid takes patience and careful handling. Take your time with each step, especially when working with the roots, to avoid damaging them. Rushing can result in errors that could eventually damage the plant.
20. Don’t forget to monitor regularly.
After repotting, keep a close eye on your Vanda orchid for the first few weeks. Watch for any signs of stress, such as drooping leaves or discoloration. Monitoring can help you quickly identify any issues that need addressing, ensuring your orchid adjusts well to its new pot.
Final Thoughts
Repotting a Vanda orchid may seem intimidating at first, but with the right approach, it’s a straightforward and rewarding process that can benefit your plant’s health and growth. By following these 20 dos and don’ts, you’ll be well-equipped to give your Vanda orchid a smooth transition to its new pot. Keep in mind that the secret to a good repotting procedure is patience and care.
With the right care and attention, your Vanda orchid will reward you with vibrant blooms and healthy growth for years to come. Happy repotting!
FAQs
What are Vanda orchids?
Vanda orchids are a genus of tropical orchids known for their vibrant colors and intricate flower patterns. They are native to Southeast Asia and parts of the Himalayas.
How much sunlight do Vanda orchids need?
They need bright, indirect sunlight. A few hours of morning or late afternoon sun is ideal, but avoid harsh midday sunlight to prevent leaf burn.
Can Vanda orchids be grown indoors?
Yes, but they require high humidity, bright light, and good air circulation, which can be challenging to maintain indoors.
How often should I water Vanda orchids?
Vandas need frequent watering, especially in warm climates. Water them 3-4 times a week, ensuring the roots stay hydrated but not waterlogged.
Do Vanda orchids need a potting medium?
Unlike many orchids, Vandas can be grown without a potting medium. They can be mounted, placed in baskets, or grown bare-root.

