Orchids Pencil Test: 10 Watering Mistakes Every Orchid Owner Should Avoid
Table of Contents 👈 Tap Here
Most orchid owners kill their plants with kindness — and the weapon of choice is almost always water. Overwatering is the number one reason orchids develop root rot, drop their blooms, and slowly decline. The good news is there’s one ridiculously simple tool that can prevent all of that: a pencil. The orchids pencil test takes less than ten seconds and tells you exactly whether your plant is thirsty or still holding moisture — no guesswork, no schedule, no expensive gadgets required.
Proper watering isn’t just about frequency — it’s about timing based on actual soil conditions. Orchids don’t follow a calendar. They respond to their environment, and their needs shift with the seasons, humidity levels, and the type of potting mix they’re growing in. Learning to read those signals instead of relying on a weekly routine is what separates struggling orchids from thriving ones.
Orchids Pencil Test
What Is the Orchids Pencil Test?
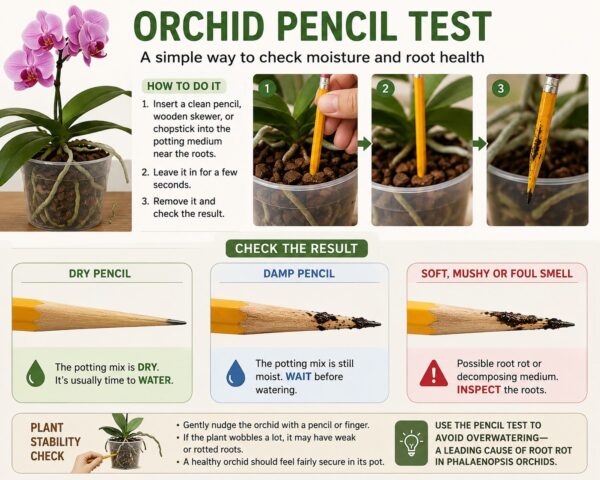
The orchids pencil test is a moisture-detection method where you insert a plain wooden pencil or skewer into the orchid’s potting mix to check how wet or dry the growing medium is before watering. If the wood comes out damp and slightly discolored, the roots still have access to moisture. If it comes out clean and dry, it’s time to water.
Orchid growers use this test because orchid bark and moss don’t behave like regular potting soil. The surface can look dry while the interior is still saturated — the exact conditions that lead to root rot. The pencil test bypasses that deception by getting directly to the moisture level where the roots actually live, giving you an honest read every time.
You should perform the pencil test whenever you’re considering watering — not on a set schedule. Before you pick up the watering can, run the test. It takes seconds and removes all the uncertainty. Over time, you’ll start to recognize patterns, but the test is still worth doing because environmental conditions can make your orchid’s needs unpredictable week to week.
How to Perform the Orchids Pencil Test
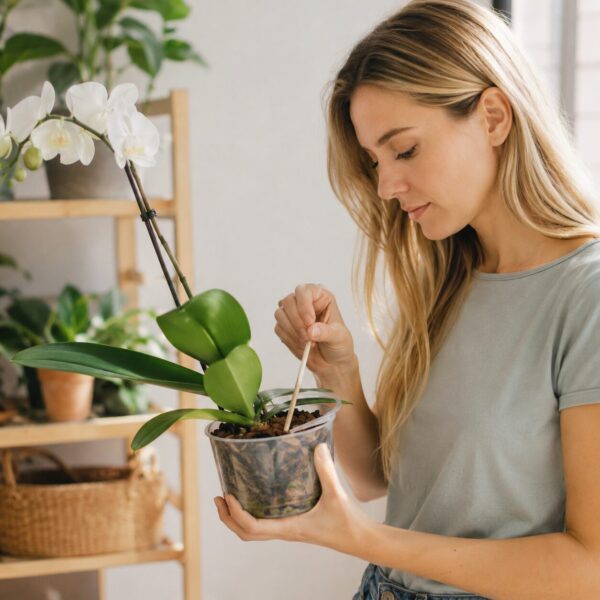
Step 1 — Choose a clean pencil or wooden skewer. Use an unfinished wooden pencil or a plain bamboo skewer. Avoid painted pencils or ones with heavy lacquer coatings, as these won’t absorb moisture effectively and can give you a false reading. A basic number 2 pencil or a disposable bamboo skewer from the kitchen works perfectly.
Step 2 — Insert it into the potting mix. Push the pencil about halfway into the bark or moss, aiming for the center of the pot where the roots are most active. Don’t just poke the surface — you want to reach the moisture zone deeper in the growing medium, which is where your orchid’s roots are feeding and where rot tends to develop when overwatering occurs.
Step 3 — Wait a few seconds. Leave the pencil in the mix for about five to ten seconds. This gives the wood enough time to absorb any available moisture from the surrounding medium. The longer it stays, the more accurate the reading — but even a quick dip gives you useful information compared to just looking at the surface and guessing.
Step 4 — Remove and inspect the pencil. Pull the pencil out and examine the tip and lower portion. If the wood is noticeably darker, feels cool to the touch, or shows visible moisture, the potting mix still has water available. If the wood looks exactly the same as when you put it in — dry, clean, and unchanged — the mix has dried out sufficiently for watering.
Step 5 — Decide whether your orchid needs watering. A moist pencil means wait another day or two, then test again. A dry pencil means your orchid is ready for a thorough watering. Water deeply, allow the pot to drain completely, and never let the roots sit in standing water. Then repeat the test before the next watering session, regardless of how much time has passed.
10 Watering Mistakes You’re Making
1. Watering Without Using the Orchids Pencil Test
Watering by instinct or visual inspection alone is the most common orchid mistake. The surface of bark mix can look bone dry within a day while moisture is still trapped deep inside the pot where roots are growing. Skipping the pencil test and watering on appearance alone means you’re flying blind — and for orchids, that almost always means too much water, too often.
2. Using a Set Schedule for Watering Rather than Monitoring Moisture
“Water every seven days” is advice that sounds reliable but isn’t. Orchids don’t care about your calendar — they respond to temperature, humidity, light levels, and the season. A once-a-week schedule might be perfect in dry winter air and catastrophically too frequent during a humid summer. The pencil test replaces the schedule with real information, so you water when the plant actually needs it.
3. Overwatering Your Orchid
Consistent overwatering saturates the roots and cuts off the oxygen supply they need to stay healthy. Orchid roots evolved to experience wet and dry cycles — they need to dry out between waterings to breathe and function properly. When roots sit in permanent moisture, they suffocate, turn brown and mushy, and begin to rot. This is almost always fatal if not caught early enough.
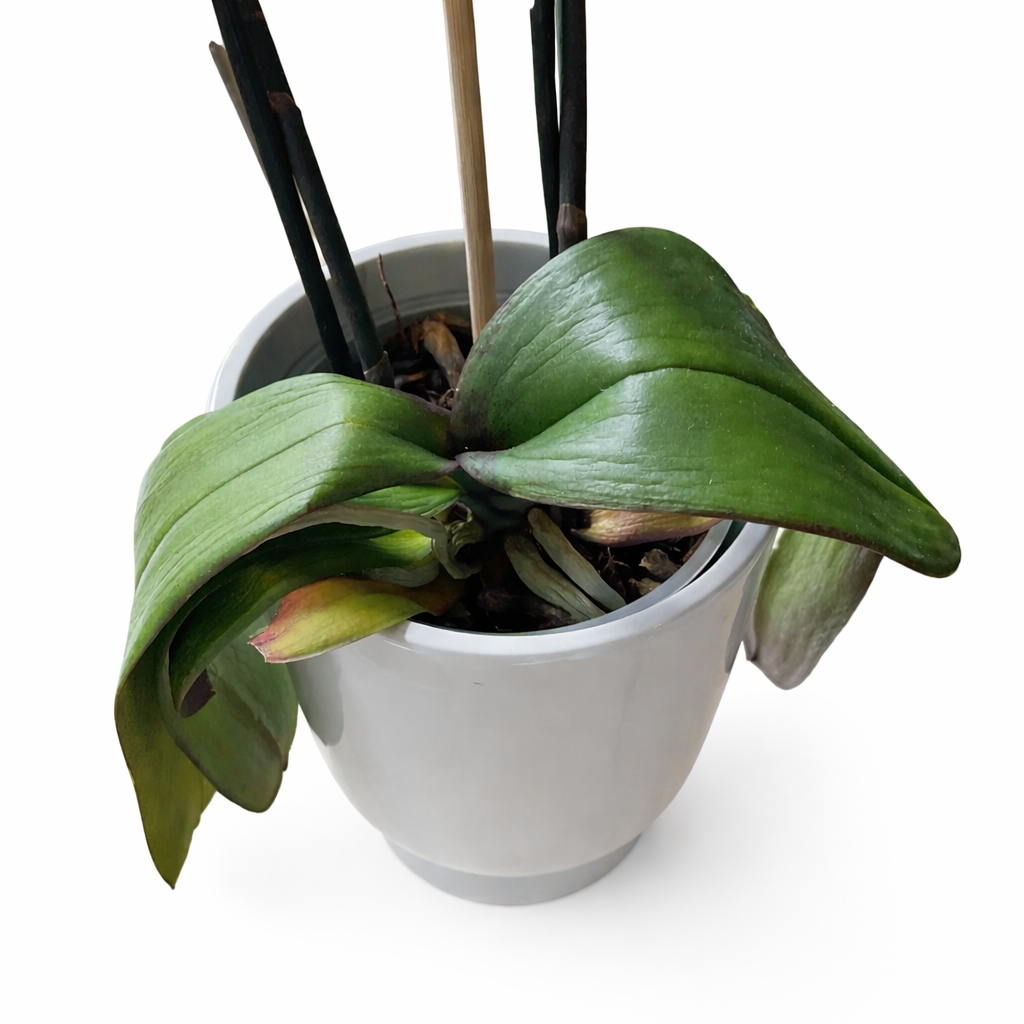
4. Letting the Potting Mix Stay Bone Dry for Too Long
Underwatering is a less common mistake but still damaging. When an orchid’s roots are denied water for extended periods, the plant begins pulling moisture from its own leaves and pseudobulbs, leading to wrinkling, softening, and reduced blooming. A healthy orchid should be watered thoroughly as soon as the pencil test confirms the mix is dry — don’t wait until the plant shows visible stress.
5. Watering with Ice Cubes
The ice cube watering method became popular as a simplified tip for beginners, but it’s fundamentally incompatible with how orchids grow. Orchids are native to tropical and subtropical environments where roots never encounter near-freezing temperatures. Ice damages root tissue and creates cold stress that weakens the plant over time. Use room-temperature water and water thoroughly — the simple way is also the right way.
6. Leaving Water in the Orchid Crown
Water pooling in the crown — the central point where the leaves emerge — creates the ideal environment for bacterial and fungal rot to develop. This is one of the fastest ways to lose an otherwise healthy orchid. After watering, tilt the plant gently to allow any collected water to drain away from the crown, or use a soft cloth to wick up the excess. Never let water sit there overnight.
7. Using the Wrong Potting Mix
Orchids cannot thrive in standard potting soil. Regular soil holds too much moisture and compacts around the roots, suffocating them and creating the waterlogged conditions that cause rot. Orchids need a chunky, fast-draining mix — typically fir bark, perlite, sphagnum moss, or a commercial orchid blend — that mimics their natural growing environment and allows air to circulate freely around the root system.
8. Ignoring Root Color Before Watering
Orchid roots are transparent and tell you exactly what’s happening inside the pot. Healthy, hydrated roots appear bright green or silver-green. Roots that have faded to silvery-gray or white are signaling that they’re dry and ready for water. Check the root color through the clear or mesh sides of the pot before watering — it’s a powerful visual cue that works alongside the pencil test to give you a complete picture.
9. Using Pots Without Proper Drainage
Pots without drainage holes trap water at the bottom of the growing medium with no way to escape, and orchid roots sitting above that reservoir are essentially being slow-roasted in moisture. Always use pots with drainage holes and never place an orchid pot in a solid decorative cache pot without checking that water isn’t accumulating underneath. If you love a specific decorative pot, place a layer of gravel at the bottom to elevate the root zone above standing water.
10. Forgetting That Seasons Change Watering Needs
Orchid Watering by Season
Forgetting that seasons change watering needs is one of the most common orchid care mistakes
Season at a glance
Spring
Growth resumes
7–10 days between waterings
Increase watering as new roots appear
Summer
Peak growing season
5–7 days between waterings
Hot weather dries roots fast — check often
Autumn
Slowing down
10–14 days between waterings
Reduce watering as growth slows
Winter
Dormant / resting
14–21 days between waterings
Roots stay moist longer in cool air
Full watering timetable
| Season | Frequency | Volume | Best time | Root check tip |
|---|---|---|---|---|
| 🌱 SpringMar – May | Every 7–10 days | Moderate | Morning | Green roots = still moist; wait if so |
| ☀️ SummerJun – Aug | Every 5–7 days | Generous | Early morning | Silver/white roots = dry and ready |
| 🍂 AutumnSep – Nov | Every 10–14 days | Moderate | Morning | Let top 2 cm of medium dry first |
| ❄️ WinterDec – Feb | Every 14–21 days | Light | Late morning | Overwatering in winter = root rot risk |
💡 Golden watering rules (all seasons)
An orchid that needed water every five days in summer may only need watering every ten to fourteen days in winter. Cooler temperatures slow down water evaporation, lower light levels reduce the plant’s metabolic activity, and indoor heating can either increase or decrease humidity depending on your setup. The pencil test accounts for all of these variables automatically — which is exactly why it’s more reliable than any fixed watering schedule, year-round.
Signs Your Orchid Needs Water
Knowing when and how to water are equally crucial. Keep an eye out for these warning signs that your orchid is dehydrated.
Silvery roots are the clearest indicator. When the roots visible through a clear pot fade from green to silver or pale gray, the plant is ready for water. This color shift happens because the velamen layer surrounding the roots — a spongy outer coating — empties of moisture and becomes reflective. It’s a reliable, real-time moisture gauge built right into the plant’s anatomy.
Dry potting mix confirmed by the pencil test is the gold standard. When you insert a pencil and it comes out completely clean and dry, the medium has dried out to a point where watering is appropriate. Don’t wait for additional symptoms to appear — a dry pencil test result is sufficient reason to water thoroughly and immediately.
A lightweight pot is another useful indicator, especially once you’re familiar with how heavy your particular pot feels when freshly watered. As the bark dries out, the pot becomes noticeably lighter. Lifting the pot before and after watering a few times trains your hand to recognize the difference, and this weight-based check pairs well with the pencil test for double confirmation.
Wrinkled leaves indicate advanced dehydration and mean the orchid has already begun drawing moisture from its own tissues. At this stage, the plant is under real stress. Water immediately and consider whether your watering intervals have been too long. Wrinkled leaves can recover with consistent proper watering, but repeated dehydration weakens the plant and reduces future bloom production significantly.
Signs You’re Overwatering
Overwatering damage often develops slowly before becoming obvious, which makes it more dangerous than underwatering. These are the warning signs to watch for.
Yellow leaves that appear soft, pale, or almost translucent are a classic early sign of overwatering. While some yellowing is natural as older leaves age and drop, yellowing that appears on multiple leaves simultaneously — especially on younger growth — usually points to root stress caused by excess moisture and poor drainage in the potting mix.
Mushy roots are the most definitive sign of overwatering damage. Healthy roots feel firm and slightly spongy. Overwatered roots become soft, dark brown or black, and collapse when pressed. If you unpot your orchid and find mushy roots, remove all damaged tissue with sterile scissors immediately, dust the cuts with cinnamon as a natural antifungal, and repot in fresh dry bark mix.
A bad smell coming from the potting medium or the roots is a serious red flag. Healthy orchid mix smells earthy and neutral. A sour, rotten, or sulfurous odor means organic breakdown is occurring in the root zone — a direct result of waterlogged conditions. Investigate immediately by unpotting and inspecting the roots rather than waiting to see if the smell resolves on its own.
Root rot and fungus gnats often appear together as twin consequences of chronic overwatering. Fungus gnats lay eggs in consistently moist potting mix, and their larvae can damage roots further as they feed. If you notice small flies hovering around your orchid soil, it’s almost certainly staying too wet for too long between waterings. The pencil test and corrected watering frequency will break the cycle.
Best Time to Water Orchids
Water in the morning whenever possible. Morning watering gives leaves and crowns time to dry out completely before temperatures drop in the evening. Moisture left on the plant overnight in cooler conditions creates the perfect environment for fungal and bacterial infections to take hold. A morning watering routine also aligns with the plant’s natural growing cycle, since orchids are most metabolically active during daylight hours.
Adjust your frequency with the seasons. In summer, higher temperatures, increased light, and stronger airflow mean your orchid’s potting mix dries out much faster — sometimes in as little as four or five days. In winter, lower light and cooler indoor temperatures slow evaporation dramatically, and the same mix might stay moist for ten days or more. Let the pencil test guide you rather than assuming your summer schedule still applies once the weather changes.
Indoor humidity levels matter more than most growers realize. Orchids prefer 50–70% relative humidity. In very dry indoor environments — common during winter when heating systems strip moisture from the air — orchids may actually need water more frequently despite cooler temperatures, because their roots lose moisture through the air. In humid climates or during rainy seasons, the opposite is true. A small hygrometer near your orchids gives you useful context alongside the pencil test.
Conclusion
The orchids pencil test is one of the most practical and underused tools in any orchid grower’s routine. It costs nothing, takes seconds, and removes the guesswork that leads to the most damaging and most preventable orchid care mistake: watering at the wrong time. Whether you’re growing Phalaenopsis on a windowsill or a collection of species orchids in a dedicated space, the test works across all varieties and all growing conditions.
Before every single watering, do the test. Make it as automatic as checking the weather before leaving the house. Your orchid’s roots, leaves, and blooms will reflect the difference — healthier growth, longer-lasting flowers, and a plant that actually thrives instead of just surviving. The pencil is humble, but the results speak for themselves.
Orchids Pencil Test – Frequently Asked Questions (FAQs)
1. What is the Orchids Pencil Test?
The Orchids Pencil Test is a simple method used to determine whether your orchid needs watering. Insert a clean wooden pencil into the potting mix for a few minutes. If the pencil comes out dark or damp, the mix still contains moisture. If it comes out dry and light-colored, it’s usually time to water.
__
2. How does the Orchids Pencil Test work?
The Orchids Pencil Test works by allowing the wooden pencil to absorb moisture from the potting medium. This gives you a better idea of the moisture level around the roots instead of relying only on the surface, helping prevent overwatering and root rot.
__
3. Is the Orchids Pencil Test accurate?
Yes, the Orchids Pencil Test is considered a reliable and beginner-friendly way to check moisture. While it is not as precise as a moisture meter, it provides a quick and effective indication of whether your orchid’s growing medium is still damp.
__
4. Which type of pencil should I use for the Orchids Pencil Test?
For the Orchids Pencil Test, use a plain, untreated wooden pencil. Avoid painted, coated, or mechanical pencils because they do not absorb moisture effectively and may not provide accurate results.
__
5. How long should the pencil stay in the pot?
During the Orchids Pencil Test, leave the pencil inserted into the potting mix for about five to ten minutes. This gives the wood enough time to absorb moisture and helps you make a more accurate watering decision.
__
6. Can beginners use the Orchids Pencil Test?
Absolutely. The Orchids Pencil Test is one of the easiest watering methods for beginners because it requires no special equipment. It helps new orchid growers understand moisture levels and build better watering habits.
__
7. Does the Orchids Pencil Test work for all orchids?
The Orchids Pencil Test works well for most orchids grown in bark, moss, or mixed potting media. However, always consider your orchid species, pot size, and environmental conditions when deciding how often to water.
__
8. Can the Orchids Pencil Test prevent root rot?
Yes, the Orchids Pencil Test can reduce the risk of root rot by helping you avoid watering when the growing medium is still moist. Proper watering is one of the most important factors in maintaining healthy orchid roots.
__
9. How often should I perform the Orchids Pencil Test?
You can perform the Orchids Pencil Test every few days, especially during active growth or warm weather. Regular moisture checks are much safer than watering on a fixed schedule.
__
10. Is the Orchids Pencil Test better than watering on a schedule?
Yes, the Orchids Pencil Test is generally more reliable than following a calendar because orchids dry out at different rates depending on temperature, humidity, light, and airflow.
__
11. Can I use the Orchids Pencil Test in moss?
Yes, the Orchids Pencil Test works well in sphagnum moss. Since moss retains moisture longer than bark, checking with a pencil helps prevent watering too early and keeps the roots healthier.
__
12. Does the Orchids Pencil Test replace a moisture meter?
The Orchids Pencil Test is an affordable alternative to a moisture meter for many home growers. Although a moisture meter offers more precise readings, the pencil method is often sufficient for everyday orchid care.
__
13. What should I do if the pencil comes out damp?
If the pencil is damp after the Orchids Pencil Test, wait a little longer before watering. Allowing the potting mix to dry slightly between waterings helps promote strong root growth and prevents excessive moisture.
__
14. What if the pencil comes out completely dry?
When the pencil comes out dry during the Orchids Pencil Test, it usually indicates that the growing medium has dried enough for watering. Water thoroughly and allow excess water to drain completely.
__
15. Can the Orchids Pencil Test be used indoors?
Yes, the Orchids Pencil Test is ideal for indoor orchids because indoor conditions often slow the drying process. Regular testing helps prevent accidental overwatering in homes with limited airflow.
__
16. Is the Orchids Pencil Test safe for orchid roots?
The Orchids Pencil Test is safe when performed gently. Carefully insert the pencil into the potting mix without forcing it through the roots to avoid damaging the orchid’s root system.
__
17. Why is the Orchids Pencil Test popular?
The Orchids Pencil Test is popular because it is inexpensive, simple, and effective. Many orchid growers appreciate this easy method for checking moisture without needing specialized gardening tools.
__
18. Can I reuse the same pencil?
Yes, you can reuse the same pencil for the Orchids Pencil Test. Wipe it clean after each use and allow it to dry before testing another orchid to help prevent spreading diseases.
__
19. Does pot size affect the Orchids Pencil Test?
Yes, pot size can influence the Orchids Pencil Test because larger pots usually retain moisture longer than smaller ones. Always insert the pencil deep enough to check the moisture near the root zone.
__
20. Why should every orchid owner learn the Orchids Pencil Test?
Every orchid grower can benefit from learning the Orchids Pencil Test because it encourages proper watering habits, reduces the chances of root problems, and helps orchids stay healthier, stronger, and more likely to produce beautiful blooms.
Hi, I’m Steve, an orchid grower with 30+ years of hands-on experience caring for indoor and outdoor plants. I share practical, tested tips and beginner-friendly guides to help plant enthusiasts nurture healthy, thriving plants.