Orchids are one of the most popular and beautiful plants in the world. They come in various colors, shapes, and sizes, making them a favorite among gardeners and flower enthusiasts. However, despite their beauty, orchids are susceptible to a common and often deadly disease known as root rot. Orchid root rot is caused by a variety of factors, including overwatering, poor drainage, and fungal infections.
In this article, we’ll explore the causes and symptoms of orchid root rot, as well as the best treatment options to help your orchids thrive and remain healthy for years to come. So if you’re an orchid lover or simply looking to care for your plants better, read on to learn more.
Orchid root rot is a condition that affects the root system of the plant, causing it to decay and ultimately die. This can be a devastating blow to any orchid grower, as the root system is essential for the plant’s survival and overall health.
In addition to the causes mentioned earlier, orchid root rot can also be caused by other factors such as temperature fluctuations, low humidity, and pests. Symptoms of orchid root rot include yellowing leaves, wilting, and a foul smell emanating from the roots. If left untreated, the disease can spread rapidly and lead to the death of the entire plant.

What Is Orchid Root Rot?
Orchid root rot is a fungal infection that affects the roots of orchid plants. It is caused by various types of fungi, including Fusarium, Pythium, and Rhizoctonia. These fungi thrive in moist conditions and can infect the roots of orchids that are overwatered, poorly drained, or planted in soil that does not allow proper airflow to the roots.
Symptoms of orchid root rot include the appearance of black or brown spots on the roots, soft and mushy roots, and the wilting or yellowing of leaves. The plant may also become stunted and fail to produce new growth. If left untreated, orchid root rot can cause the plant to die.
Preventing orchid root rot involves providing the plant with proper drainage, avoiding overwatering, using a well-draining potting mix specifically designed for orchids, and maintaining proper airflow around the roots.
If the plant does develop root rot, it is important to act quickly to prevent the spread of the infection. This may involve repotting the orchid in fresh, sterile potting mix and trimming away any infected roots. Additionally, antifungal treatments may be necessary to kill the fungus and prevent it from spreading.

Signs of Root Rot in Orchids
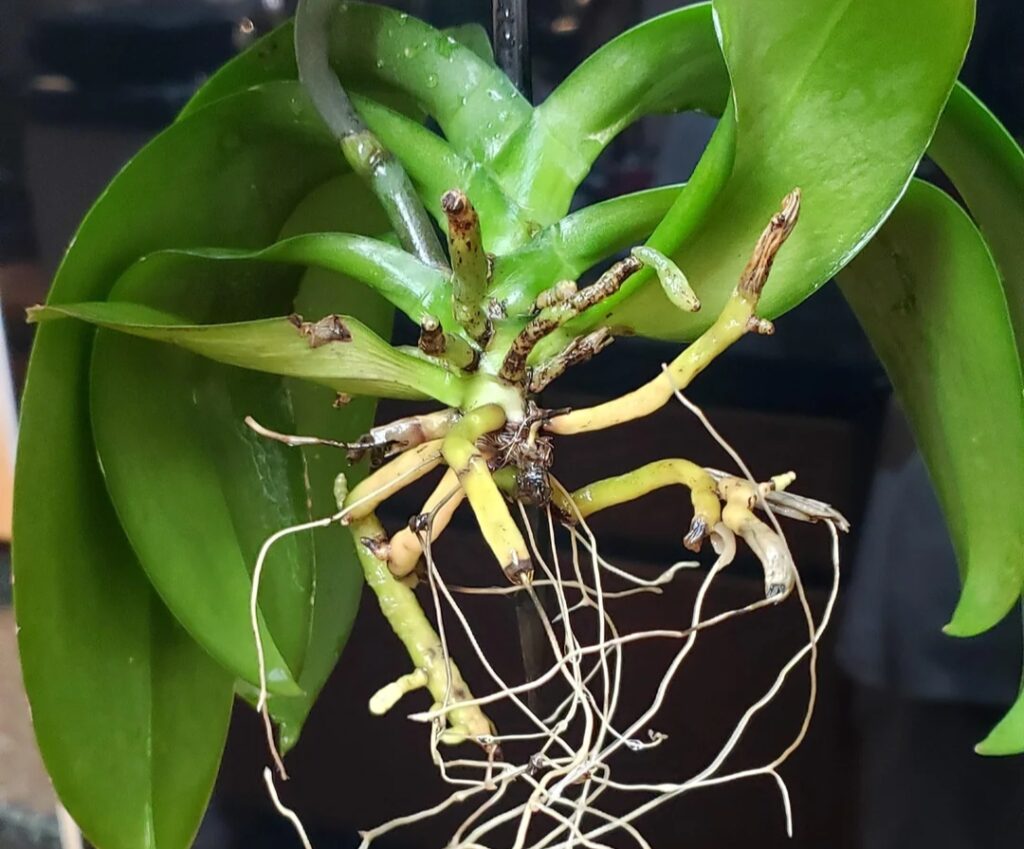
Discolored roots: Healthy orchid roots should be firm, plump, and white or green. If you notice black, brown, or mushy roots, this is a sign that the roots are rotting.
Foul odor: A foul smell coming from the orchid pot is another sign of root rot. The smell is caused by the decaying roots and can be a strong indication that the infection is severe.
Droopy leaves: When orchid roots are not able to absorb water and nutrients properly due to rot, the plant may show signs of dehydration, such as wilted or droopy leaves.
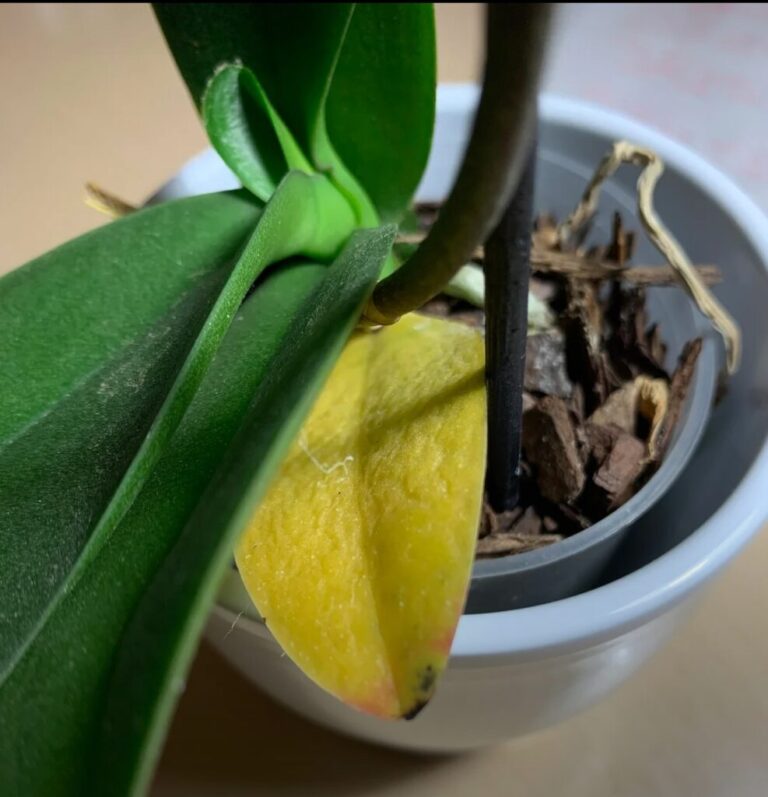
Yellowing leaves: As the root rot progresses, the leaves of the orchid may turn yellow and fall off. This is because the plant is not able to get the nutrients it needs from the infected roots.
Stunted growth: Orchids with root rot may also have stunted growth or no growth at all. This is because the plant is not able to get the nutrients it needs to grow and develop properly.
If you notice any of these signs, it is important to take action immediately to prevent further damage to the orchid. Treatment options for root rot include removing infected roots, repotting in fresh soil, and applying a fungicide to the plant. Regular monitoring and proper orchid care can help prevent root rot from occurring in the first place.
Causes of Root Rot in Orchids
Orchids are a delicate and beautiful plant that requires proper care and attention to thrive. However, one of the most common problems that orchid growers face is root rot, a fungal infection that can cause significant damage to the plant’s roots. Overwatering, poor soil drainage, poor air circulation, fungal spores, and temperature and light conditions are all factors that can contribute to root rot in orchids.
To prevent root rot, it is essential to provide the plant with the appropriate environment, including well-draining potting mix, appropriate watering, good air circulation, and proper temperature and light conditions. Regular inspections of the roots and leaves can also help identify and treat root rot early, preventing further damage to the plant. By taking proper care of your orchids and monitoring their environment, you can help prevent root rot and keep your plants healthy and beautiful.
How to Treat Orchid Root Rot
Orchid Root Rot Care Timetable
| Stage | Task | Time Required | Frequency |
|---|---|---|---|
| Detection | Check for yellowing leaves, mushy roots, or foul odor | 5-10 mins | Weekly |
| Immediate Action | Remove orchid from the pot and inspect roots | 10-15 mins | As needed |
| Trimming Rotted Roots | Use sterilized scissors to cut away black/brown mushy roots | 10-20 mins | As needed |
| Disinfection | Soak roots in fungicide or hydrogen peroxide (3%) | 10 mins | Once after trimming |
| Drying Phase | Let roots dry in aerated space before repotting | 2-4 hours | Once |
| Repotting | Use fresh, well-draining bark or sphagnum moss mix | 15-20 mins | After drying |
| Watering Adjustment | Reduce watering and ensure proper drainage | Ongoing | Weekly (check moisture first) |
| Airflow & Humidity | Maintain good air circulation (fan/open space) and 50-70% humidity | Ongoing | Daily |
| Preventative Care | Use a well-draining pot and water only when dry | Ongoing | Always |
| Follow-Up Check | Inspect roots for new growth and signs of recovery | 5-10 mins | Every 2 weeks |
Orchid root rot is a common problem that can be caused by overwatering, poor soil drainage, fungal infections, and other factors. If you suspect that your orchid has root rot, it is essential to act quickly to prevent further damage to the plant. Here are some steps you can take to treat orchid root rot:
Remove the orchid from the pot: Gently remove the orchid from its pot and inspect the roots for signs of rot. Healthy roots should be firm and white, while rotting roots may be mushy, brown, or black.
Trim away the affected roots: Using clean, sharp scissors, trim away any rotting or dead roots. Be sure to cut back to healthy tissue, and avoid damaging any healthy roots.
Treat the remaining roots: Once you have removed the affected roots, you can treat the remaining roots with a fungicide solution to kill any remaining fungal spores. Follow the instructions on the fungicide carefully, as some solutions may require dilution.
Repot the orchid: After treating the roots, repot the orchid in a clean, well-draining potting mix. Avoid using the same potting mix that may have contributed to the root rot in the first place. Make sure the pot has adequate drainage holes to prevent excess water from accumulating around the roots.
Adjust watering and care: Finally, adjust your watering and care routine to prevent the root rot from recurring. Water your orchid only when the potting mix is dry to the touch, and avoid overwatering. Provide good air circulation and appropriate temperature and light conditions for your orchid’s specific needs.
By taking these steps, you can effectively treat orchid root rot and restore your plant to health. With proper care and attention, your orchid can continue to thrive and bloom beautifully for years to come
Treating Fungus on orchid
One effective way to treat fungus on orchids is to use a combination of cinnamon powder and hydrogen peroxide. Simply mix a small amount of cinnamon powder with hydrogen peroxide to create a paste, and apply it directly onto the affected areas of the orchid. The cinnamon acts as a natural anti-fungal agent, while the hydrogen peroxide helps to disinfect the area and prevent further infection.
It’s important to note that while this method can be effective, prevention is always the best approach. Make sure to keep your orchids in a well-ventilated area with good air circulation, and avoid over-watering or allowing the soil to become waterlogged. Regularly inspect your orchids for signs of fungal infection, and take action immediately if you notice any issues.
How To Prevent Root Rot in Orchids
Preventing root rot in orchids is crucial for their overall health and longevity. One of the best ways to prevent root rot is to ensure that the orchid is potted in the appropriate type of potting mix. Orchids require a well-draining mix that allows for air circulation around the roots, as waterlogged roots are more susceptible to rot. It’s also important to avoid over-watering,
which can lead to standing water in the pot and create a favorable environment for root rot to develop. Another preventative measure is to regularly inspect the orchid for any signs of rot, such as yellowing or mushy roots, and to promptly remove any affected roots to prevent further spread of the disease.
Additionally, keeping the orchid in a well-ventilated area with good air circulation can help to prevent the buildup of excess moisture around the roots, reducing the risk of rot. By following these preventative measures, you can help ensure that your orchids remain healthy and vibrant for years to come
How To Save Orchids With No Roots
If your orchid has no roots, don’t lose hope! There are still steps you can take to try and save it. The first step is to carefully remove the orchid from its pot and inspect the roots. If the roots have completely rotted away, it may be difficult to save the plant, but if there are still some healthy roots remaining, there is still a chance. Next, trim away any dead or mushy roots using a sterile cutting tool.
Then, soak the remaining healthy roots in a diluted fertilizer solution for about 30 minutes to help stimulate growth. After the roots have soaked, gently pot the orchid in a new pot with fresh, well-draining potting mix. You can also add a layer of sphagnum moss on top of the potting mix to help retain moisture.
Finally, place the orchid in a well-lit area with indirect sunlight and keep the soil moist but not waterlogged. With patience and proper care, your orchid may eventually grow new roots and recover from its rootless state.
Should Orchid Roots Be Exposed?
Orchid roots should not be exposed to direct sunlight as they are sensitive and can easily be damaged. While orchid roots do require some exposure to air, they should not be left completely exposed or placed in direct sunlight as this can cause the roots to dry out and become damaged. It’s important to provide orchids with the proper growing conditions, including a well-draining potting mix that allows for air circulation around the roots, and a location with indirect sunlight or filtered light.
Additionally, it’s important to avoid over-watering, as this can lead to waterlogged roots that are more susceptible to disease and rot. By providing the proper growing conditions and avoiding exposure to direct sunlight, you can help ensure that your orchid roots remain healthy and thriving.
By taking these steps, you can effectively treat orchid root rot and restore your plant to health. With proper care and attention, your orchid can continue to thrive and bloom beautifully for years to come.
FAQ
What causes root rot in orchids?
Root rot in orchids is typically caused by over-watering, poor drainage, or using a potting mix that retains too much moisture. This creates a favorable environment for fungus to grow and attack the roots, leading to root rot.
What is the best fungicide for orchid root rot?
The best fungicide for orchid root rot depends on the type of fungus causing the infection. Commonly used fungicides for orchids include copper-based fungicides, chlorothalonil, and thiophanate-methyl. However, it’s important to follow the instructions carefully and use the fungicide only as directed.
What are the signs of stem rot in orchids?
The signs of stem rot in orchids include black or brown spots or lesions on the stem, soft or mushy areas of the stem, and wilting or drooping leaves. In severe cases, the entire stem may become black and mushy, leading to the death of the plant.
What is the best fungicide for orchid roots?
The best fungicide for orchid roots depends on the type of fungus causing the infection. Commonly used fungicides for orchids include copper-based fungicides, chlorothalonil, and thiophanate-methyl. However, it’s important to follow the instructions carefully and use the fungicide only as directed. It’s also important to note that prevention is key, and proper growing conditions, such as well-draining potting mix and avoiding over-watering, can help prevent root rot and other fungal infections from occurring in the first place.
