Dry Orchid Leaves? Discover 10 Shocking Causes & Fixes
Table of Contents 👈 Tap Here
Dry Orchid Leaves :Are your orchid leaves starting to look dry, crispy, or lifeless? If so, you’re not alone. Many plant lovers encounter this problem and often wonder what they did wrong. The truth is, orchids are sensitive and often signal distress through their leaves. But here’s the good news: most issues can be quickly fixed once identified. In this post, we’ll explore 10 shocking reasons why your orchid leaves may be drying up—and how to fix each problem so your orchid stays healthy and thriving.

Is Your Orchid Getting Too Much Sun?
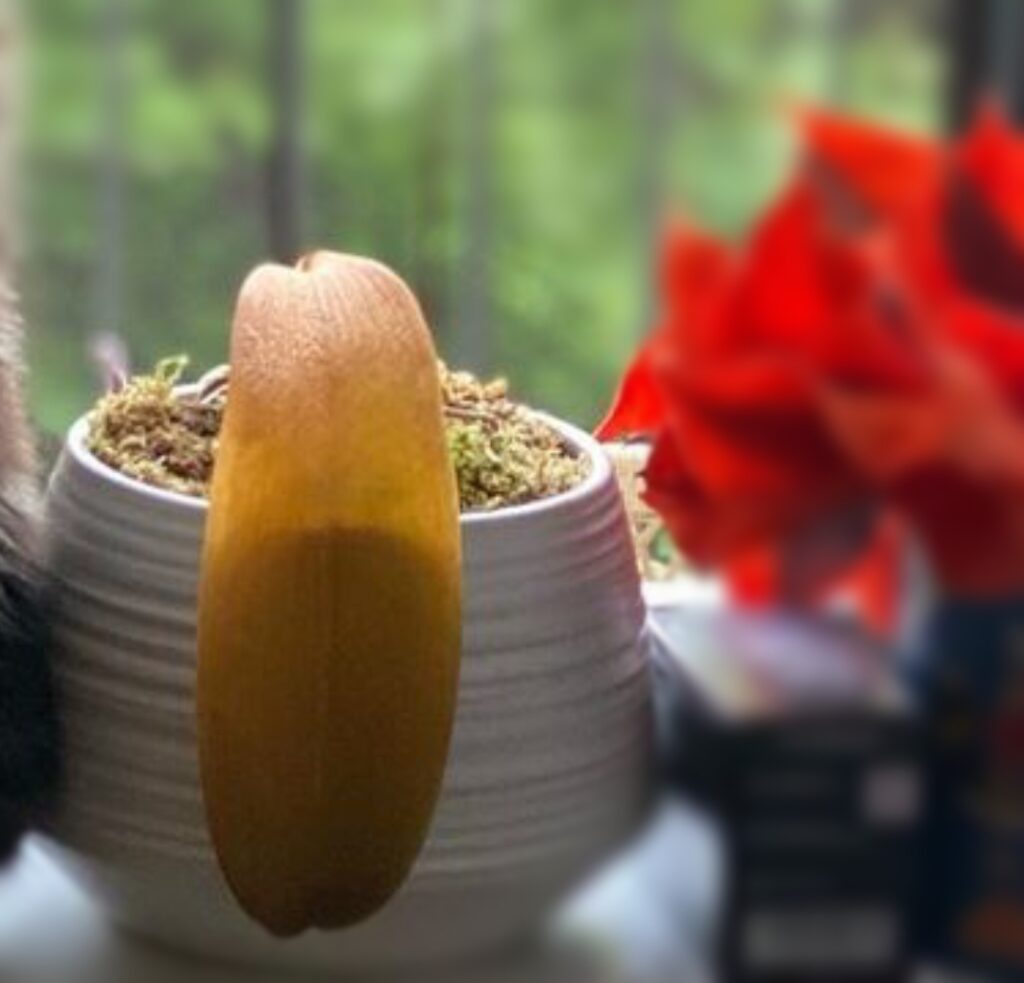
Cause: Orchids love light, but too much direct sunlight—especially intense afternoon rays—can be damaging. Direct exposure burns the leaves, making them dry, bleached, or covered in sunspots. If you notice a yellowish hue and paper-like texture, it’s likely a sunburn issue.
Fix: Shift your orchid to an area with bright, indirect sunlight—like an east-facing window or behind a sheer curtain. Avoid placing orchids in south-facing windows unless filtered. Protecting them from harsh rays will help restore leaf health and prevent further damage.
Are You Forgetting to Water Properly?
Cause: Inconsistent watering is one of the biggest contributors to dry orchid leaves. Orchids don’t like to be bone dry for long periods. If you’re skipping watering sessions or not giving them enough, the leaves begin to shrivel and become leathery due to moisture loss.
Fix: Establish a consistent watering routine based on your environment. Water your orchid when the top inch of the potting mix feels dry, usually once a week. Use water that is at room temperature and thoroughly rinse the pot until the water runs off the bottom. Your orchid’s roots should stay hydrated but never soggy.
Overwatering—Yes, It’s a Thing!
Cause: Too much love can kill, especially with orchids. Overwatering suffocates roots and causes rot. Rotten roots can’t absorb moisture, which ironically leads to leaf dehydration and dryness. If your orchid looks wilted despite watering, this might be the culprit.
Fix: Let the potting media dry out slightly between waterings. Always use pots with drainage holes. Check roots—healthy ones are firm and green/silver. If they’re brown or mushy, it’s time to trim and repot. Improving drainage and spacing out watering sessions will help reverse the damage over time.
Are You Using the Wrong Potting Mix?
Cause: Using regular potting soil is a big mistake. It retains too much water, clogs airflow, and suffocates roots—eventually leading to dry, limp leaves as the roots struggle to function. Orchids need special growing conditions, especially in containers.
Fix: Switch to a well-aerated orchid mix made of bark chips, perlite, sphagnum moss, or charcoal. These ingredients promote airflow and proper drainage, essential for healthy orchid roots. Repot your orchid using this mix and choose a ventilated pot designed for epiphytes. This small change can significantly improve leaf moisture and root function.
Is Your Humidity Too Low?
Cause: Orchids originate from humid tropical forests. When grown indoors in dry air—especially with heaters or air conditioners on—the leaves start drying out due to lack of ambient moisture. This is common in winter months or in very dry climates.
Fix: Aim for humidity levels between 50% and 70%. Place a humidity tray under the pot, use a room humidifier, or group multiple plants together to raise moisture levels naturally. Misting occasionally can help, but it’s not enough on its own. A consistent humidity boost will help keep your orchid leaves soft and hydrated.
Are There Hidden Pests?
Cause: Pests like spider mites, aphids, scale, and mealybugs quietly suck the moisture and nutrients from orchid leaves. As a result, leaves become dry, shriveled, and weak over time. These pests are sneaky and often hide on the underside of leaves or in leaf joints.
Fix: Check your orchid regularly. If you find pests, treat them with neem oil, insecticidal soap, or rubbing alcohol applied with a cotton swab. Repeat treatments weekly until the infestation is gone. Keeping your plant clean and isolated from new arrivals can prevent future infestations and help restore leaf health.
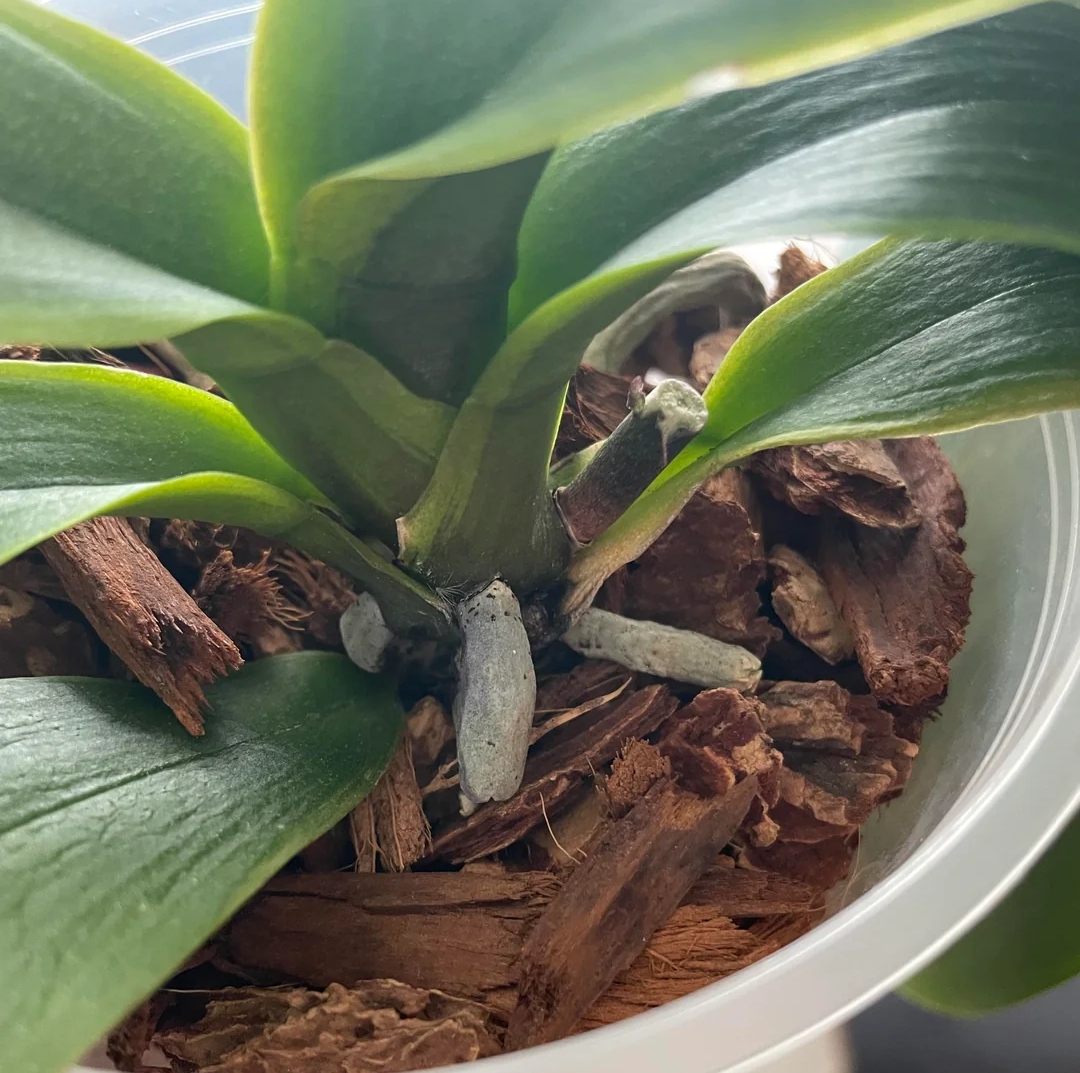
Is Your Orchid Rootbound?
Cause: Over time, orchid roots can outgrow their pot and become rootbound. This means there’s not enough space for the roots to breathe or absorb water efficiently. As a result, the plant struggles to stay hydrated, and the leaves begin to dry or wrinkle.
Fix: If you see roots spilling out of the pot or the media breaking down, it’s time to repot your orchid. Choose a slightly larger container and fresh orchid mix. Trim away dead or rotted roots during the process. Repotting gives your orchid room to grow and improves water and nutrient absorption.
Fertilizer Overload?
Cause: Orchids need nutrients—but not too much. Over-fertilizing, especially with chemical fertilizers, can cause salt buildup in the media, which burns the roots. This damage makes it difficult for your orchid to absorb water, resulting in dry, crispy leaf tips or edges.
Fix: A balanced orchid fertiliser diluted to a fourth strength should be used. Feed only during active growth periods, usually every 2 to 4 weeks. Once a month, flush the pot with clean water to wash away excess salts. Less is more when it comes to feeding orchids—avoid feeding when they’re dormant or stressed.
Sudden Temperature Changes?
Cause: Orchids dislike extremes. Drafts from windows, sudden cold snaps, or hot air from vents can stress your plant quickly. Rapid temperature shifts disturb moisture balance, leading to dry, limp, or curled leaves.
Fix: A steady temperature range of 65°F to 80°F (18°C to 27°C) is ideal for your orchid.Avoid placing it near heaters, air conditioners, or cold windows. Maintain consistency—especially during seasonal transitions—to prevent thermal shock and help your orchid leaves remain plump and strong.
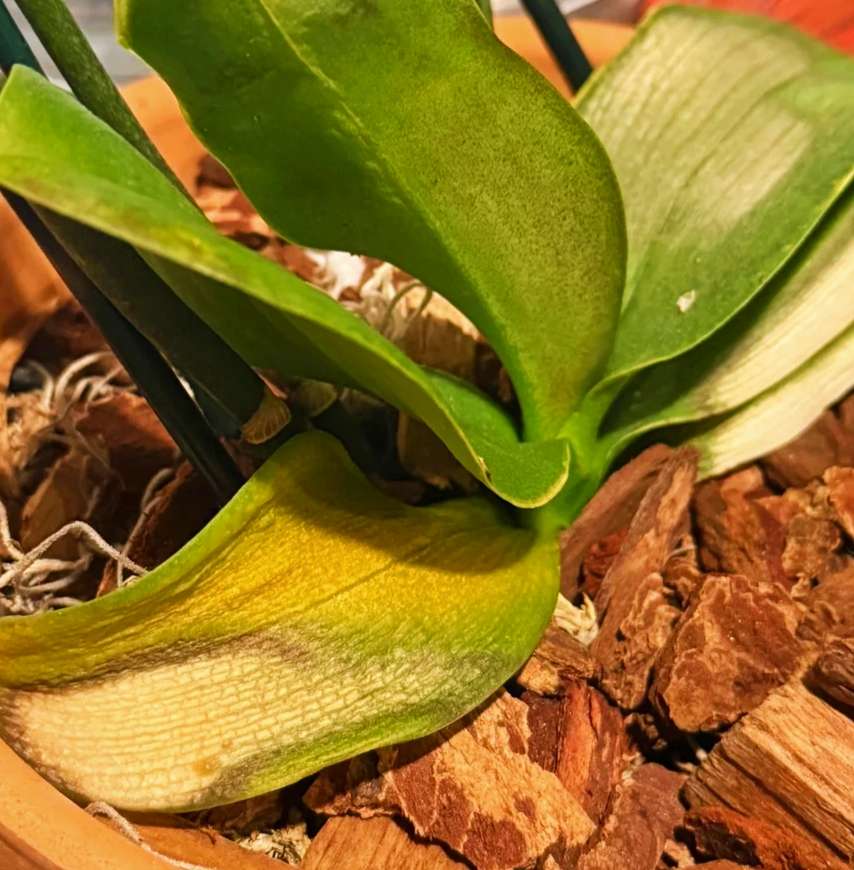
Is Your Orchid Too Old?
Cause: If only one or two bottom leaves are drying out, your orchid might just be shedding old growth naturally. This process often happens after flowering and is totally normal. Older leaves yellow and dry before falling off as new ones grow.
Fix: Relax! A typical stage of the orchid’s life cycle is this.Once the leaf is fully dried and detached from the stem, gently remove it using clean scissors or let it fall off naturally. Continue regular care, and focus on supporting new growth with proper light, watering, and feeding.
Final Thoughts: Understand, Adjust, and Thrive
Dry orchid leaves might look alarming, but they’re usually the plant’s way of asking for help. By understanding these 10 surprising causes and making a few thoughtful changes, you can help your orchid bounce back to health. Keep observing your plant, respond to its needs, and your reward will be lush green leaves and vibrant blooms.
FAQS
What causes dry orchid leaves?
Dry orchid leaves can result from several issues including underwatering, low humidity, root rot, excessive sunlight, or poor airflow. Identifying the exact cause early helps prevent long-term damage. Always observe your plant’s environment and adjust care accordingly to avoid the stress that leads to dry orchid leaves
Can dry orchid leaves recover on their own?
Unfortunately, dry orchid leaves rarely return to their original healthy state. However, once the underlying cause is fixed, your orchid can produce new, healthy leaves. It’s best to focus on improving the plant’s care conditions to encourage fresh growth, even if the current dry orchid leaves don’t recover fully.
How can I prevent dry orchid leaves in the future?
Preventing dry orchid leaves involves maintaining consistent humidity levels, proper watering habits, and giving the orchid the right light exposure. Aim for 50–70% humidity, water when roots turn silvery, and place the orchid in bright but indirect sunlight. Balanced care is the best defense against dry orchid leaves
Is misting helpful for dry orchid leaves?
Misting can be beneficial if used properly, especially in dry climates or during winter when indoor air gets dry. It adds moisture to the air around your orchid, helping reduce the chances of dry orchid leaves. Just be sure not to mist at night or allow water to pool in leaf crevices.
Should I cut off dry orchid leaves?
Dry orchid leaves can be trimmed, but only if they are completely dried out and no longer serving the plant. If the leaf still has some green or flexibility, it’s best to leave it. Cutting healthy parts too soon can stress the orchid more and delay recovery from dry orchid leaves.
Do dry orchid leaves mean my orchid is dying?
Not always. Dry orchid leaves are a warning sign, but they don’t necessarily mean your orchid is beyond saving. With prompt adjustments—such as correcting watering, boosting humidity, or repotting—the plant can recover. Focus on root health and new growth when evaluating the seriousness of dry orchid leaves.
Are dry orchid leaves common in Phalaenopsis orchids?
Yes, dry orchid leaves are fairly common in Phalaenopsis, especially when grown indoors. These orchids are sensitive to environmental changes and need stable humidity and indirect light. When these conditions aren’t met, the plant can show stress through dry orchid leaves, which many beginners mistake for natural aging.
Will repotting help fix dry orchid leaves?
Repotting can be very helpful if the orchid’s potting medium is old, broken down, or harboring fungus. Fresh medium allows better root health, which can stop dry orchid leaves from worsening. Always check root condition during repotting to make sure they’re not mushy, which contributes to dry orchid leaves.
How long does it take to fix dry orchid leaves?
Fixing dry orchid leaves isn’t instant—it depends on how badly the plant was affected. With proper care, you may see improvement within a few weeks, but full recovery and new growth can take several months. Patience is essential when treating dry orchid leaves, especially for slow-growing orchid varieties.
Can pests cause dry orchid leaves?
Yes, pests like spider mites, aphids, or scale insects feed on leaf tissue and sap, which can cause dry orchid leaves. These pests also reduce the plant’s overall strength and hydration. Regularly inspect your orchid, especially under leaves, and treat with neem oil or insecticidal soap to prevent dry orchid leaves.
Is tap water bad for orchids with dry orchid leaves?
Tap water can sometimes contain chlorine, fluoride, or heavy minerals that harm orchid roots, contributing to dry orchid leaves. If you notice leaf drying after watering, try using filtered, distilled, or rainwater instead. Healthy roots mean better hydration, which directly reduces the risk of dry orchid leaves developing.
Do dry orchid leaves affect blooming?
Yes, dry orchid leaves signal that your plant is stressed, and stress can delay or prevent blooming. Orchids require healthy leaves to photosynthesize properly. If energy is going toward survival, it won’t go toward flowers. Fixing the issues behind dry orchid leaves increases the chances of a beautiful bloom cycle.
What is the best way to treat dry orchid leaves naturally?
Naturally treating dry orchid leaves includes adjusting watering habits, improving humidity with a tray or humidifier, and ensuring indirect light. Avoid chemical treatments unless pests are involved. With a consistent routine and a calm environment, your orchid can recover naturally—even if the current dry orchid leaves remain wrinkled.
Hi, I’m Steve, an orchid grower with 30+ years of hands-on experience caring for indoor and outdoor plants. I share practical, tested tips and beginner-friendly guides to help plant enthusiasts nurture healthy, thriving plants.