- 1 A Guide to Orchid Reblooming
- 2 Removing clips or stakes attached to the stalk.
- 3 Finding the healthiest node and cutting the stalk above it.
- 4 Allowing the orchid to rest.
- 5 Caring for a Dormant Orchid:
- 6 Watering the orchid once a week.
- 7 Fertilizing the orchid once a month
- 8 Maintaining a regular care schedule.
- 9 Triggering Rebloom:
- 10 Moving the orchid to a cooler place
- 11 Looking for signs of reblooming.
- 12 Returning to the regular watering and fertilizing schedule.
- 13 Leaving the plant in the same location until a blossom fully forms.
- 14 Clipping the stalk to a stake when it’s fully formed.
- 15 Returning to the regular watering and fertilizing schedule.
- 16 Leaving the plant in the same location until a blossom fully forms.
- 17 Clipping the stalk to a stake when it’s fully formed.
- 18 FAQ
Orchids, with their exquisite beauty, grace our spaces with vibrant blooms. Yet, as these delicate flowers finish their display, many orchid enthusiasts wonder how to encourage a spectacular rebloom. Fear not! In this guide, we’ll take you through the essential steps to ensure your orchids go through a successful reblooming cycle, bringing renewed beauty into your home
A Guide to Orchid Reblooming

Checking the spike and leaves for health.
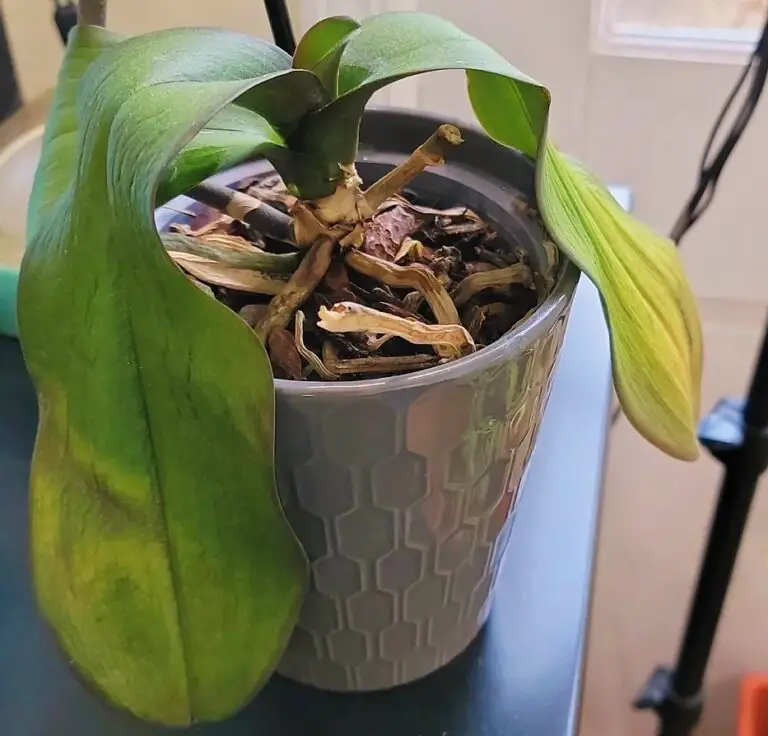
To ensure your orchid is healthy enough to rebloom, check the spike and leaves. Look for signs of vitality, such as green and well-hydrated leaves. If the spike and leaves appear healthy, it indicates that the plant is still alive and capable of reblooming. Conversely, signs of a dying orchid include a yellowing stalk and withering leaves with dark spots.
Removing clips or stakes attached to the stalk.
Remove any clips or stakes attached to the stalk of your orchid. Stakes are typically used to keep orchid stems straight, but during the plant’s resting period, they are unnecessary and may interfere with the reblooming process. By eliminating these supports, you allow the orchid the freedom it needs for healthy reblooming without obstruction.
Finding the healthiest node and cutting the stalk above it.
To encourage your orchid to rebloom, locate the healthiest node on the stalk. Nodes are the bulges along the orchid’s stalk, and new growth often emerges from them after the resting period. Choose the node closest to the last blooming flower, ensuring it is green and healthy. Carefully cut the stalk approximately 1 inch above this selected, healthy node. This pruning technique redirects the plant’s nutrients to the chosen node, setting the stage for a successful and healthy rebloom.
Allowing the orchid to rest.
After cutting the orchid stalk, it’s crucial to allow the plant to rest. This dormant period is a natural part of the orchid’s life cycle, during which it conserves energy for the upcoming blooming cycle. Be patient during this phase, as it might take a few months for the orchid to rebloom. Resist the urge to overcare, and let the plant recuperate undisturbed. This rest period is essential for the orchid’s overall health and future flowering.
Caring for a Dormant Orchid:
Placing the orchid near a window out of direct sunlight.
During the orchid’s dormant period, place it near a window but out of direct sunlight. Orchids still require sunlight, but exposing them to direct sunlight during this phase may be detrimental. Optimal positioning near a window provides the necessary light without the risk of overexposure. Monitor the color of the leaves – dark green indicates insufficient light, while a lighter, grass-colored green with some yellow tones signifies adequate light for a resting orchid. This thoughtful placement contributes to the orchid’s overall well-being during its dormant stage.
Watering the orchid once a week.
To care for your dormant orchid, water it once a week. Even during its resting period, orchids need hydration. A common recommendation is to place three ice cubes in the pot once a week to provide enough water without drowning the plant. This controlled watering method helps maintain the right moisture level for the orchid without risking overhydration. Consistent and moderate watering supports the orchid’s health during its dormancy, preparing it for the eventual reblooming phase.
Fertilizing the orchid once a month
During the orchid’s dormant period, fertilize it once a month to replenish the nutrients in the soil. Use a balanced 20-20-20 formula, which contains a mix of 20% phosphorus, 20% nitrogen, and 20% potassium. This adjusted fertilizing schedule supports the orchid in gathering the strength it needs for the upcoming reblooming phase. Maintaining a monthly fertilizing routine ensures the plant receives essential nutrients without overwhelming it. Consistent care during dormancy sets the foundation for a healthy and vibrant orchid when it’s ready to bloom again.
Maintaining a regular care schedule.
To support your dormant orchid, it’s crucial to maintain a regular care schedule. Orchids are sensitive to changes in routine during their resting period. Ensure that you stick to a consistent watering and fertilizing schedule to provide stability for the plant. Avoid sudden changes, as they can potentially shock the orchid. By adhering to a regular care routine, you contribute to the overall well-being of the orchid during its dormancy, preparing it for a successful reblooming phase when the time comes.
Triggering Rebloom:
Waiting until fall or early winter.
For optimal reblooming, wait until the fall or early winter. Orchids naturally initiate reblooming during cooler weather, making this period ideal for triggering a new flowering cycle. By allowing your orchid to rest and following a patient approach, you set the stage for successful reblooming during the appropriate season. Waiting until fall or early winter aligns with the orchid’s natural growth patterns and enhances the likelihood of a robust and beautiful flowering display.
Moving the orchid to a cooler place
To facilitate reblooming, move your orchid to a cooler place. Cooler temperatures signal to the orchid that it’s time to initiate the reblooming process. Aim for a temperature of about 60 °F (16 °C), maintaining these conditions for approximately 3-4 weeks before expecting the orchid to start reblooming. Creating a cooler environment, especially during the fall, can help trigger the orchid’s natural response for a successful and vibrant rebloom.
Looking for signs of reblooming.
As you patiently wait, look for signs of reblooming in your orchid. The main indicator is the appearance of new growths from the healthy node you left intact during pruning. Regularly check for these growths or protrusions, as they signify that the orchid is beginning to enter the reblooming phase. Exercise patience during this period, as orchids may take some time, possibly over a year, to fully rebloom. By observing these signs, you can gauge the progress of your orchid’s recovery and anticipate the upcoming blossoms.
Returning to the regular watering and fertilizing schedule.
Once you observe signs of reblooming, it’s time to return to your regular watering and fertilizing schedule. As the orchid starts to grow and develop new blossoms, it requires more nutrients than during its dormant period. Resume your standard care routine to provide the necessary hydration and nutrients for the flourishing orchid. Remember to water when the soil has dried out and fertilize every two weeks, adhering to the specific needs of your orchid species. Consistency in care practices ensures a healthy and successful transition from dormancy to a fully bloomed orchid.
Leaving the plant in the same location until a blossom fully forms.
To promote healthy growth, leave your orchid in the same location until a blossom fully forms. Moving the plant prematurely into direct sunlight may cause new growths to develop unevenly. Wait until a new blossom has fully formed, characterized by a rounded end and a mitten-like shape. This indicates the optimal time to consider relocating the orchid. By exercising patience and allowing the blossom to fully develop in its current location, you support the orchid’s proper growth and ensure a more successful transition to a new setting.
Clipping the stalk to a stake when it’s fully formed.
When the stalk of your orchid has fully formed, clip it to a stake. This helps keep the orchid straight and provides support for the weight of new flowers. Ensure that the stalk has completed its growth before clipping it to the stake, as doing so prematurely could inhibit further development. By carefully securing the fully formed stalk, you contribute to the overall stability and aesthetic appeal of the orchid as it progresses through its reblooming phase.
FAQ
How often should I water my orchid to promote reblooming?
Proper watering is crucial. Generally, water when the top inch of the orchid’s growing medium feels dry. Adapt the frequency to the surrounding conditions, such as temperature and humidity
Can any type of orchid be encouraged to rebloom following this guide?
Yes, the principles discussed apply to a variety of orchid species. Tailor the care to the specific needs of your orchid, whether it’s a Phalaenopsis, Cattleya, or another type.
How can I ensure my orchid gets enough light for optimal reblooming?
Orchids typically need bright, indirect light. Put them next to a window that lets in filtered sunlight. Adjust the positioning based on the orchid species and the intensity of light it requires.
Is fertilization necessary, and if so, what type of fertilizer is best for orchid reblooming?
Yes, fertilizing is essential. Adhere to the suggested dilution and treatment frequency, and use a balanced fertiliser for orchids.Adjust the fertilizer ratio during different growth stages to support reblooming.

