Why Is My Orchid Dying After Repotting? (Expert Fixes)
Table of Contents 👈 Tap Here
Orchids are delicate plants, and repotting—though necessary—can sometimes do more harm than good, leaving many growers frustrated. Why is my orchid dying after repotting? If your once-thriving orchid now has drooping leaves, yellowing foliage, or seems to have stopped growing, don’t panic! This is a common issue, and the good news is that most orchids can recover with the right care.
You carefully repotted your orchid, expecting it to flourish with fresh potting mix and more space for its roots. But instead of thriving, it looks weaker—its leaves are limp, roots seem unhealthy, and flowers might be wilting or falling off. What went wrong? Orchids are highly sensitive to environmental changes, and even small missteps—like disturbing the roots too much, overwatering, or using the wrong potting mix—can trigger transplant shock. But don’t worry! With the right adjustments, your orchid can bounce back, often stronger than before.
In this guide, we’ll explore the most common post-repotting problems, why they happen, and the expert fixes that will bring your orchid back to life. Let’s get started!
Why Is My Orchid Dying After Repotting
")
Understanding Orchids and Their Growth Needs
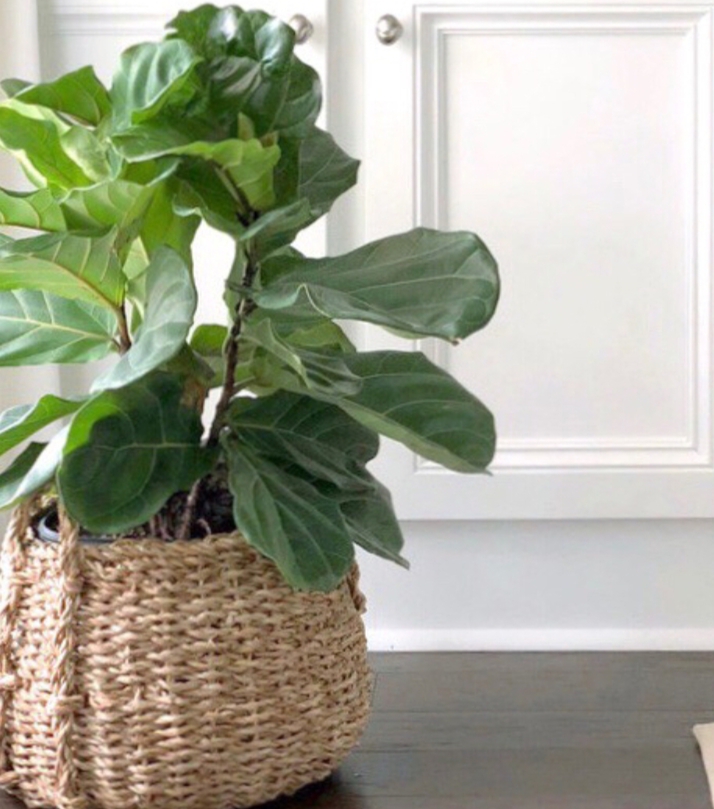
Unlike regular houseplants, orchids, especially Phalaenopsis, are epiphytes. This means they don’t grow in soil but instead attach to trees, absorbing moisture and nutrients from the air. Their roots need excellent airflow, and repotting can disturb their delicate balance. When done incorrectly, it may lead to root damage, dehydration, or even rot. However, if you follow proper repotting techniques and provide post-care, your orchid will adjust and flourish again.
Orchid Repotting Recovery Timetable
| Time After Repotting | What Happens? | Expert Fixes |
|---|---|---|
| Day 1–3 | Orchid may look stressed, leaves slightly limp. | Keep in a shaded, humid spot. Avoid direct sun or watering. |
| Week 1 | Some roots may dry out; orchid adjusts to new medium. | Mist lightly if needed, but avoid soaking roots. Ensure good airflow. |
| Week 2–3 | Leaves may wrinkle or turn yellow (stress reaction). | Check roots for rot. If healthy, maintain stable humidity and indirect light. |
| Week 4–6 | New roots should start forming. | Begin light watering. Use diluted fertilizer (¼ strength). |
| Week 8+ | Orchid fully adjusts; normal growth resumes. | Resume regular care. If no growth, adjust light, humidity, or nutrients. |
Typical Repotting Errors and How to Prevent Them
Choosing the Wrong Potting Mix
One of the biggest mistakes beginners make is using regular potting soil for orchids. This type of soil is too dense and retains too much moisture, suffocating the delicate roots. Orchids require a well-draining mix that mimics their natural growing conditions. Using the wrong mix can lead to root rot and dehydration, ultimately causing the plant to weaken and decline.
✅ Solution: Use an orchid-specific potting mix that provides good aeration and moisture control. The best options include:
Bark chips – promote airflow around the roots.
Sphagnum moss – retains moisture for longer periods.
Coconut husk – balances moisture and drainage well.
Check your potting medium to ensure it isn’t staying too wet or drying out too quickly, as both conditions can cause stress to your orchid.
Using an Inappropriate Pot
Selecting the wrong pot can create problems for your orchid after repotting. A pot that’s too large holds excess moisture, increasing the risk of root rot, while a pot without drainage holes causes water to accumulate at the bottom, suffocating the roots. Additionally, opaque pots make it difficult to monitor root health, which is crucial for orchids that rely on aerial roots for stability and nutrient absorption.
✅ Solution: Choose a clear plastic pot with multiple drainage holes, allowing you to monitor root health and moisture levels. Clear pots also enable better light penetration, which helps with photosynthesis in root systems. If using decorative pots, ensure they have proper ventilation or place the orchid in a plastic pot inside the decorative container to allow excess water to drain out effectively.
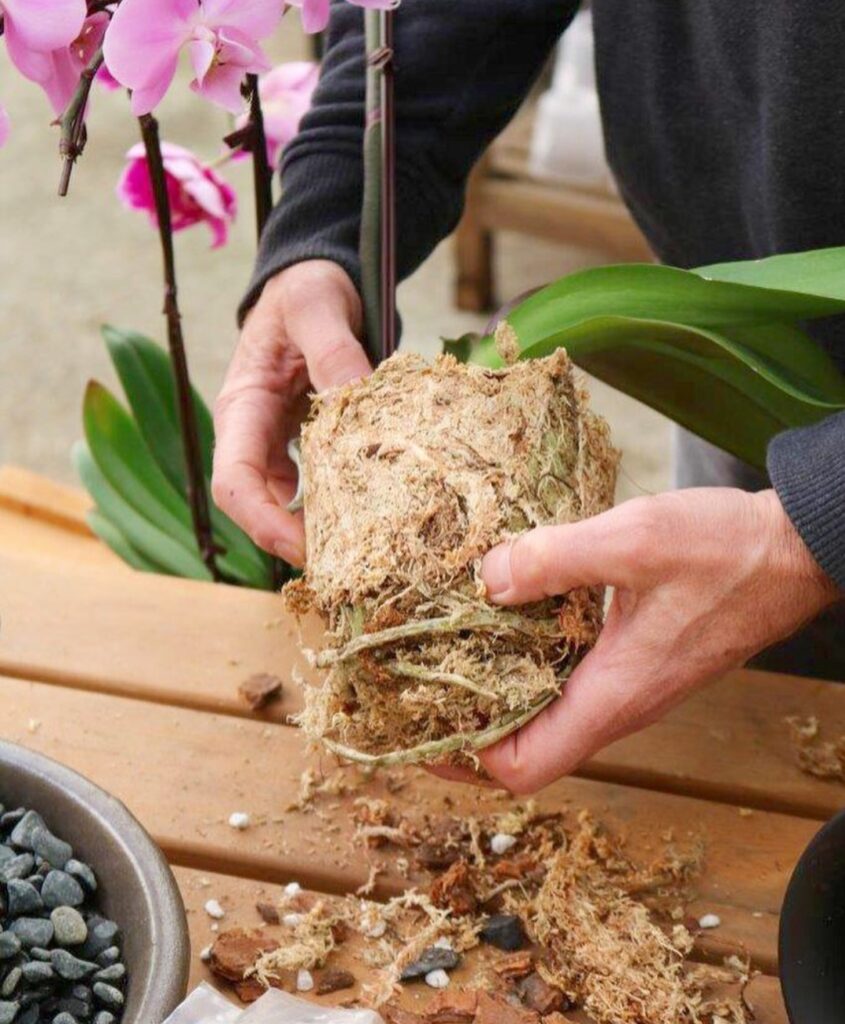
Damaging the Roots During Repotting
Orchid roots are delicate and can be easily damaged during repotting, leading to stress and slowed growth. Many growers make the mistake of trimming too many roots, including healthy ones, or handling them roughly, which can cause trauma to the plant. Cutting healthy roots disrupts the plant’s ability to absorb water and nutrients, making recovery more difficult.
✅ Solution: Always use sterilized pruning shears before cutting any roots to prevent infections. Only trim roots that are clearly black, mushy, or dry and brittle. Avoid excessive root handling, as disturbing them too much can cause shock. When repotting, gently shake off the old potting medium and replant the orchid with minimal disturbance to the remaining healthy roots.
Repotting at the Wrong Time
Repotting at an inappropriate time can stress the orchid even further. Some growers repot their orchids when they are in full bloom, causing the plant to drop flowers prematurely. Others repot during extreme temperature changes, which can further slow down recovery. Timing is crucial, and repotting during the wrong phase of growth can lead to longer periods of stress and even plant decline.
✅ Best time to repot: After the orchid has finished blooming and when new root growth begins. This is when the plant has enough energy to establish itself in its new environment.
🚫 Avoid repotting when:
The orchid is actively blooming (it may drop its flowers).
Temperatures are too extreme (hot summers or cold winters).
Signs of Orchid Stress After Repotting
After repotting, your orchid may take time to adjust, but certain signs indicate serious problems. Identifying these early will help you take quick action before it’s too late.
Wilting Leaves
Possible cause: Root damage or dehydration.
Fix: Lightly mist the leaves and ensure the roots receive adequate but not excessive water.
Yellowing Leaves
Possible cause: Overwatering, poor drainage, or too much direct sunlight.
Fix: Check the roots—if they are mushy, allow the potting mix to dry before watering again.
Root Rot
Possible cause: Excess moisture due to improper drainage or excessive watering.
Fix: Remove affected roots, repot in a fresh orchid mix, and reduce watering frequency.
Dropped Buds or Flowers
Possible cause: Stress from repotting, temperature changes, or sudden relocation.
Fix: Keep humidity stable and avoid sudden environmental changes.
How to Help Your Orchid Recover After Repotting
If your orchid is struggling after repotting, follow these care steps to encourage recovery:
Adjust Watering Practices
Overwatering is the leading cause of post-repotting issues, but underwatering can also cause stress. Orchids prefer a balance, where their roots are hydrated but not sitting in water.
✅ Watering tips:
Water only when the potting mix is nearly dry.
Use the skewer test: Insert a wooden skewer into the mix; if it comes out damp, wait before watering.
Water in the morning to allow excess moisture to evaporate before nightfall.
Provide the Right Light Conditions
Light plays a vital role in an orchid’s recovery after repotting. If your orchid isn’t getting enough light, it may struggle to produce new growth, while too much direct sunlight can cause sunburn.
✅ Best placement:
Near an east- or south-facing window with sheer curtains for filtered light.
If using artificial lights, place the orchid 12-15 inches under a grow light to simulate natural conditions.
Nutrient Management and Fertilization
Fertilization helps orchids regain their strength, but overfeeding can do more harm than good. During recovery, orchids require gentle feeding to avoid stressing the roots further.
✅ Best fertilizer routine:
Use a balanced 20-20-20 orchid fertilizer.
Dilute it to half strength and apply every two weeks to avoid nutrient overload.
If the orchid is in severe stress, hold off on fertilizing and focus on root recovery first.
Repotting can be stressful for orchids, but with the right approach, your plant will bounce back stronger. To ensure success:
✔ Choose the correct potting mix and pot to promote airflow.
✔ Handle the roots gently and avoid unnecessary trimming.
✔ Water only when needed and maintain proper humidity levels.
✔ Be patient—orchids take time to adjust but will reward you with healthy growth.
Bonus Section: How to Prevent Repotting Stress in the Future
While repotting is necessary for orchid health, taking preventive measures can minimize stress and ensure a smoother transition. Here’s how you can repot your orchid with minimal disruption:
✅ Repot at the right time: Always wait until the orchid has finished blooming before repotting. The best time is when new roots start forming.
✅ Soak the orchid before repotting: Hydrate the roots by soaking them in lukewarm water for 10–15 minutes before repotting. This makes them more flexible and reduces breakage.
✅ Prepare the new potting mix in advance: Moisten the new orchid mix before repotting to help with root acclimation.
✅ Use clean tools and pots: Always sterilize pruning shears and wash pots thoroughly to prevent infections.
✅ Avoid overwatering after repotting: Newly repotted orchids need time to adjust—water sparingly for the first week and gradually resume normal watering.
My Personal Experience After Repotting Orchids
After repotting my orchids, I follow a simple but effective routine to help them transition smoothly. I start by soaking the orchid’s pot in a bucket of water mixed with Orchid Focus Grow, a liquid fertilizer rich in essential nutrients and minerals. I let it sit for about five minutes to give the roots an extra boost of hydration and support after being moved to a new growing medium.
Once the soaking is complete, I place the orchids in a shaded, well-ventilated area to reduce stress and allow them to adjust gradually. Proper airflow is crucial to prevent fungal issues and encourage healthy root development. Additionally, I always use pots with drainage holes to ensure excess water drains away, reducing the risk of root rot.
For those in cold climates, using a plastic pot helps retain moisture and warmth, preventing the roots from getting too cold. In warmer climates, a clay pot with holes is ideal, as it provides better aeration and prevents overheating.This method has helped my orchids recover quickly and thrive after repotting.
Repotting your orchid may seem intimidating, but with careful handling and proper post-care, your plant will adjust and thrive. Avoid common mistakes, monitor signs of stress, and provide the right environment for recovery. If you stay patient and consistent, your orchid will reward you with new growth and beautiful blooms.
By following these steps, you can make future repotting stress-free and give your orchid the best chance to thrive.
FAQs on Why Is My Orchid Dying After Repotting
Why is my orchid dying after repotting?
If you’re asking, why is my orchid dying after repotting, the main reasons could be root damage, improper watering, or transplant shock. Orchids are sensitive to changes, and repotting can disturb their growth cycle. Ensure you use fresh, well-draining orchid mix and trim unhealthy roots. Also, avoid placing your orchid in direct sunlight right after repotting, as it can stress the plant further. If the leaves turn yellow or the roots appear mushy, adjust watering and humidity to help your orchid recover.
How long does it take for an orchid to recover after repotting?
If you’re wondering, why is my orchid dying after repotting, know that recovery time varies depending on the orchid type and its condition before repotting. Generally, it takes 2–4 weeks for an orchid to adjust and show new growth. During this period, keep it in a stable environment with indirect light and moderate humidity. Water sparingly, and avoid fertilizing immediately after repotting, as weak roots may not absorb nutrients well.
.After repotting, should I water my orchid right away?
One common mistake that leads to why is my orchid dying after repotting is watering too soon. Freshly cut roots need time to callous over, so waiting at least 5–7 days before watering is best. If you water immediately, the damaged roots can rot, leading to further decline. Instead, mist the leaves lightly to maintain humidity while the plant adjusts. When you do water, ensure excess moisture drains properly to prevent root suffocation
Can overwatering cause my orchid to die after repotting?
Yes, overwatering is a significant cause of why is my orchid dying after repotting. When orchids are moved to fresh media, it often retains more moisture than old, broken-down bark. This excess moisture can lead to root rot, preventing the orchid from absorbing water properly. To prevent this, always use a well-draining potting mix, check for proper ventilation, and allow the top layer of the medium to dry out before the next watering session.
Why are my orchid’s leaves wrinkling after repotting?
Wrinkled leaves are another sign that may make you ask, why is my orchid dying after repotting? The cause is usually dehydration or transplant shock. Even if the roots look fine, they may take time to adjust to the new medium and absorb water effectively. Increase humidity around the plant by placing a tray of water nearby or using a humidifier. Avoid overwatering, as too much moisture can lead to root suffocation instead of hydration.
Why is my orchid not growing after repotting?
If you keep asking, why is my orchid dying after repotting, the lack of new growth could be due to stress or improper environmental conditions. Orchids need a stable temperature, sufficient humidity, and bright but indirect light to encourage growth. Also, ensure you haven’t buried the crown too deep in the potting mix, as this can suffocate the plant and slow down recovery.
Should I fertilize my orchid after repotting?
Many people who ask, why is my orchid dying after repotting, have fertilized too soon. Newly repotted orchids need time to adjust, and their stressed roots cannot efficiently absorb nutrients. Wait at least 3–4 weeks before applying a balanced orchid fertilizer. Start with a diluted formula to prevent burning delicate roots.
Why do my orchid’s roots look shriveled after repotting?
Shriveled roots are a common concern when people ask, why is my orchid dying after repotting. This usually happens if the orchid isn’t absorbing water due to root damage or improper potting mix. Ensure the medium retains enough moisture while draining well. If the roots are still green when wet, they are healthy. However, if they remain shriveled and brown, they may be dead and need trimming.
Can I repot my orchid while it’s in bloom?
If you repot an orchid in bloom and then ask, why is my orchid dying after repotting, it’s likely because repotting during flowering causes stress. The plant redirects its energy from blooms to root establishment, which can lead to bud blast or early flower drop. The best time to repot is after flowering, when the orchid enters its vegetative growth phase.
Why do my orchid flowers drop after repotting?
Flower loss is a common reason people ask, why is my orchid dying after repotting. Repotting disturbs the root system and shifts the plant’s focus from blooming to survival. To minimize stress, repot only when necessary and provide a stable environment with consistent humidity and temperature. If flower drop happens, continue regular care, and the orchid should rebloom in the next cycle.
What is the best time to repot an orchid?
Repotting at the wrong time is another reason why is my orchid dying after repotting. The best time to repot is after the orchid has finished blooming, during its active growth phase. This allows the plant to recover quickly and establish new roots in fresh potting media without added stress from supporting flowers.
Why are my orchid’s leaves turning yellow after repotting?
Yellowing leaves often lead people to ask, why is my orchid dying after repotting. This could be due to transplant shock, overwatering, or exposure to direct sunlight. If only the bottom leaves are yellowing, it’s natural shedding. However, if multiple leaves turn yellow quickly, reassess watering habits and light exposure.
Should I trim my orchid’s roots before repotting?
Many growers who ask, why is my orchid dying after repotting, may have neglected root care. Always inspect and trim any dead, mushy, or blackened roots before repotting. Firm, green or white roots are indicative of good health. Removing dead roots helps prevent fungal infections and allows the orchid to focus on growing strong new roots.
Why does my orchid look weak after repotting?
A weak appearance is another reason people wonder, why is my orchid dying after repotting. The plant requires time to acclimatise to its new surroundings. Keeping humidity levels between 50–70%, avoiding direct sunlight, and ensuring proper air circulation will help the orchid regain its strength.
How do I prevent my orchid from dying after repotting?
If you want to stop asking, why is my orchid dying after repotting, follow these steps: use fresh, well-draining orchid mix, trim unhealthy roots, water sparingly for the first week, maintain humidity, and place your orchid in bright, indirect light. Patience is key—most orchids take a few weeks to adjust after repotting.
Can using the wrong potting mix cause my orchid to die after repotting?
Yes, using the wrong potting mix is a major reason people ask, Why Is My Orchid Dying After Repotting? Orchids need a well-draining, airy mix such as bark, sphagnum moss, or a combination of both. If the mix retains too much moisture, roots can rot, leading to plant decline. On the other hand, if the mix dries out too quickly, the roots may become dehydrated. Choosing the right potting medium for your orchid species is essential to prevent stress and ensure healthy growth after repotting.
Why is my orchid wilting after repotting?
If you’re wondering, Why Is My Orchid Dying After Repotting?, wilting can be a sign of transplant shock, dehydration, or improper care. Orchids experience stress when moved to a new pot, and it may take a few weeks for them to adapt. Ensure the roots are healthy, avoid overwatering, and maintain proper humidity. If the leaves appear limp or droopy, increase humidity around the plant and check that the potting mix allows enough airflow to the roots.
Hi, I’m Steve, an orchid grower with 30+ years of hands-on experience caring for indoor and outdoor plants. I share practical, tested tips and beginner-friendly guides to help plant enthusiasts nurture healthy, thriving plants.