
The Best 10 secret for the orchid to take root quickly no one has shared
Orchids are often regarded as delicate and finicky plants, but with the right care and a few hidden secrets, they can thrive and take root quickly. In this blog post, we’ll uncover the ten best-kept secrets to help your orchids establish strong roots and flourish in your care.
Choose the Right Pot
Choosing the right pot is a crucial step in the successful care of orchids. Here are some key factors to consider when selecting a pot for your orchid:
Size Matters: Orchids prefer pots that are just large enough to accommodate their roots. A pot that is too large can trap excess moisture and lead to root rot. Typically, the pot should be only slightly larger than the root system, allowing for some growth.
Proper Drainage: Orchids hate soggy roots. Look for a pot with drainage holes to ensure excess water can escape. Additionally, consider using a pot with raised feet or placing it on a potting mix to encourage drainage.
Transparent or Semi-Transparent: Clear or semi-transparent pots can be beneficial because they allow you to monitor the root system. This helps you assess the health of the roots and whether they need repotting.
Ventilation: Some orchid pots are designed with slits or holes along the sides. These provide additional ventilation for the roots, which can be beneficial for some orchid varieties.
Material Matters: Orchid pots are commonly made from materials like plastic, clay, or wood. Each has its pros and cons. Plastic pots are lightweight and hold moisture well, while clay pots offer good aeration but can dry out quickly. Choose the material that suits your orchid’s specific needs.
Remember that selecting the right pot is just the first step in providing ideal conditions for your orchid’s roots. Proper potting mix, watering, and other care factors play significant roles in the overall health of your orchid. By considering these factors, you can create an environment that encourages your orchid to thrive.
Use the Ideal Orchid Mix
Using the ideal orchid mix is crucial for the health and successful growth of your orchids. Orchids have unique soil requirements that differ from most other houseplants. Here’s how to select and use the right orchid mix:
Buy or Create a Well-Draining Mix: Orchids require a potting mix that provides excellent drainage while retaining some moisture. You can find pre-made orchid mixes at gardening stores, or you can create your mix by combining materials like fir bark, perlite, and sphagnum moss.
Orchid Mix Components: Fir Bark: Fir bark is a primary component of many orchid mixes. It provides structure, aids in aeration, and breaks down slowly, allowing the roots to breathe.
Perlite: Perlite is a lightweight, porous material that helps with drainage and aeration. It prevents the potting mix from becoming compacted.
Sphagnum Moss: Sphagnum moss can hold moisture while still allowing air to circulate around the roots. It’s especially useful for certain orchid varieties.
Adjust the Mix for Your Orchid: Different types of orchids may have specific mix requirements. For example, epiphytic orchids like Phalaenopsis often prefer finer mixes with some sphagnum moss, while terrestrial orchids might benefit from coarser mixes with more bark.
Potting Your Orchid: When repotting or potting your orchid for the first time, ensure that you choose a pot that allows for proper drainage. Place a layer of the orchid mix at the bottom of the pot, set the orchid in place, and then fill in the mix around the rootsTake care not to harm the roots.
Monitor Moisture Levels: Orchid mixes can dry out relatively quickly, so it’s essential to keep an eye on moisture levels. Water your orchid when the mix approaches dryness, but don’t let it become bone dry.
Repot When Necessary: Over time, the orchid mix will break down and become less effective. Repot your orchid every couple of years or when you notice the mix is deteriorating.
Using the ideal orchid mix, tailored to the specific needs of your orchid, is a critical factor in promoting healthy root growth and overall orchid health. It ensures that the roots receive the right balance of moisture and oxygen, leading to beautiful and thriving orchids in your care.
Water Sparingly:
Watering your orchids sparingly is one of the fundamental secrets to their success. Here’s why and how to water your orchids appropriately:
Allow the Mix to Dry Slightly: Orchids, in their natural habitat, often grow on trees or rocks, with their roots exposed to air. They prefer to dry out slightly between waterings. When the top layer of the potting mix feels dry to the touch, it’s usually time to water.
Use the Soak-and-Dry Method: To water your orchids effectively, immerse the entire pot in a basin of water and let it soak for about 10-15 minutes. This allows the roots to absorb water thoroughly.
Drain Excess Water: After soaking, remove the pot from the water and allow excess moisture to drain away. Ensure there are drainage holes in the pot to prevent waterlogged roots.
Avoid Standing Water: Never allow your orchid to sit in a saucer of water for an extended period, as this can lead to root rot. Discard any excess water that collects in the saucer.
Observe Your Orchid: Pay attention to your orchid’s specific needs. Factors like temperature, humidity, and the type of orchid you have will influence how often you need to water. For instance, orchids in a warm, dry environment may need more frequent watering.
Be Cautious During Winter: Many orchids have a rest period during the winter when they require less water. Reduce the frequency of watering during this time, but still, ensure the potting mix doesn’t completely dry out.
Remember that overwatering is a common mistake when caring for orchids. By watering sparingly and paying close attention to your orchid’s needs, you can provide the right amount of moisture for healthy root development and overall orchid well-being.

Provide Proper Light:
Proper lighting is essential for the well-being of your orchids. Orchids have specific light requirements, and getting this aspect right can significantly influence root development and overall plant health. Here’s how to provide proper light for your orchids:
Indirect Light: Orchids prefer bright, indirect light. They need sufficient light to photosynthesize and produce energy, but direct sunlight can scorch their leaves. A sheer curtain or placing the orchid a few feet away from a sunny window can help filter and diffuse the light.
Determine Your Orchid Type: Different orchid species have varying light requirements. Some, like Phalaenopsis, are often referred to as “low-light” orchids and can thrive in relatively low light conditions. Others, such as Vanda orchids, prefer bright, filtered sunlight.
Avoid Midday Sun: Orchids are particularly sensitive to the intense midday sun. It’s best to protect them from direct sunlight during these hours. Morning and late afternoon sunlight are generally milder and safer for orchids.
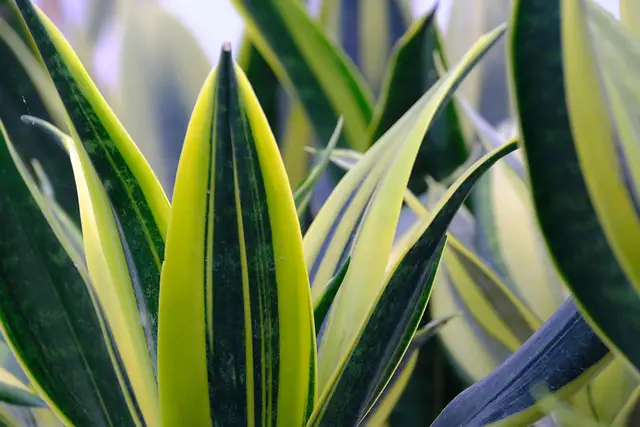
Observe Leaf Color: The color of your orchid’s leaves can be an indicator of whether they are receiving the right amount of light. Healthy orchid leaves should be bright green. If they become too dark or turn reddish, it might indicate they are getting too much light, while pale or yellowing leaves could suggest insufficient light.
Rotate Your Orchid: To ensure even light exposure, rotate your orchid periodically. This helps prevent one side of the plant from getting more light than the other.
Supplement with Grow Lights: If you can’t provide adequate natural light, consider using artificial grow lights designed for orchids. These lights mimic the spectrum of natural sunlight and can be a great way to ensure your orchids get the light they need.
By paying attention to your orchid’s specific light requirements and ensuring they receive the proper amount of indirect light, you’ll create the ideal conditions for healthy root development and vibrant, beautiful orchids.
Humidity Matters:
Humidity is a critical factor in the successful care of orchids. These tropical plants thrive in environments with higher humidity levels, and maintaining the right humidity is essential for healthy root development and overall orchid well-being. Here’s why humidity matters and how to ensure the right levels for your orchids:
Why Humidity Matters:
Mimics Natural Habitat: Orchids originate from humid rainforests and cloud forests. Replicating their natural habitat’s humidity levels is crucial for their health.
How to Provide Adequate Humidity:
Humidity Tray: Place a tray filled with water and pebbles near your orchids. The surrounding humidity rises when the water vapour escapes the plants.
Misting: Regularly mist your orchids with water to raise the humidity. Be cautious not to overdo it, as excessive moisture on the leaves and in the crown can lead to issues.
Humidifier: Using a humidifier in the same room as your orchids can help maintain consistent humidity levels.
Grouping Orchids: Grouping orchids together can naturally increase humidity levels around the plants, especially when they transpire moisture.
Avoid Drafts: Keep your orchids away from drafts, which can dry the air around them.
Maintaining adequate humidity, typically in the range of 50-70%, is vital for your orchids’ root health, as it helps prevent them from drying out or becoming stressed due to low humidity. By attending to this aspect of care, you’ll contribute to the overall success of your orchid growing efforts.
Prune with Care:
Pruning your orchids with care is essential for maintaining their health and encouraging strong root growth. Pruning helps remove dead or decaying plant material and promotes new growth. Here’s how to prune your orchids effectively:
Sterilize Your Tools: Before you start pruning, ensure that your cutting tools, such as scissors or pruning shears, are clean and sterilized. This prevents the spread of diseases and infections to your orchids.
Remove Dead or Yellowing Leaves: Trim away any leaves that have turned yellow or become damaged. These leaves may harbour pests or illnesses and are no longer beneficial to the plant’s growth.
Prune Flower Spikes: After your orchid has finished blooming, you can prune the flower spike to encourage new growth. Trim the spike just above a node, which is a small, swollen area on the stem. New branches or buds may emerge from these nodes.
Cut Carefully: When cutting, make clean, precise cuts to avoid damaging the healthy parts of the plant. Ensure that your cuts are slanted, so water doesn’t pool on the cut surface, potentially causing rot.
Allow Airflow: Pruning can also help improve airflow around the plant, which can reduce the risk of fungal issues and promote overall root health.
Monitor for Pests and Diseases: Regular pruning allows you to closely inspect your orchids for signs of pests or diseases. If you find any problems, take the necessary action to fix them right away.
Be Patient: Orchids can take some time to respond to pruning. It may take a few weeks to see new growth or branches emerging from pruned areas.
Pruning with care is a vital part of orchid maintenance. It helps keep your orchids healthy, encourages new growth, and enhances root development. By following these guidelines and being gentle with your orchids during the pruning process, you can ensure that your plants continue to thrive and flourish.
Fertilize Sparingly:
Fertilizing your orchids sparingly is essential to their overall health and root development. Orchids are not heavy feeders, and over-fertilizing can lead to root damage and other issues. Here’s how to fertilize your orchids effectively:
Choose the Right Fertilizer: Use a balanced orchid fertilizer, specifically formulated for these plants. Look for a fertilizer with equal amounts of nitrogen (N), phosphorus (P), and potassium (K), such as 20-20-20 or 10-10-10.
Dilute the Fertilizer: When using liquid fertilizer, dilute it to half or even a quarter of the recommended strength. Orchids prefer a weaker solution because they are adapted to nutrient-poor environments.
Apply During the Growing Season: Orchids typically benefit from fertilizer during their active growing season. This occurs in the spring and summer for most orchids. Reduce or eliminate fertilization during the dormant or resting period, which is often in the fall and winter.
Frequency of Fertilization: Fertilize your orchids approximately every 4-6 weeks during the growing season. Never apply fertilizer to dry soil; water your orchids first, and then add the diluted fertilizer solution.
Flush with Water: Occasionally, it’s a good practice to flush the potting mix with plain water to remove any accumulated salts from the fertilizer. This helps prevent the buildup of salts that can harm the roots.
Monitor Your Orchids: Keep an eye on your orchids for signs of over-fertilization, such as burnt or yellowing leaves. If you notice these symptoms, reduce the frequency and strength of your fertilization.
By fertilizing your orchids sparingly and following a balanced approach, you can provide the necessary nutrients for healthy root development without risking root damage or over-fertilization issues. Orchids are relatively low-maintenance when it comes to feeding, and a gentle touch with fertilization goes a long way in ensuring their well-being.
Repot When Necessary
Repotting your orchids when necessary is a crucial step in maintaining their health, promoting strong root development, and ensuring continued growth. Here are some guidelines to help you determine when and how to repot your orchids:
Signs It’s Time to Repot: The potting mix has broken down, become compacted, or no longer drains properly.
The roots have outgrown the pot and are overcrowded.
The orchid is not thriving or has stopped blooming, despite proper care.
You notice a foul odor, which can indicate root rot or other issues.
Timing: Repot your orchids during their active growth period, typically in the spring or early summer. Avoid repotting during the dormant phase or while the plant is in bloom, as it can cause stress.
Select the Right Pot: Choose a pot that is just slightly larger than the current one, allowing room for the orchid to grow. Ensure the pot has drainage holes to prevent waterlogged roots.
Gently Remove the Orchid: Carefully remove the orchid from its current pot. Shake off the old potting mix, and examine the roots for any signs of damage or disease. Trim any dead or rotting roots with sterilized scissors.
Replace the Potting Mix: Prepare a fresh orchid mix suitable for your orchid type. Repot the orchid, positioning it in the center of the new pot, and fill the remaining space with the mix.
Water Sparingly After Repotting: After repotting, water your orchid sparingly for the first few weeks to allow the roots to adjust. Avoid overwatering during this period.
Observe Your Orchid: Keep a close eye on your orchid after repotting. It may take some time for the plant to recover and establish its roots in the new potting mix.
Regularly repotting your orchids when needed ensures they have adequate space for root growth, access to fresh nutrients, and a healthy environment. This practice is essential for their long-term well-being and can help them thrive and produce beautiful blooms for years to come.
Maintain Air Circulation
Maintaining proper air circulation around your orchids is a key aspect of their care, which can significantly impact root health and overall plant well-being. Here’s why air circulation is important and how to achieve it:
Why Air Circulation Matters:
Prevents Fungal Issues: Good airflow helps reduce the risk of fungal diseases like root rot, which can be detrimental to orchid roots.
Enhances Transpiration: Adequate airflow allows orchids to transpire effectively, releasing excess moisture from their leaves and roots.
How to Maintain Air Circulation:
Spacing: Avoid overcrowding your orchids. Leave enough space between them to allow air to circulate freely around each plant.
Fan or Ventilation: Consider using a small fan or providing natural ventilation by occasionally opening windows or doors, especially during the growing season. Gentle air movement helps reduce stagnant, humid conditions that can encourage fungal growth.
Trim Overgrown Foliage: Prune and trim any dense or overgrown foliage that might obstruct airflow. This practice not only benefits air circulation but also enhances the overall appearance of your orchids.
Monitor Humidity: Orchids prefer higher humidity levels, but overly humid conditions can lead to poor air circulation. Maintain a balance that suits your specific orchid species and your local climate.
Position Carefully: Place your orchids in areas where they can benefit from adequate but indirect light and good airflow. Avoid corners or tight spaces where air may become stagnant.
Maintaining air circulation is crucial for preventing root and fungal issues while ensuring your orchids have a healthy environment. By implementing these practices, you can help your orchids thrive and achieve strong root development.
Be Patient:
Patience is a virtue when it comes to growing and caring for orchids, especially regarding root development and overall plant health. Here’s why patience is crucial and how it plays a vital role in your orchid care journey:
Orchids Have Their Own Pace: Orchids are known for their slow growth. They may not show immediate results, and changes in root development can take time. Understanding and accepting this natural pace is essential.
Recovery After Stress: Orchids, like any other plants, can experience stress from factors such as repotting, environmental changes, or even pruning. After such events, it may take a while for your orchid to recover and produce new roots.
Adaptation Period: When you bring a new orchid into your care, it needs time to adjust to its new environment. During this adaptation period, the orchid may not show significant root growth or flowering.
Seasonal Variations: Orchids often have seasonal growth patterns. They may be more active during the growing season and slow down during the dormant phase. Recognizing these natural cycles and adjusting your care accordingly is important.
Individual Variability: Each orchid is unique, and its growth rate may vary. Some orchids might take longer to establish their roots, while others may grow more quickly.
Avoid Overcare: Orchids can be sensitive to overwatering, over-fertilizing, or excessive handling. Being patient and allowing them to adapt and grow at their own pace can help avoid these pitfalls.
Remember that, with proper care and patience, your orchids will gradually develop strong roots, adapt to their new environment, and reward you with beautiful blooms. It’s all part of the rewarding journey of orchid growing, where the patience you invest is often richly rewarded.


