Mini Orchid: Best 25-Step Guide to Growing These Beautiful Plants
Are you captivated by the delicate beauty of mini orchids but feel overwhelmed by the thought of caring for these exquisite plants? You’re not alone. Many plant enthusiasts admire these tiny orchid’s assuming they’re too difficult to grow at home.
Table of Contents 👈 Tap Here
But what if we told you that with the right knowledge and techniques, anyone can become a mini orchid expert? Imagine the satisfaction of nurturing these living jewels, watching them thrive and bloom under your care. From selecting the perfect mini orchid to mastering the art of watering, fertilizing, and even propagation, our comprehensive 25-step guide will transform you from a hesitant admirer to a confident grower. Get ready to embark on a journey that will not only beautify your living space but also enrich your plant parenting skills. Let’s dive into the fascinating world of mini orchids and discover how you can grow and care for these stunning botanical wonders!
Understanding Mini Orchids

Defining mini orchids
Mini orchids, also known as miniature orchids, are compact versions of their larger counterparts. These delightful plants typically measure less than 6 inches in height and produce smaller flowers. Despite their diminutive size, mini orchids offer the same stunning beauty and exotic allure as full-sized orchids.
Popular mini orchid varieties
Several captivating mini orchid varieties are popular among enthusiasts:
- Phalaenopsis Mini
- Dendrobium Mini
- Paphiopedilum Mini
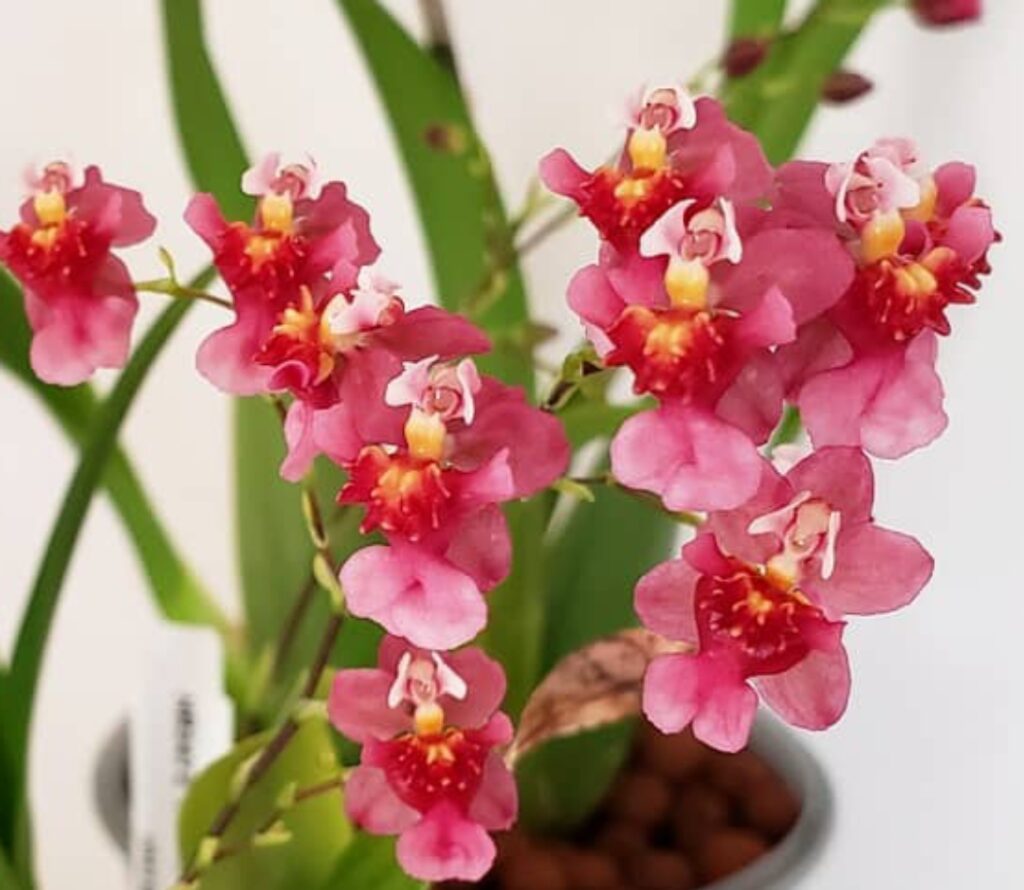
- Oncidium Mini
- Masdevallia
Here’s a comparison of these popular mini orchid varieties:
| Variety | Flower Size | Growth Habit | Care Level |
|---|---|---|---|
| Phalaenopsis Mini | 1-2 inches | Epiphytic | Easy |
| Dendrobium Mini | 0.5-1 inch | Epiphytic | Moderate |
| Paphiopedilum Mini | 2-3 inches | Terrestrial | Moderate |
| Oncidium Mini | 0.5-1 inch | Epiphytic | Moderate |
| Masdevallia | 1-2 inches | Epiphytic | Challenging |
Benefits of growing mini orchids
Mini orchids offer several advantages over their larger counterparts:
- Space-saving: Perfect for small apartments or offices
- Versatility: Can be grown in various containers and arrangements
- Lower maintenance: Require less water and fertilizer
- Faster blooming: Often bloom more frequently than larger orchids
- Affordability: Generally less expensive than full-sized orchids
These compact beauties bring the same elegance and charm as larger orchids while being more manageable for novice growers and those with limited space. Now that we’ve explored the basics of mini orchids, let’s delve into how to choose the right one for your home or office.
Choosing the Right Mini Orchid
Assessing your growing environment
Before selecting a mini orchid, it’s crucial to evaluate your growing environment. Consider factors such as light availability, temperature, and humidity levels in your space. Most mini orchids thrive in bright, indirect light and prefer temperatures between 60-80°F (15-27°C).
Here’s a quick reference guide for optimal growing conditions:
| Factor | Ideal Range |
|---|---|
| Light | Bright, indirect |
| Temperature | 60-80°F (15-27°C) |
| Humidity | 50-70% |
Selecting healthy plants
When choosing a mini orchid, look for these signs of a healthy plant:
- Firm, plump leaves with a vibrant green color
- Strong, sturdy stems
- White or silvery roots that are firm to the touch
- No visible pests or diseases
- Multiple flower buds or blooms (if in season)
Avoid plants with yellowing leaves, mushy roots, or any signs of damage or infestation.
Matching orchid types to your skill level
Mini orchids come in various species, each with different care requirements. Here’s a list of popular mini orchids, ranked from easiest to more challenging:
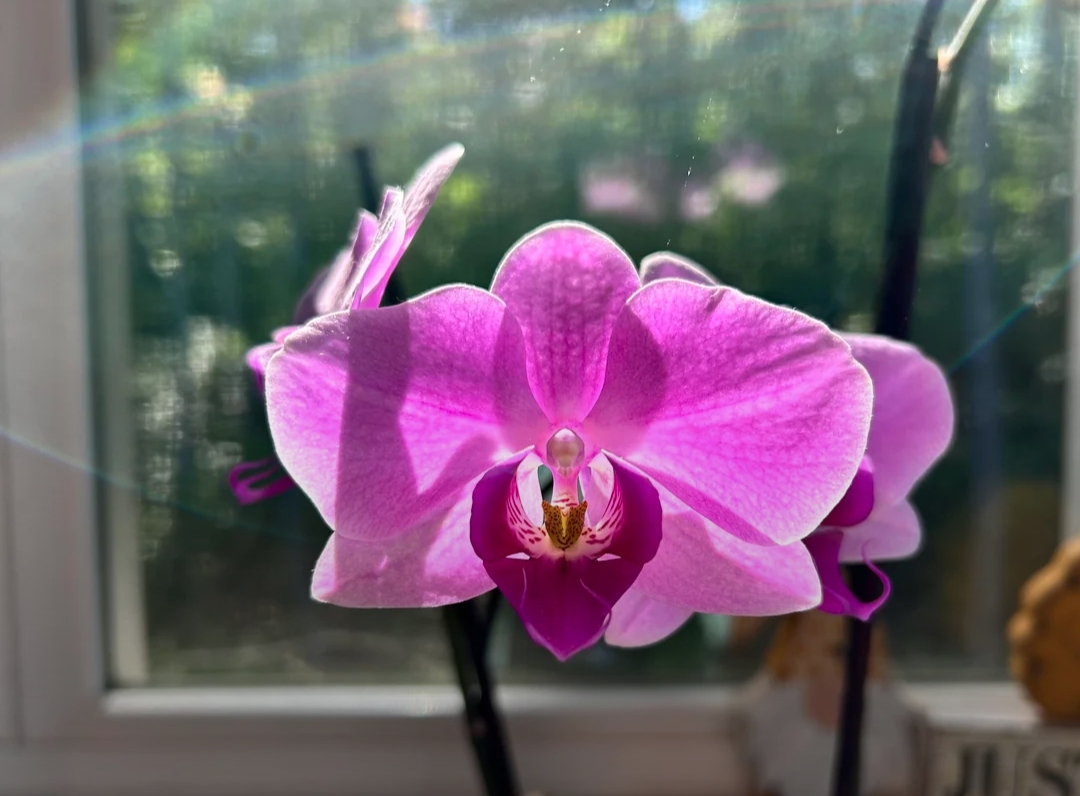
- Phalaenopsis (Moth Orchid)
- Paphiopedilum (Slipper Orchid)
- Dendrobium
- Oncidium
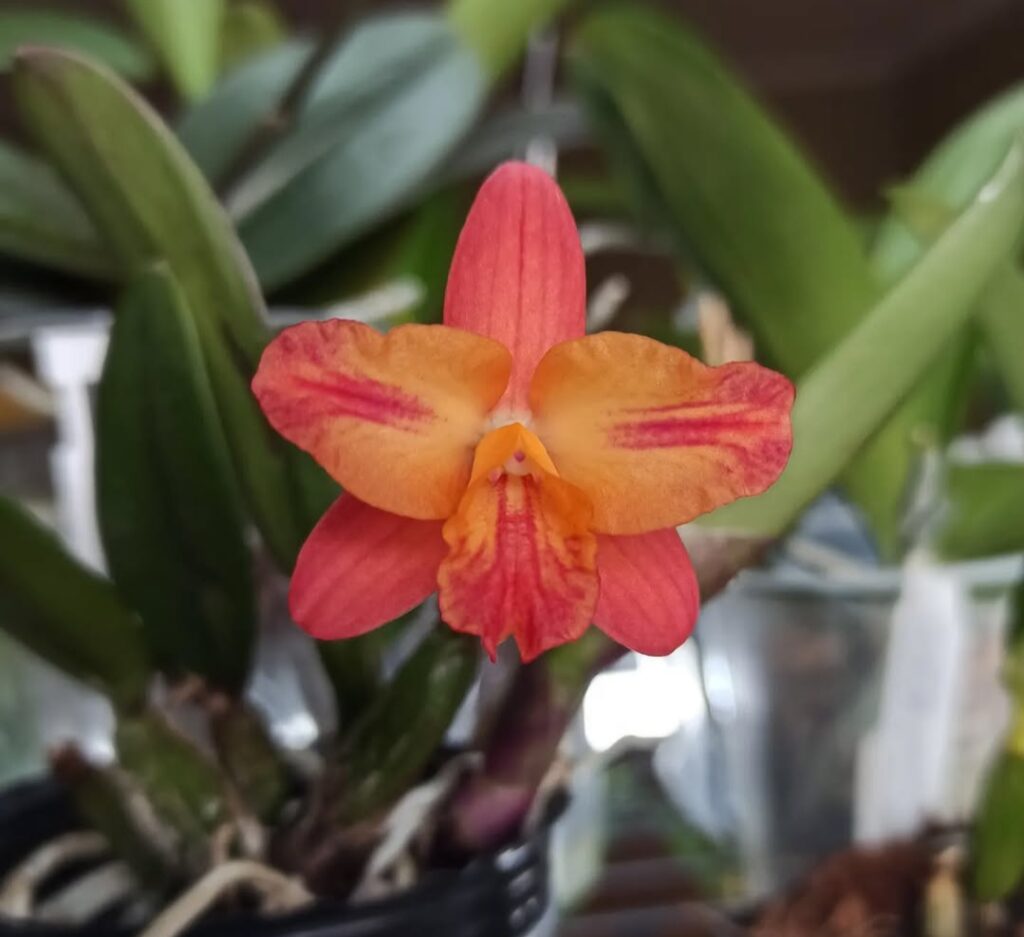
- Cattleya
Beginners should start with Phalaenopsis, as they’re more forgiving and adaptable to indoor conditions. As you gain experience, you can gradually move on to more demanding species.
Essential Growing Conditions
Optimal light requirements
Mini orchids thrive in bright, indirect light. For best growth, place them close to windows that face east or west.Avoid direct sunlight, which can scorch leaves. If natural light is insufficient, use artificial grow lights to supplement.
| Light Intensity | Ideal Location |
|---|---|
| Bright, indirect | East/West window |
| Moderate | North window |
| Low | Artificial light |
Temperature and humidity needs
These delicate plants prefer temperatures between 60-80°F (15-27°C). Maintain higher humidity levels, ideally 50-70%, using humidity trays or a small humidifier. Avoid placing mini orchids near heating vents or air conditioners.
Air circulation importance
Good air circulation is crucial for preventing fungal growth and promoting overall plant health. Use a small fan to create gentle air movement around your mini orchids, but avoid direct drafts.
- Benefits of proper air circulation:
- Prevents stagnant air
- Reduces risk of fungal infections
- Strengthens stems
- Promotes even temperature distribution
Ideal potting mediums
Select a potting mix made especially for orchids that drains well. Bark, perlite, and sphagnum moss are a good combination. Regular potting soil should not be used since it holds too much moisture and can cause root rot.
Now that we’ve covered the essential growing conditions, let’s explore the proper watering techniques to keep your mini orchids thriving.
Watering Techniques
Proper watering frequency
Watering mini orchids requires a delicate balance. These plants prefer a cycle of slight dryness between waterings. Generally, water your mini orchid once every 7-10 days, but always check the potting medium first. If it feels dry to the touch, it’s time to water. Watering more often may be necessary in drier climates or during warmer months.
Watering schedule comparison
| Season | Frequency | Notes |
|---|---|---|
| Spring/Summer | Every 5-7 days | Adjust based on humidity |
| Fall/Winter | Every 10-14 days | Reduce frequency in cooler months |
Water quality considerations
Mini orchids are sensitive to water quality. Use rainwater, distilled water, or filtered water to avoid mineral buildup.If you’re using tap water, let it out all night so the chlorine can dissipate. Water should be at room temperature or a little bit warmer.
Avoiding common watering mistakes
- Overwatering: This is the most common mistake.Keep the plant out of standing water at all times and make sure it has adequate drainage.
- Watering late in the day: Water in the morning to allow excess moisture to evaporate before nightfall.
- Wetting the leaves: Focus on watering the growing medium, not the leaves or crown of the plant.
- Using ice cubes: Despite popular advice, ice cubes can shock the roots. Stick to room temperature water.
Remember, observing your mini orchid’s response to watering is key. Keep the plant out of standing water at all times and make sure it has adequate drainage.
Fertilizing for Optimal Growth
Choosing the right fertilizer
When it comes to fertilizing mini orchids, selecting the appropriate fertilizer is crucial for optimal growth.Look for a balanced, water-soluble fertilizer specifically formulated for orchids. A good option is a 20-20-20 NPK (Nitrogen-Phosphorus-Potassium) ratio or a slightly higher nitrogen content for vegetative growth.
| Fertilizer Type | NPK Ratio | Best For |
|---|---|---|
| Balanced | 20-20-20 | General use |
| High Nitrogen | 30-10-10 | Leaf growth |
| Bloom Booster | 10-30-20 | Flowering |
Fertilizing schedule
Mini orchids benefit from a regular fertilizing routine. During the active growing season (spring and summer), fertilize every 1-2 weeks. Seek out a water-soluble fertiliser that is balanced and made especially for orchids. Always follow the “weakly, weekly” rule: use a diluted fertilizer solution at 1/4 to 1/2 strength of the recommended dosage.
- Spring/Summer: Every 1-2 weeks
- Fall/Winter: Once a month
- Always use diluted solution
Adjusting nutrients for different growth stages
Tailor your fertilizing approach to your mini orchid’s growth stage:
- Vegetative growth: Use a balanced fertilizer or one with slightly higher nitrogen.
- Pre-blooming: Switch to a bloom booster formula with higher phosphorus content.
- Blooming: Continue with bloom booster, but reduce frequency.
- Post-blooming: Return to balanced fertilizer to support overall plant health.
In order to avoid salt accumulation, don’t forget to flush the potting media with plain water once a month.With proper fertilization, your mini orchids will thrive and produce stunning blooms. Next, we’ll explore the important process of repotting and caring for your mini orchid’s delicate root system.
Repotting and Root Care
Signs it’s time to repot
Recognizing when your mini orchid needs repotting is crucial for its health and growth. Here are key indicators:
- Roots growing out of the pot
- Yellowing or wilting leaves
- Slow growth or reduced blooming
- Potting medium breaking down
- Plant becoming top-heavy
| Sign | Description |
|---|---|
| Overgrown roots | Visible roots emerging from drainage holes |
| Degraded medium | Soil appears compacted or decomposed |
| Stunted growth | Plant shows little to no new growth |
Step-by-step repotting guide
- Gather materials: new pot, fresh orchid mix, sterilized scissors
- Remove plant from current pot
- Trim dead or rotting roots
- Place orchid in new pot
- Fill with fresh orchid mix
- Place in a shaded spot and give it a little water.
Root health maintenance
Maintaining healthy roots is essential for mini orchids. Follow these tips:
- Ensure proper drainage
- Use a well-aerated potting mix
- Avoid overwatering
- Provide adequate humidity
- Monitor for signs of root rot
Regular inspection and care of your mini orchid’s roots will contribute significantly to its overall health and longevity. With proper repotting and root care, your mini orchid will thrive and continue to delight you with its beautiful blooms. In the next section, we’ll explore the importance of pruning and grooming to keep your mini orchid looking its best.
Pruning and Grooming
Removing dead or yellowing leaves
Keeping your mini orchid looking its best starts with regular pruning and grooming. Leaf removal that is yellowing or dead is one of the most crucial chores. In addition to detracting from the plant’s aesthetic appeal, these leaves may harbour illnesses and pests.Use clean, sharp scissors or pruning shears to cut the leaf off at the base, close to the stem. Be careful not to damage healthy tissue.
Trimming spent flower spikes
Once your mini orchid’s blooms have faded, it’s time to trim the flower spike. There are two approaches:
- Cut the spike at the base if it’s brown and dry
- Trim above a node if the spike is still green, potentially encouraging a second bloom
Here’s a quick guide to trimming flower spikes:
| Spike Condition | Action | Potential Outcome |
|---|---|---|
| Brown and dry | Cut at base | Encourages new growth |
| Green | Trim above node | May produce new flowers |
.
Pest and Disease Management
Identifying common mini orchid pests
Mini orchids, like their larger counterparts, can fall prey to various pests. The most common culprits include:
- Aphids
- Spider mites
- Mealybugs
- Scale insects
- Thrips
| Pest | Appearance | Damage |
|---|---|---|
| Aphids | Small, pear-shaped insects | Distorted growth, sticky residue |
| Spider mites | Tiny, spider-like creatures | Webbing, yellow or brown spots |
| Mealybugs | White, cottony clusters | Stunted growth, weakened plant |
| Scale insects | Small, oval bumps | Yellowing leaves, reduced vigor |
| Thrips | Slender, winged insects | Silvery patches, deformed flowers |
Natural pest control methods
To combat these pests without harsh chemicals, try these eco-friendly approaches:
- Neem oil spray
- Insecticidal soap
- Rubbing alcohol (for spot treatments)
- Beneficial insects like ladybugs
- Pruning affected areas
Preventing and treating orchid diseases
Disease prevention is crucial for mini orchid health. Common diseases include:
- Root rot
- Leaf spot
- Botrytis blight
To prevent these issues:
- Ensure proper air circulation
- Avoid overwatering
- Use sterile tools when pruning
- Prior to adding additional plants to your collection, quarantine them.
If disease occurs, promptly remove affected parts and adjust care routines. For severe cases, consider using a fungicide specifically formulated for orchids.
By staying vigilant and addressing issues early, you can maintain healthy, thriving mini orchids. Next, we’ll explore how to encourage these delicate beauties to produce stunning blooms.
Encouraging Blooms
Light manipulation techniques
Light plays a crucial role in encouraging mini orchids to bloom. By manipulating light exposure, you can stimulate flower production:
- Gradually increase the light’s intensity Every day, give them 12–14 hours of bright, indirect light.
- If natural light is not enough, use artificial grow lights.
| Light Type | Pros | Cons |
|---|---|---|
| Natural sunlight | Free, full spectrum | Weather-dependent |
| LED grow lights | Energy-efficient, customizable | Initial cost |
| Fluorescent lights | Affordable, low heat | Limited spectrum |
Temperature fluctuation benefits
Mini orchids thrive with temperature variations between day and night:
- Daytime temperatures: 70-80°F (21-27°C)
- Nighttime temperatures: 60-65°F (15-18°C)
- Temperature drop: 10-15°F (5-8°C)
This temperature fluctuation mimics natural conditions and triggers the blooming process.
Bloom-boosting fertilizers
Blooming can be greatly improved by using the appropriate fertilisers:
- High-phosphorus fertilizers (e.g., 3-12-6 NPK ratio)
- Orchid-specific bloom boosters
- Organic choices such as fish emulsion or seaweed extract
Apply fertilizers at half-strength every 2-3 weeks during the growing season. In order to avoid salt accumulation, don’t forget to flush the potting media with plain water once a month.
Now that we’ve covered techniques to encourage blooming, let’s explore how to propagate mini orchids for an ever-growing collection.
Propagation Methods
A. Division of mature plants
Dividing mature mini orchids is an effective propagation method that allows you to create new plants from established ones. This technique works best with sympodial orchids, which grow horizontally along a rhizome. To divide a mature plant:
- Choose a healthy plant with at least 4-6 pseudobulbs
- Sterilize a sharp knife or scissors
- Carefully separate the rhizome, ensuring each division has 3-4 pseudobulbs
- Pot each division in fresh orchid mix
| Pros | Cons |
|---|---|
| Creates exact clones | Requires a mature plant |
| Fast establishment | Risk of damaging roots |
| High success rate | Limited number of divisions |
Propagation Methods for Mini Phalaenopsis Orchids:
1. Keiki (Baby Orchid) Propagation
When to Propagate Keikis: Keikis (baby orchids) typically emerge on the flower spike or near the base of the orchid. They are ready for propagation when they develop several leaves and roots around 2 inches long. Keikis are genetically identical to the mother plant and can be separated when strong enough.
How to Propagate:
Wait until the keiki has formed healthy roots and leaves.
Using sterilized tools (razor blade or shears), carefully cut the keiki from the main plant.
Pot the keiki into a small container with well-draining orchid mix, ensuring that the roots are comfortably in the medium.
Keep it in a humid environment with bright, indirect light to support root establishment and growth.
2. Division of Offsets (Clump Division)
When to Divide: If the Mini Phalaenopsis Orchid has multiple growths or offsets, it’s time to divide when the plant becomes overcrowded and the offsets develop their own leaves and roots.
How to Propagate:
Separate the offsets (or small growths) from the main plant, ensuring each division has leaves and roots.
Pot them individually into small orchid containers with well-draining media (e.g., orchid bark, perlite, and sphagnum moss).
Keep the divisions in bright, indirect light and maintain a high humidity environment to support recovery and new growth.
3. Post-Propagation Care
Potting Mix: Use a well-draining mix (bark, perlite, and sphagnum moss) to help the newly propagated plantlet thrive.
Container: Choose pots that have adequate drainage. The best pots for tracking root health are clear ones.
Light: Provide light that is both brilliant and indirect. Leaves can be burned by direct sunshine, while growth can be slowed by insufficient light.
Humidity: A humidifier or pebble tray can be used to regulate moisture levels, which orchids prefer.
4. Keiki Paste (Optional)
If you don’t see natural keikis, keiki paste can be applied to a node on the orchid spike to encourage the growth of new keikis. However, this method may take a few weeks to show results.
Common Issues to Watch Out for in Propagation:
Root Rot: Ensure good drainage and avoid overwatering to prevent root rot.
Pests: Regularly check your orchid for pests like aphids or mealybugs, especially during the propagation phase.
Stress and Keiki Overproduction: If your orchid is producing many keikis, it might be stressed, possibly from overwatering or poor root health. Make sure to assess your orchid’s care routine.
Keikis can be propagated when they have established roots and leaves.
Offsets (or divisions) are also a great way to propagate, especially if your mini orchid has outgrown its pot.
After propagation, provide the right environment with good light, humidity, and proper watering to help your new plants thrive.
Mini orchids are a delightful addition to any home or garden, offering vibrant beauty and charm in a compact size. By following this 25-step guide, you can ensure that your mini orchids thrive and flourish year-round. Remember, successful orchid care combines patience, consistency, and a keen eye for detail.
Whether you’re a beginner or an experienced gardener, the joy of watching these exquisite plants bloom is well worth the effort. Keep learning, experimenting, and nurturing, and your mini orchids will reward you with their breathtaking beauty for years to come.
Hi, I’m Steve, an orchid grower with 30+ years of hands-on experience caring for indoor and outdoor plants. I share practical, tested tips and beginner-friendly guides to help plant enthusiasts nurture healthy, thriving plants.