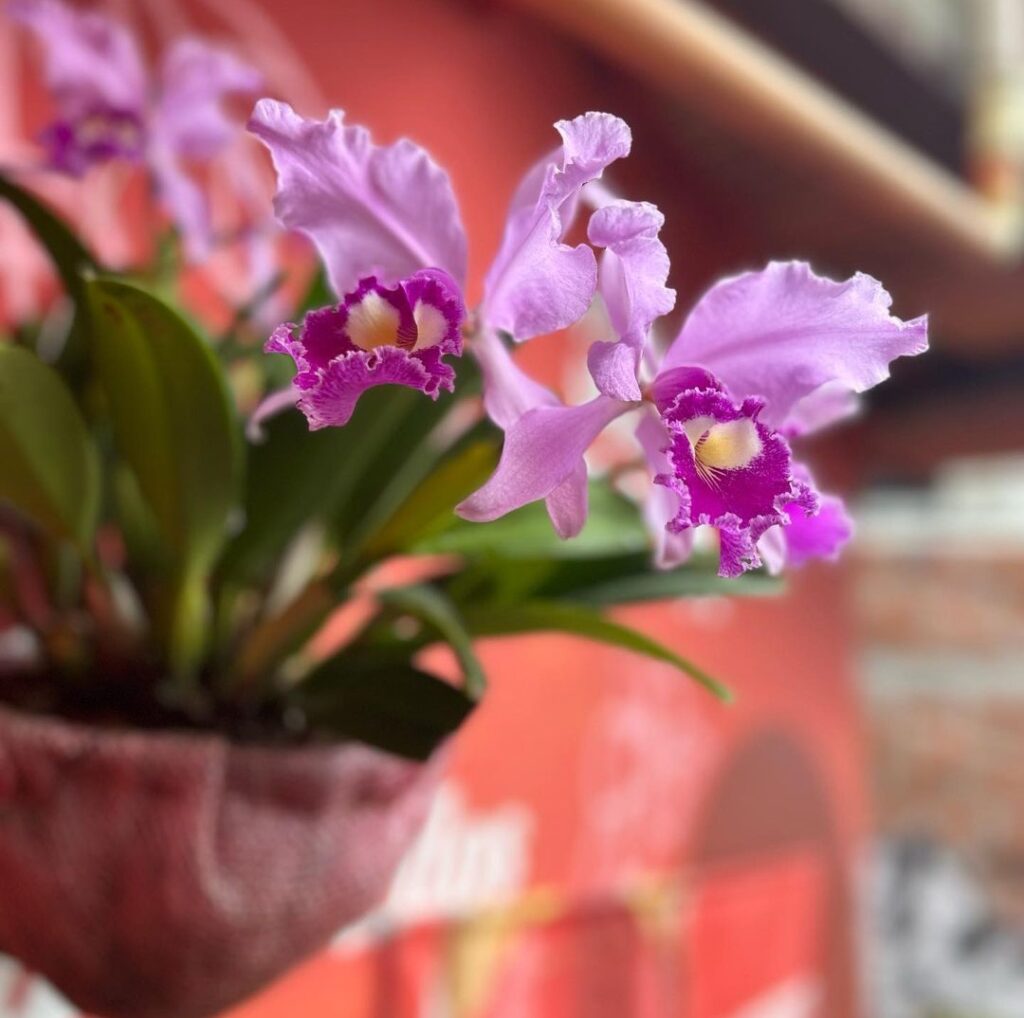
From Bud to Bloom: 7 Best Orchid Flower Spike Problems Solved”
Orchids are renowned for their exquisite blooms, captivating enthusiasts with their beauty and diversity. However, the journey from bud to bloom isn’t always smooth sailing. Orchid enthusiasts often encounter challenges along the way, particularly when it comes to flower spikes. In this guide, we’ll explore seven common orchid flower spike problems and provide practical solutions to help your orchids reach their full flowering potential.
Bud Blast:
Bud Blast in Orchids: Causes and Solutions
Table of Contents 👈 Tap Here
Bud blast, the frustrating phenomenon where orchid buds fall off before reaching full bloom, can be disheartening for orchid enthusiasts. Understanding the causes and implementing solutions is crucial to preventing this setback in your orchid’s flowering journey.
Causes of the Bud Blast:
Environmental Stress:
Issue: sudden changes in temperature, humidity, or light.
Solution: Maintain stable conditions. Avoid placing orchids in draughty areas or near heaters and vents.
Pests and diseases:
Issue: hidden pests or diseases causing stress.
Solution: Regularly inspect your orchid for pests and diseases. Treat promptly if detected.
Overwatering or underwatering:
Issue: Inconsistent watering leads to root problems.
Solution: Establish a balanced watering routine. Make sure there is adequate drainage to avoid soggy roots.
Nutrient Imbalance:
Issue: Lack or excess of essential nutrients.
Solution: Adjust fertiliser application according to your orchid’s specific needs. Consider the orchid’s growth stage and use a balanced orchid fertiliser.

Tips to Prevent Bud Blast:
Stable Growing Environment:
Ensure your orchid is placed in a location with consistent temperature, humidity, and light. Don’t make abrupt adjustments that could strain the plant.
Regular Inspection:
Regularly inspect your orchid for pests, diseases, or any signs of stress. Early detection allows for timely intervention.
Proper Watering:
Establish a regular watering schedule, providing enough moisture without causing waterlogging. Be mindful of the orchid’s natural habitat and adjust watering accordingly.
Balanced Nutrition:
Use a well-balanced orchid fertiliser and follow the recommended application rates. Adjust fertilisation based on the orchid’s growth phase.
Recovering from Bud Blast:
Trim affected areas:
If only a few buds are affected, carefully trim the damaged parts to encourage new growth.
Isolate the orchid.
If pests or diseases are identified, isolate the orchid to prevent the issue from spreading to other plants.
Review Care Practices:
Assess your overall care routine, from light exposure to watering habits. Make the necessary adjustments to create ideal circumstances.
In conclusion, bud blast is a common challenge, but with proactive care and attention, it can be minimized. By understanding the underlying causes and implementing preventive measures, you can increase the chances of your orchid’s buds developing into beautiful, healthy blooms. Remember, patience and consistent care are key to a successful orchid-growing experience.
Delayed Blooming:
Overcoming Delayed Blooming in Orchids: Strategies for Success
Delayed blooming in orchids can be a source of frustration for growers eagerly awaiting the spectacular display of flowers. Fortunately, with a strategic approach to care and some adjustments to the growing environment, you can encourage your orchids to bloom in a timely manner.
Common Causes of Delayed Blooming:
Insufficient Light:
Issue: Orchids are not receiving enough light to initiate blooming.
Solution: Place orchids in a location with appropriate light levels. Different orchid species have varying light requirements, so know your orchid’s specific needs.
Inadequate Fertilisation:
Issue: Lack of essential nutrients needed for flower development.
Solution: Provide a balanced orchid fertiliser regularly, following recommended application rates. Adjust the fertiliser composition based on the orchid’s growth phase.
Improper Watering:
Issue: Inconsistent watering leads to stress and delayed flowering.
Solution: Establish a consistent watering schedule, allowing the orchid to stay adequately hydrated without becoming waterlogged. Monitor the orchid’s moisture needs based on its natural habitat.
Environmental Factors:
Issue: Fluctuations in temperature or humidity affect the orchid’s blooming cycle.
Solution: Maintain stable environmental conditions. Protect orchids from sudden temperature changes or drafts that can disrupt their flowering process.
Strategies to Prompt Timely Blooming:
Optimal light exposure:
Ensure your orchids receive the right amount of light for their species. Consider natural light or supplement with artificial light if necessary, especially during the crucial bud development stage.
Consistent Fertilisation:
Provide a balanced orchid fertiliser with the necessary nutrients. Adjust the fertiliser formulation based on the orchid’s growth phase, focusing on phosphorus for enhanced blooming.
Regular Watering Routine:
Establish a consistent watering schedule, avoiding extremes of dryness or excess moisture. Orchids often respond positively to a natural wet-dry cycle.
Temperature and Humidity Control:
Maintain stable environmental conditions to prevent stress on the orchid. Be mindful of temperature and humidity levels, especially during critical blooming periods.
Monitoring and Patience:
Observation:
Regularly monitor your orchid for signs of new growth and bud development. Adjust care practices accordingly if you notice any deviations.
Patience:
Orchids, known for their slow and deliberate growth, may take time to acclimatise and bloom. Exercise patience, allowing the plant to follow its natural timeline.
By addressing the specific factors contributing to delayed blooming, you can set the stage for a more predictable and rewarding flowering experience with your orchids. Tailoring your care routine to the unique needs of each orchid species will undoubtedly contribute to the successful transition from bud to bloom.
One-Sided Blooms:
Achieving Balance: Preventing One-Sided Blooms in Orchids
The enchanting allure of orchids lies in their symmetrical and graceful blooms, but when flowers appear predominantly on one side of the spike, it can detract from the overall aesthetic. Understanding the causes behind one-sided blooms and implementing corrective measures is key to maintaining the visual harmony of your orchids.
Common Causes of One-Sided Blooms:
Uneven light exposure:
Issue: Orchids receiving more light on one side promote unilateral flower development.
Solution: Rotate your orchid regularly to ensure even light exposure on all sides. This encourages balanced growth and promotes symmetric blooming.
Environmental Stress:
Issue: Sudden changes in temperature or humidity cause the orchid to favour one side for blooming.
Solution: Maintain stable environmental conditions. Avoid exposing orchids to drafts or extreme temperature variations that can lead to uneven development.
Uneven Watering:
Issue: Inconsistent watering results in uneven growth on the flower spike.
Solution: Establish a regular watering routine, ensuring that each part of the orchid spike receives adequate moisture. Sufficient drainage is essential to avoid standing water.
Nutrient Imbalance:
Issue: unequal distribution of nutrients affecting flower development.
Solution: Adjust your fertilisation routine to ensure an even supply of nutrients. Use a balanced orchid fertiliser and follow the recommended application rates for uniform growth.
Corrective Measures for Balanced Blooms:
Regular Rotation:
Rotate your orchid regularly, preferably every few days, to expose all sides of the plant to sunlight. This promotes uniform growth and balanced blooming.
Stabilise environmental conditions:
Ensure a consistent environment by protecting orchids from sudden temperature changes, drafts, or extreme humidity fluctuations. Stability encourages symmetrical flower development.
Even Watering:
Water your orchid thoroughly, allowing water to reach all parts of the root system. Avoid overwatering, which can lead to uneven moisture distribution.
Nutrient Monitoring:
Monitor your orchid’s nutrient needs and adjust fertiliser application accordingly. Pay attention to the distribution of nutrients in the potting medium.
Observation and Adjustments:
Regular Inspection:
Regularly inspect your orchid for signs of uneven growth. Adjust its position and care routine based on your observations.
Adapt to individual needs:
Different orchid species may have varied requirements. Tailor your care practices to the specific needs of each orchid, considering their natural habitat.
Maintaining symmetry in orchid blooms enhances their visual appeal, turning them into captivating works of art. By addressing the causes of one-sided blooms and implementing corrective measures, you can enjoy the full splendour of balanced and harmonious flower displays from your orchids.
One-Sided Blooms:
Addressing One-Sided Blooms in Orchids: Tips for Symmetrical Beauty
The elegance of orchids lies in their stunning, symmetrical blooms. However, when orchids display one-sided blooms, where flowers favour one side of the spike, it can be a cause for concern among enthusiasts. Let’s explore the reasons behind this phenomenon and effective strategies to achieve balanced and harmonious flowering.
Causes of one-sided blooms:
Uneven light exposure:
Issue: Orchids receive more light on one side, leading to uneven flower development.
Solution: Rotate the orchid regularly to ensure all sides receive equal light exposure. Consider the natural light requirements of the specific orchid species.
Environmental Stress:
Issue: Sudden changes in temperature or humidity cause the orchid to favour one side for blooming.
Solution: Maintain stable environmental conditions. shield orchids from drafts and temperature fluctuations, providing a consistent and stress-free growing environment.
Unequal Watering:
Issue: Inconsistent watering results in uneven growth on the flower spike.
Solution: Establish a consistent watering routine, ensuring thorough hydration. For areas to stay dry, proper drainage is necessary.
Nutrient Imbalance:
Issue: unequal distribution of nutrients affecting flower development.
Solution: Adjust fertilisation practices to ensure an even nutrient supply. Employ a balanced orchid fertiliser, considering the specific nutritional needs of the orchid species.
Strategies for Balanced Blooms:
Regular Rotation:
Rotate the orchid regularly to expose all sides to sunlight. This encourages uniform growth and helps achieve symmetrical blooms.
Stable Environment:
Ensure a stable environment by protecting orchids from sudden temperature changes, drafts, or extreme humidity fluctuations. Consistency fosters even development.
Even Watering:
Water the orchid thoroughly, allowing water to reach all parts of the root system. Avoid overwatering, as it can lead to uneven moisture distribution.
Monitor nutrient levels:
Regularly monitor nutrient levels in the potting medium. Adjust the fertiliser application based on the orchid’s growth stage and nutritional requirements.
Observation and Adjustments:
Regular Inspection:
Regularly inspect your orchid for signs of uneven growth. Adjust its position and care routine based on observations to promote balanced flowering.
Tailor Care to Individual Needs:
Different orchid species may have varied requirements. Tailor your care practices to the specific needs of each orchid, considering their native conditions.
Achieving balanced and symmetrical blooms in orchids requires a thoughtful approach to care. By addressing the root causes of one-sided blooms and implementing these strategies, you can enhance the visual appeal of your orchids, showcasing their beauty in full harmony.
Yellowing or Browning Buds:
Yellowing or Browning Buds in Orchids: Identifying Issues and Solutions
The sight of yellowing or browning buds on your orchid can be disheartening, signalling potential problems in its growth and flowering process. Understanding the causes behind this issue is crucial for implementing effective solutions and ensuring your orchid reaches its full blooming potential.
Common Causes of Yellowing or Browning Buds:
Overwatering:
Issue: Excess moisture leads to root problems and bud rot.
Solution: Adjust your watering routine to prevent waterlogged conditions. Ensure proper drainage and allow the orchid to dry out between waterings.
Underwatering:
Issue: Insufficient water is causing dehydration and stress.
Solution: Establish a regular watering schedule, providing adequate moisture without overdoing it. Monitor the orchid’s specific water requirements based on its species.
Nutrient Deficiencies:
Issue: Lack of essential nutrients affects bud development.
Solution: Evaluate your fertilisation routine. Use a balanced orchid fertiliser and adjust nutrient levels based on the orchid’s growth stage. Consider micronutrient supplements if deficiencies are identified.
Environmental Stress:
Issue: fluctuations in temperature, humidity, or light causing stress to the buds.
Solution: Maintain stable environmental conditions. Protect orchids from sudden changes in temperature or drafts that can lead to bud discoloration.
Strategies for Addressing Yellowing or Browning Buds:
Evaluate watering practices:
Review your watering routine and ensure it aligns with the orchid’s specific needs. Allow the growing medium to dry out slightly between waterings to prevent overwatering.
Optimise Drainage:
Ensure proper drainage in the orchid’s container to prevent water from stagnating around the roots. Use a well-draining potting mix.
Fertilisation Adjustment:
Keep an eye on the amounts of nutrients and modify your fertilisation schedule as necessary. Provide a balanced orchid fertiliser with the necessary macro- and micronutrients.
Stabilise growing conditions:
Keep your orchid in a steady and regular environment. Protect it from sudden changes in temperature, drafts, or extreme humidity fluctuations.
Recovery and Preventive Measures:
Trim Affected Parts:
Carefully trim discoloured or damaged parts of the buds. This can promote new and healthy growth.
Isolate the orchid.
If the issue is due to pests or diseases, isolate the orchid to prevent the problem from spreading. Treat with appropriate remedies.
Regular Monitoring:
Keep a close eye on your orchid’s buds for any signs of discoloration or stress. Regular monitoring allows for timely intervention.
Addressing yellowing or browning buds requires a holistic approach to orchid care. By identifying and rectifying the underlying issues, you can promote healthy bud development and enhance the overall vitality of your orchid. Consistent observation and adjustments to your care routine are key to preventing recurrence and fostering a thriving orchid.
Drooping Flower Spike:
Lifting Spirits: Remedies for a Drooping Orchid Flower Spike
The elegance of an orchid is unmistakable, but a drooping flower spike can be a cause for concern among enthusiasts. Understanding the potential reasons behind a drooping flower spike and implementing corrective measures can revive your orchid’s grace and ensure it stands tall with resplendent blooms.
Common Causes of a Drooping Flower Spike:
Insufficient Support:
Issue: Lack of proper support for the flower spike.
Solution: Gently stake the flower spike using materials like bamboo sticks or specialised orchid stakes. This provides support and prevents drooping.
Overwatering:
Issue: Excess moisture leads to weakened roots and a drooping spike.
Solution: Review your watering routine. Allow the growing medium to dry out slightly between waterings and ensure proper drainage to prevent waterlogged conditions.
Underwatering:
Issue: Dehydration is causing the spike to wilt.
Solution: Establish a consistent watering schedule, providing adequate moisture. Adjust based on the orchid’s specific water requirements.
Environmental Stress:
Issue: Sudden changes in temperature, humidity, or light cause stress.
Solution: Maintain stable environmental conditions. Protect orchids from drafts and ensure they are positioned in an area with suitable light levels.
Strategies to Revive a Drooping Spike:
Provide external support.
Gently stake the drooping flower spike using materials like bamboo sticks or orchid stakes. This helps reposition the spike and encourages upward growth.
Adjust watering practices:
Review your watering routine, ensuring it aligns with the orchid’s specific needs. Allow the growing medium to dry out slightly between waterings to promote healthy root development.
Enhance Drainage:
Ensure proper drainage in the orchid’s container to prevent waterlogging. Use a well-draining potting mix that allows excess water to escape.
Stabilise growing conditions:
Maintain a consistent and stable environment for your orchid. This includes controlling temperature fluctuations, protecting from drafts, and providing appropriate humidity levels.
Recovery and Preventive Measures:
Trim dead or damaged parts:
Trim any dead or damaged parts of the flower spike. This promotes energy redirection to healthier sections.
Isolate the orchid.
If the drooping is due to pests or diseases, isolate the orchid to prevent the problem from spreading. Treat with suitable remedies.
Monitor and adjust:
Regularly monitor the orchid’s growth and adjust care practices as needed. This proactive approach helps prevent the recurrence of drooping spikes.
By addressing the root causes of a drooping flower spike and providing timely support, you can revitalise your orchid’s aesthetic appeal. Consistent care, coupled with attentive observation, will contribute to a rejuvenated orchid with an upright and majestic flower spike.
No Blooms After Spiking:
Unlocking Bloom Potential: Troubleshooting Orchids with No Blooms After Spiking
The anticipation of an orchid spiking is met with excitement, but when the blooms don’t follow, disappointment can set in. Understanding the reasons behind no blooms after spiking is key to unlocking the full flowering potential of your orchid. Let’s explore common issues and effective strategies to encourage those long-awaited blossoms.
Potential Causes of No Blooms After Spiking:
Insufficient Light:
Issue: Orchids are not receiving enough light to initiate or sustain blooming.
Solution: Ensure your orchid is placed in an area with appropriate light levels. Supplement natural light with artificial light if necessary, especially during critical growth phases.
Nutrient Deficiency:
Issue: Lack of essential nutrients required for flowering.
Solution: Review your fertilisation routine. Provide a balanced orchid fertiliser, emphasising phosphorus for blooming. Adjust nutrient levels based on the orchid’s growth stage.
Inadequate Dormancy Period:
Issue: Orchids requiring a dormancy period are not receiving one.
Solution: Some orchids need a period of reduced watering and lower temperatures to initiate blooming. Research your orchid species and provide the required dormancy conditions.
Overcrowded Roots:
Issue: Roots are becoming crowded in the pot, hindering blooming.
Solution: Repot your orchid if the roots are overcrowded. Use fresh potting medium and ensure the roots have enough space to grow and absorb nutrients.
Strategies to Encourage Blooming:
Optimal light exposure:
Make sure the proper amount of light reaches your orchid. Different orchid species have varying light requirements, so tailor the light exposure to your orchid’s specific needs.
Balanced Fertilisation:
Provide a well-balanced orchid fertiliser, adjusting the formulation based on the orchid’s growth stage. Focus on phosphorus to stimulate flowering.
Dormancy Considerations:
Understand the dormancy requirements of your orchid species. Mimic their natural conditions to encourage blooming.
Root health and repotting:
Check the health of the roots. If they are crowded or showing signs of decay, consider repotting. Use fresh potting medium to provide optimal conditions for root growth.
Patience and observations:
Allow time for adjustment.
Orchids may take time to adjust to changes in their environment or care routine. Be patient and allow sufficient time for the plant to respond.
Regular Monitoring:
Keep a close eye on your orchid’s growth, looking for signs of new developments or changes. Regular monitoring helps you adjust care practices as needed.
By addressing the specific issues hindering blooming and providing tailored care, you can encourage your orchid to transition from a promising spike to a spectacular display of blossoms. Patience, coupled with attentive and informed care, is key to unlocking the full potential of your orchid’s flowering capabilities.
Premature Wilting:
Combatting Premature Wilting in Orchid Blooms: A Guide to Restoration
The premature wilting of orchid blooms can be disheartening, especially after eagerly anticipating their beauty. Understanding the causes and implementing corrective measures is crucial to reviving your orchid’s blooms and ensuring they reach their full splendour.
Common Causes of Premature Wilting:
Watering Issues:
Issue: Overwatering or underwatering leads to stress and dehydration.
Solution: Review your watering routine. Ensure a well-balanced schedule, allowing the growing medium to dry slightly between waterings. Adjust based on the orchid’s specific moisture needs.
Environmental Stress:
Issue: Sudden changes in temperature, humidity, or light cause stress.
Solution: Maintain stable environmental conditions. Protect orchids from drafts, extreme temperatures, or abrupt changes that can lead to premature wilting.
Nutrient Imbalance:
Issue: Lack or excess of essential nutrients affecting bloom health.
Solution: Evaluate your fertilisation routine. Provide a balanced orchid fertiliser, adjusting nutrient levels based on the orchid’s growth stage.
Pests and diseases:
Issue: Infestation or infection causing damage to blooms
Solution: Regularly inspect your orchid for pests and diseases. Treat promptly with appropriate remedies if detected.
Strategies to Revive Prematurely Wilting Blooms:
Adjust watering practices:
Tailor your watering routine to the orchid’s specific needs. Avoid extremes of dryness or excessive moisture. Make sure there is adequate drainage to avoid standing water.
Stabilise growing conditions:
Maintain consistent environmental conditions. Shield your orchids from sudden changes in temperature or humidity, providing a stable and stress-free environment.
Balanced Fertilisation:
Provide a balanced orchid fertiliser with the necessary nutrients. Adjust the fertiliser composition based on the orchid’s growth stage, with a focus on promoting bloom health.
Pest and Disease Management:
Regularly inspect your orchid for pests or diseases. Treat promptly if any issues are identified. Remove impacted plants to stop the issue from getting worse.
Additional Recovery Measures:
Trim damaged parts:
Gently trim any damaged or wilted parts of the blooms. This encourages the plant to redirect energy to healthier sections.
Isolate and monitor:
If pests or diseases are detected, isolate the orchid to prevent further spread. Keep a watchful eye on the plant for indications of recovery.
Preventive Practices:
Regular Inspection:
Consistently inspect your orchid for signs of stress, pests, or diseases. Early detection allows for timely intervention and prevents issues from escalating.
When making changes to the orchid’s care routine, do so gradually to allow the plant to acclimatise without causing stress.
Orchid care requires a delicate balance of environmental factors, and flower spikes can be particularly sensitive. By addressing these common problems early on, orchid enthusiasts can ensure a spectacular display of blooms, transforming their budding orchids into vibrant, flourishing plants. Remember to observe your orchid closely, adapt care practices accordingly, and enjoy the rewarding experience of nurturing these captivating flowering plants.
FAQ
What are common issues with orchid flower spikes during their development?
Orchid flower spikes can face challenges like bud blast, yellowing, or stunted growth. Understanding these issues is crucial for successful orchid care.
How can I prevent bud blast in my orchid flower spikes?
To prevent bud blast, ensure stable environmental conditions, avoid sudden temperature changes, and maintain consistent watering. Adequate humidity is also vital for bud development.
What causes yellowing in orchid flower spikes, and how can it be addressed?
Yellowing may indicate stress or nutrient deficiencies. Adjusting light levels, providing appropriate fertilization, and addressing root health can help resolve yellowing issues in orchid flower spikes.
My orchid flower spike seems stunted. What steps can I take to promote healthy growth?
Stunted growth may result from insufficient light, improper watering, or inadequate nutrients. Evaluate and adjust these factors to encourage robust development in your orchid flower spikes.
Hi, I’m Steve, an orchid grower with 30+ years of hands-on experience caring for indoor and outdoor plants. I share practical, tested tips and beginner-friendly guides to help plant enthusiasts nurture healthy, thriving plants.