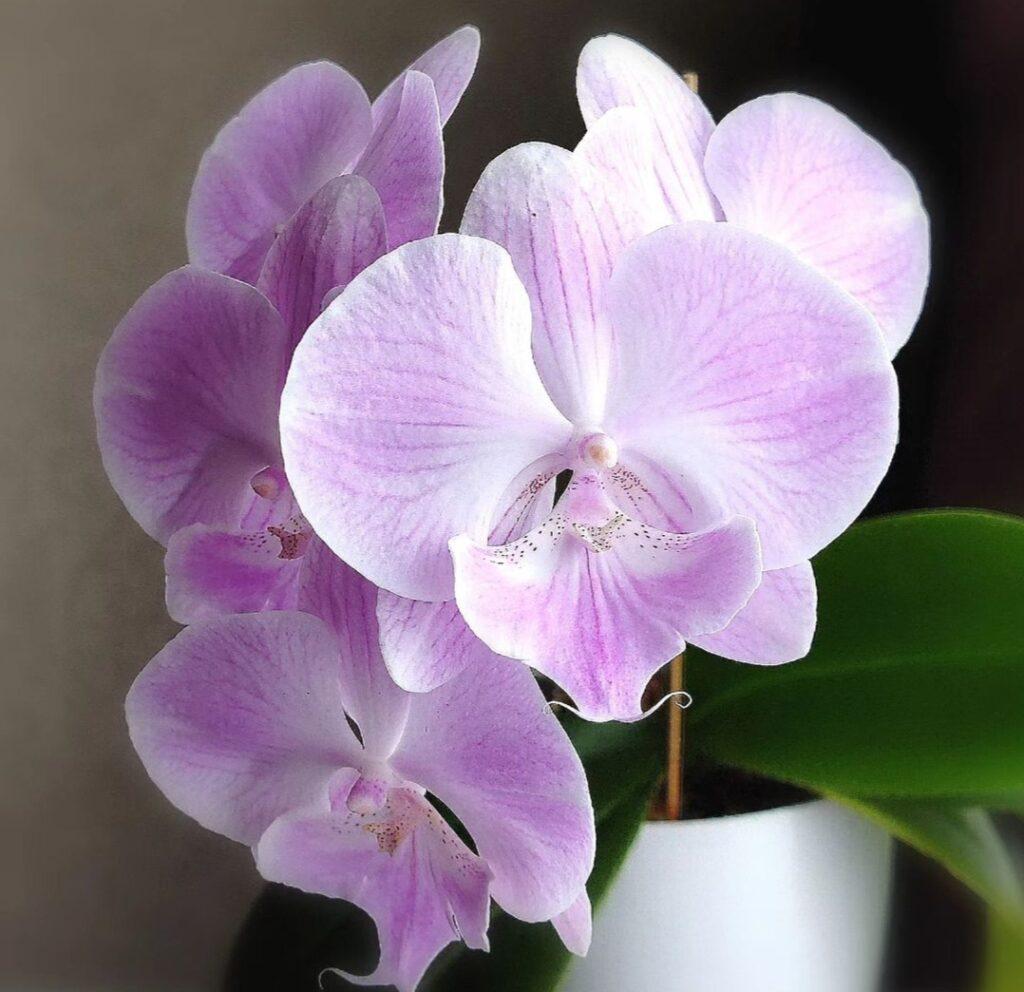
Cattleya Orchid Care Made Easy: 10 Key Tips for Gorgeous Blooms
Table of Contents 👈 Tap Here
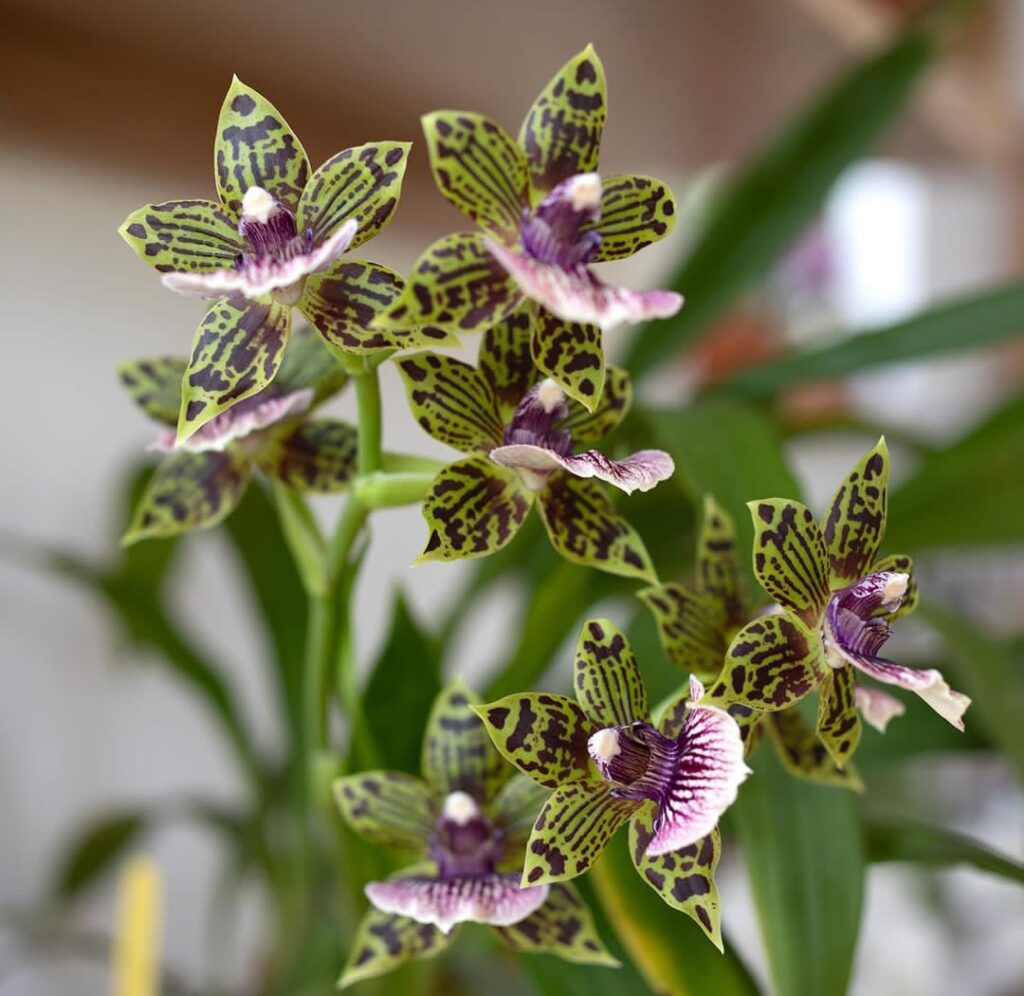
Cattleya orchids are renowned for their vibrant, fragrant blooms, making them a favorite among orchid enthusiasts. Whether you’re a beginner or an experienced grower, mastering Cattleya Orchid Care Made Easy is the key to achieving stunning, long-lasting flowers. These orchids thrive with the right balance of light, humidity, and proper watering, but they can also be finicky if their needs aren’t met. In this guide, you’ll discover 10 essential tips to help your Cattleya orchids flourish, ensuring they reward you with spectacular blossoms season after season.
Cattleya orchids are a joy to grow for orchid enthusiasts and beginners alike. By following these 10 key tips for Cattleya orchid care, you’ll be well on your way to enjoying the spectacular and fragrant blossoms that these orchids are known for. Remember, with a little attention and care, you can create a thriving orchid that graces your home with its beauty for years to come. Happy orchid growing!

Cattleya Orchid Care
| Care Activity | Spring | Summer | Fall | Winter |
|---|---|---|---|---|
| Watering | Moderate (Allow drying between waterings) | Frequent (Every 4–7 days) | Reduce (Every 7–10 days) | Minimal (Every 10–14 days) |
| Light | Bright, indirect sunlight (12–14 hours) | Bright, indirect sunlight (12–14 hours) | Bright, indirect sunlight (10–12 hours) | Reduce slightly (8–10 hours) |
| Temperature | 65–75°F (18–24°C) | 70–85°F (21–29°C) | 60–75°F (15–24°C) | 55–70°F (13–21°C) |
| Humidity | 50–70% | 50–80% | 50–70% | 40–60% |
| Fertilizing | Every 2 weeks (Balanced 20-20-20) | Weekly (Diluted 20-20-20) | Every 2 weeks (Low nitrogen) | Monthly (Weak solution) |
| Repotting | If necessary (After blooming) | Best season for repotting | Avoid repotting | Avoid repotting |
| Blooming | Some varieties bloom | Peak blooming season | Some varieties bloom | Resting phase |
| Pest Control | Monitor for pests (mites, mealybugs) | Watch for pests (thrips, aphids) | Inspect for pests | Fungal prevention |
| Pruning | Trim old flower spikes | Remove dead growth | Minimal pruning | Remove dead leaves |
Lighting Matters:
Absolutely, lighting is a critical factor in the successful care of Cattleya orchids. These orchids have specific lighting requirements that are essential for their growth and blooming. Here’s a more detailed look at why lighting matters for Cattleya orchids:
Optimal Light Levels: Cattleya orchids thrive in bright, indirect sunlight. This means they need plenty of light but not direct, scorching sun exposure. South- or east-facing windows are typically ideal, as they provide the right balance of light intensity.
Avoid direct sunlight: Protect your Cattleya orchid from direct sunlight, especially during the hot afternoon hours. Too much sun can lead to sunburn, which manifests as brown or white patches on the leaves.
Adjust for Seasonal Changes: Be mindful of how the angle of the sun changes with the seasons. During winter, when the sun is lower in the sky, you may need to move your orchid closer to the window to ensure it gets enough light.
Supplemental Lighting: In regions with limited natural light, consider using artificial grow lights. LED grow lights designed for orchids can provide the right spectrum of light to promote healthy growth and flowering.
Rotate Your Orchid: To ensure even growth and prevent the orchid from leaning towards the light source, rotate it every few weeks.
Monitor light levels: Pay attention to your orchid’s leaves. If they become dark green and floppy, it might indicate too little light. If they turn reddish or yellowish, they may be getting too much direct light.
In summary, providing the correct lighting conditions is fundamental to the well-being of your Cattleya orchid. By mimicking their natural habitat’s bright, filtered light, you’ll encourage healthy growth and the stunning blooms that make Cattleyas so beloved among orchid enthusiasm

Proper Potting Mix:
Selecting the right potting mix is crucial for the health and vitality of your Cattleya orchid. Cattleya orchids are epiphytic, meaning they grow on trees in their natural habitat. To replicate these conditions in your home, you must use a well-draining potting mix that provides stability for the roots while allowing for good aeration. Here’s what you need to know about the proper potting mix for Cattleya orchids:
Orchid-Specific Mix: Use an orchid-specific potting mix designed for epiphytic orchids like Cattleyas. These mixes typically contain a combination of materials such as bark, sphagnum moss, perlite, and charcoal.
Well-Draining: The mix should be well-draining to prevent water from pooling around the roots, which can lead to root rot. Cattleya orchids prefer a little bit of drying time in between waterings.
Adequate Aeration: The potting mix should allow for good airflow around the roots. This promotes oxygen exchange and helps prevent root suffocation.
Repot Periodically: Cattleya orchids generally need to be repotted every 2–3 years. This is not only to refresh the potting mix but also to provide more space for root growth.
Select the Right Container: Choose a pot or container with ample drainage holes to ensure excess water can escape easily. Orchid pots with slits or clear plastic pots are often suitable, as they allow you to monitor root health.
Gently Pack the Mix: When repotting, gently pack the potting mix around the roots without compacting it too tightly. This provides stability for the plant while still allowing for aeration.
Watch for Signs of Decay: Over time, the potting mix may break down or become overly compacted. If you notice your orchid’s growth slowing or the mix retaining too much moisture, it’s time for repotting.
Remember that the quality of the potting mix is crucial for your orchid’s overall health and vitality. By selecting the right mix and repotting as needed, you’ll provide your Cattleya orchid with a comfortable home where it can thrive and produce those stunning, fragrant blooms.
Water Wisely:
Watering your Cattleya orchids wisely is one of the most critical aspects of their care. Proper watering ensures that your orchid stays healthy with lush foliage and vibrant blooms. Here are some essential tips for watering your Cattleya orchid:
Allow the mix to dry slightly. Cattleyas prefer to dry out slightly between waterings. Before you water, stick your finger about an inch into the potting mix. Drink some water if the air feels dry at this depth.
Use the Soak and Drain Method: When it’s time to water, thoroughly soak the potting mix until water starts to drain from the bottom of the pot. It’s time to hydrate if it seems dry at this depth.
Avoid Standing Water: Never allow your orchid’s pot to sit in standing water. After watering, empty the saucer under the pot to prevent root rot.
Water Early in the Day: Water your orchid in the morning to allow excess moisture to evaporate during the day. This helps prevent fungal and bacterial issues that can occur in stagnant, humid conditions.
Consider Your Environment: Environmental factors like temperature and humidity affect how often you should water. In warmer and drier conditions, you may need to water more frequently, while in cooler or more humid environments, less frequent watering may be required.
Monitor for Signs of Overwatering: Yellowing leaves, a foul odour, or soggy potting mix can be signs of overwatering.Adjust your watering schedule if you observe any of these symptoms.
Use room-temperature water: Avoid using cold water on your orchid, as it can shock the roots. Instead, use room-temperature water when watering.
Consider Your Potting Mix: The type of potting mix you use can influence your watering schedule. If your mix retains moisture for an extended period, be cautious not to overwater.
Drench and Dry: Some orchid enthusiasts follow a “drench and dry” approach. This means thoroughly watering the orchid and allowing it to dry out before the next watering.
Seasonal Adjustments: During the active growing season (spring and summer), your orchid may need more frequent watering. In the dormant period (fall and winter), reduce watering to mimic its natural cycle.
By following these guidelines and paying close attention to your Cattleya orchid’s specific needs, you’ll master the art of watering and help your orchid flourish, leading to the stunning, long-lasting blooms you desire.
Humidity is key.
Maintaining the right humidity level is indeed crucial for the health and well-being of your Cattleya orchid. These orchids are native to tropical regions with high humidity, so replicating those conditions in your home will help your orchid thrive and produce gorgeous blooms. Here’s why humidity is key for Cattleya orchids and how to achieve optimal humidity levels:
Natural Habitat Mimicry: Cattleya orchids are naturally found in tropical rainforests, where humidity levels are typically high, ranging from 50% to 70% or more. To encourage healthy growth and flowering, it’s essential to create a similar environment in your home.
Root Health: Adequate humidity helps prevent the orchid’s roots from drying out. Healthy roots are crucial for nutrient uptake and overall plant health.
Prevents Dehydration: Low humidity levels can lead to dehydration, causing the orchid to wilt and its blooms to wither prematurely.
Disease Prevention: Maintaining proper humidity reduces the risk of fungal and bacterial diseases that can affect orchids in dry conditions.
Here’s how to ensure the right humidity for your Cattleya orchid:
Use a Humidity Tray: Place a tray filled with water and pebbles near your orchid. As the water evaporates, it raises the humidity around the plant.
Room Humidifier: Investing in a room humidifier is an excellent way to maintain consistent humidity levels in your orchid’s environment.
Misting: Lightly misting your orchid with room-temperature water can temporarily increase humidity. Do this in the morning to allow excess moisture to evaporate during the day.
Grouping Orchids: If you have multiple orchids, grouping them together can create a microclimate with higher humidity levels.
Adjust Placement: Be mindful of where you place your orchid. Avoid locations with drafts or near heating or cooling vents, as these can reduce humidity.
Monitor Humidity: Use a hygrometer to monitor humidity levels in the room where your orchid is located. This enables you to make the required modifications.
Remember that humidity requirements can vary depending on your orchid’s specific environment and the season. During the dry winter months, you may need to increase humidity more than during the humid summer season. By paying attention to your Cattleya orchid’s needs and maintaining the right humidity, you’ll create an environment where it can thrive and produce those stunning, fragrant blooms.
Temperature Control:
Controlling temperature is a vital aspect of caring for your Cattleya orchid. These orchids have specific temperature preferences that can influence their growth and flowering patterns. Proper temperature control ensures that your Cattleya orchid remains healthy and produces those exquisite blooms. Here’s what you need to know:
Daytime Temperatures: Cattleya orchids thrive in daytime temperatures ranging from 70 to 85°F (21 to 29°C). This range mimics their natural tropical habitat and encourages healthy growth.
Nighttime Temperatures: To promote flowering, provide your orchid with a nighttime temperature drop. Ideally, nighttime temperatures should be around 55–65°F (13–18°C). This temperature differential between day and night helps trigger flower bud formation.
Avoid Extreme Temperature Fluctuations: While Cattleya orchids appreciate a temperature drop at night, avoid exposing them to extreme temperature fluctuations, which can stress the plant. Maintain a consistent temperature within the recommended ranges.
Protect from cold drafts: Avoid placing your orchid in areas with cold drafts or near heating vents. Sudden drops in temperature can harm the plant.
Seasonal Adjustments: Be mindful of seasonal temperature changes. In the winter, when indoor heating is prevalent, you may need to adjust your orchid’s placement to ensure it experiences the necessary temperature drop at night.
Consider Geographic Variations: Keep in mind that the temperature preferences for Cattleya orchids can vary slightly depending on their specific geographic origin. Research the specific species or hybrid you have to determine its ideal temperature range.
Cooler Rest Period: During the fall and winter, Cattleya orchids enter a natural rest period. During this time, reduce fertilisation and limit watering to mimic their natural seasonal cycle.
By maintaining the right temperature conditions for your Cattleya orchid, you’ll encourage not only healthy foliage but also the development of flower buds. With proper temperature control, your orchid will reward you with the spectacular and fragrant blooms that make Cattleyas so beloved among orchid enthusiasts.
Fertilise Strategically:
Fertilising your Cattleya orchid strategically is essential to ensuring its proper growth and vibrant blooms. Cattleya orchids, like all plants, require essential nutrients to thrive, but their nutritional needs vary throughout the year. Here are some key tips for fertilising your Cattleya orchid effectively:
Use a Balanced Orchid Fertiliser: Opt for a balanced, water-soluble orchid fertiliser with an N-P-K (Nitrogen-Phosphorus-Potassium) ratio of approximately 20-20-20. This balanced formula provides the necessary nutrients without overstimulating one aspect of growth over another.
Fertilise During the Growing Season: Cattleya orchids have distinct growth and dormancy periods. Fertilise during their active growth season, which typically occurs in the spring and summer. This is when they are producing new leaves, roots, and potentially flower spikes.
Frequency and Dilution: Dilute the fertiliser to half or quarter strength according to the label instructions. Fertilise your orchid every 2–4 weeks during the growing season. Over-fertilisation can lead to salt buildup in the potting mix, which can harm your orchid.
Reduce Fertilisation During Dormancy: In the fall and winter, when your Cattleya orchid enters a natural dormancy period, reduce or suspend fertilization. During this time, the plant’s growth slows, and it doesn’t require as many nutrients.
Leach the Potting Mix: To prevent salt buildup, periodically flush the potting mix by watering your orchid thoroughly and allowing water to drain freely through the pot. This helps remove excess salts from the potting mix.
Observe Your Orchid: Pay attention to how your orchid responds to fertilization. If you notice excessive leaf or root growth without flower spikes, you may be over-fertilizing. Adjust your fertilisation routine accordingly.
Foliar Feeding: Occasionally, you can apply a very diluted fertiliser solution directly to the leaves (foliar feeding). This can provide a quick nutrient boost when needed, but it should not replace root fertilisation.
Microelement Supplements: Consider using a specialised orchid fertiliser that includes essential microelements like iron, magnesium, and calcium. These elements are vital for overall orchid health.
Remember that proper fertilisation is just one aspect of caring for your Cattleya orchid. It should be part of a comprehensive care routine that includes appropriate lighting, watering, temperature control, and humidity management. By fertilising strategically, you can help your orchid reach its full potential and produce those stunning and long-lasting blooms.
Air Circulation
Air circulation is a crucial factor in maintaining a healthy environment for your Cattleya orchid. Good air circulation helps prevent issues such as fungal and bacterial diseases, promotes proper gas exchange, and creates a more stable microclimate around your orchid. Here’s why air circulation matters and how to achieve it:
Disease Prevention: Adequate air movement can help reduce the risk of fungal and bacterial diseases. Stagnant air can create a humid, sheltered environment where these pathogens thrive. Proper airflow disrupts their growth and spread.
Oxygen Exchange: Orchid roots require oxygen for respiration. Good air circulation ensures that oxygen reaches the root system while carbon dioxide is efficiently expelled. This is essential for healthy root growth.
Temperature Regulation: Air movement can help regulate temperatures by preventing hot spots and cold pockets. It ensures that the temperature around your orchid remains consistent.
Reducing Moisture Buildup: In high-humidity environments, air circulation helps prevent excessive moisture from accumulating on leaves and in the potting mix. This can reduce the risk of rot and other moisture-related issues.
Here’s how to ensure proper air circulation for your Cattleya orchid:
Positioning: Place your orchid in a location where there’s natural airflow, but avoid strong drafts or direct exposure to fans or air conditioning vents. Gentle, consistent air movement is ideal.
Use a Fan: If your orchid is in an area with limited natural air circulation, consider using a small, oscillating fan set on a low setting. Ensure the fan doesn’t blow directly on the orchid but rather circulates the air around it.
Regular Maintenance: Regularly clean the area around your orchid and remove any debris or dust. Clean leaves allow for better gas exchange and reduce the risk of pest infestation.
Repotting: During repotting, ensure that the potting mix provides adequate aeration for the roots. Well-draining mixes and proper potting techniques are essential for maintaining healthy roots and encouraging air circulation in the root zone.
Grouping Orchids: If you have multiple orchids, placing them close together can create a microclimate with improved air circulation.
By paying attention to air circulation and taking steps to promote it, you’ll help create an environment where your Cattleya orchid can thrive. Combined with proper lighting, watering, and other care factors, good air circulation is an integral part of keeping your orchid healthy and encouraging those beautiful, fragrant blooms.
Pruning and repotting:
Pruning and repotting are essential aspects of Cattleya orchid care that can help maintain the health and vitality of your orchid. These practices should be done strategically to encourage new growth and prevent issues. Here’s how to approach pruning and repotting your Cattleya orchid:
Pruning:
Prune Spent Flower Spikes: After your Cattleya orchid has finished blooming, it’s important to prune the spent flower spikes. Use clean, sterile pruning shears or scissors to cut the spike just above a node or pseudobulb. This encourages the orchid to redirect its energy into new growth.
Trim Dead or Yellowing Leaves: Regularly inspect your orchid for dead or yellowing leaves. These can be signs of ageing or disease. Trim these leaves back to the base using sterile tools to maintain a tidy appearance and prevent disease spread.
Remove Unhealthy Roots: During repotting (discussed below), take the opportunity to inspect the roots. Trim away any dead, brown, or rotting roots with sterile pruning shears.White, green, or solid roots indicate healthy roots.
Divide Overgrown Orchids: If your Cattleya orchid has outgrown its pot or is becoming crowded, you may need to divide it during repotting. Gently separate the orchid into smaller sections, ensuring each division has a healthy pseudobulb and roots. Repot these divisions into separate containers.
Repotting:
Repot Every 2-3 Years: Cattleya orchids generally benefit from repotting every 2-3 years, or when you notice signs of overcrowding, deteriorating potting mix, or slow growth.
Select the Right Time: The best time to repot is during the orchid’s active growth phase, typically in the spring or early summer. Avoid repotting when the orchid is in bloom or during its dormant period.
Choose the Correct Pot: Select a pot that provides ample space for the orchid’s roots to grow. Ensure it has drainage holes and is just large enough to accommodate the orchid comfortably.
Use Fresh Potting Mix: Choose a well-draining orchid potting mix suitable for epiphytic orchids. Remove the old potting mix from the roots and replace it with a fresh mix. Gently loosen the roots during this process.
Repot with Care: Carefully place the orchid in the new pot, ensuring that the pseudobulbs are positioned slightly below the pot’s rim. Fill in the space around the roots with fresh potting mix, gently tapping the pot to remove air pockets.
Water and Monitor: After repotting, water your orchid thoroughly. Keep an eye on the plant for a few weeks to ensure it’s adjusting well to the new pot and mix. Adjust your watering routine as needed.
Pruning and repotting are essential maintenance tasks that promote healthy growth and longevity in your Cattleya orchid. By performing these tasks with care and at the right times, you’ll help your orchid thrive and continue producing those gorgeous, fragrant blooms.
Pest Control:
Effective pest control is crucial to keeping your Cattleya orchid healthy and thriving. While these orchids are relatively hardy, they can still fall victim to common orchid pests. Regular inspection and prompt action are key to preventing and managing infestations. Here’s how to control pests on your Cattleya orchid:
Inspect Regularly: Make it a habit to inspect your orchid regularly, examining both the foliage and the potting mix. Look for any signs of pests or damage, such as discoloured or deformed leaves, tiny moving insects, or sticky residue.
Isolate Infested Plants: If you discover that one of your orchids has a pest problem, isolate it from your other plants immediately. This prevents the infestation from spreading.
Remove Pests by Hand: For minor infestations, you can often remove pests like aphids, mealybugs, or scale insects by gently wiping them off with a soft cloth or a cotton swab dipped in rubbing alcohol.
Use natural predators: Some beneficial insects, such as ladybirds and lacewings, can help control pests in your orchid collection. Introducing these natural predators can be an effective and environmentally friendly pest control method.
Neem Oil: Neem oil is a natural and safe pesticide for orchids. Dilute neem oil according to the instructions on the product label and apply it to both the upper and lower surfaces of the leaves to control various pests.
Insecticidal Soap: Insecticidal soap is another safe option for controlling soft-bodied pests like aphids and mealybugs. Be sure to follow the instructions on the product label and apply it as needed.
Horticultural Oil: Horticultural oils, such as mineral oil, can suffocate and control certain pests. These oils should be used when the orchid is not in direct sunlight.
Repot with Fresh Mix: If you suspect that your orchid’s potting mix is infested with pests or their eggs, repot the orchid using fresh potting mix to prevent reinfestation.
Maintain Cleanliness: Keep the area around your orchids clean and free of plant debris, fallen leaves, and spent flowers. This reduces hiding places for pests.
Quarantine New Additions: Whenever you introduce a new orchid to your collection, it’s a good practice to quarantine it for a few weeks to monitor for any potential pest issues before placing it with your established plants.
Remember that prevention is often more effective than treatment when it comes to pest control. Regularly inspecting your Cattleya orchid and maintaining good orchid care practices will go a long way in preventing pest infestations and ensuring your orchid continues to produce stunning blooms.
Be Patient:
Patience is a virtue when it comes to caring for Cattleya orchids. These exquisite orchids may not always be in full bloom, but their stunning and fragrant flowers are well worth the wait. Here’s why patience is key in Cattleya orchid care:
Natural Growth Cycle: Cattleya orchids, like all orchids, have a natural growth cycle that includes periods of growth, dormancy, and flowering. It’s important to understand and respect these phases.
Resting Period: Cattleya orchids typically have a resting period during the fall and winter. During this time, they may not produce new growth or flowers. A normal phase of their life cycle includes this.
Budding and Blooming: The processes of bud formation and blooming can take time. Orchids often need several weeks or even months to develop flower buds, and the duration can vary depending on factors like light, temperature, and the orchid’s individual health.
Healthy Growth: Rushing or stressing the orchid in an attempt to force blooms can lead to health issues. Healthy growth and good care practices ultimately result in the best and longest-lasting flowers.
Environmental Factors: Orchid growth and flowering are influenced by environmental conditions. Changes in light, temperature, and humidity can impact when and how your orchid blooms.
Variability: Orchids, even within the same species or hybrid, can show variability in their flowering habits. Some may bloom more frequently, while others take longer between blooming cycles.
Enjoy the Journey: Cattleya orchids are not just about the blooms; they’re beautiful year-round with their lush foliage. Embrace the entire process of orchid care, from nurturing new growth to the anticipation of upcoming flowers.
Steady Care: Consistent, attentive care over time is key to encouraging regular blooming. Maintain proper lighting, watering, temperature, and humidity, and your orchid will reward you with breathtaking flowers when its natural cycle allows.
FAQ
When do Cattleya orchids bloom?
Cattleya orchids typically bloom in the late winter to early spring, although the exact timing can vary depending on the specific variety and growing conditions.
What is the easiest way to care for Cattleya orchids?
Cattleya Orchid Care Made Easy involves providing bright, indirect light, proper humidity, and allowing the roots to dry between waterings. Ensuring good air circulation also helps prevent diseases.
How often should I water my Cattleya orchid?
A key part of Cattleya Orchid Care Made Easy is watering only when the potting medium is dry. Overwatering can lead to root rot, so it’s best to check the moisture level before watering.
What is the best light condition for Cattleya orchids?
For Cattleya Orchid Care Made Easy, bright, indirect sunlight is ideal. These orchids thrive in conditions similar to their natural habitat—filtered sunlight with good ventilation.
How can I get my Cattleya orchid to rebloom?
Cattleya Orchid Care Made Easy recommends providing the right temperature drop at night, proper fertilization, and ensuring the plant gets enough light to trigger blooming
What type of fertilizer should I use for Cattleya orchids?
Using a balanced orchid fertilizer is essential for Cattleya Orchid Care Made Easy. A 20-20-20 formula diluted to half strength is ideal for regular feeding.
Can I grow Cattleya orchids indoors?
Yes! Cattleya Orchid Care Made Easy suggests placing them near a bright window with filtered light. Using a humidity tray can help maintain the right moisture levels indoors.
What is the best potting medium for Cattleya orchids?
Cattleya Orchid Care Made Easy recommends using a well-draining mix, such as bark or coconut husk, to promote healthy root growth and prevent water retention.
How do I prevent pests and diseases in Cattleya orchids?
A crucial step in Cattleya Orchid Care Made Easy is inspecting plants regularly for pests like spider mites or scale. Proper air circulation and using neem oil can help keep them at bay.
Should I repot my Cattleya orchid?
Yes, repotting is an important aspect of Cattleya Orchid Care Made Easy. These orchids should be repotted every 2–3 years or when the potting medium starts breaking down.
What temperature range do Cattleya orchids prefer?
For Cattleya Orchid Care Made Easy, maintaining a temperature between 65–85°F (18–29°C) during the day and a slight drop at night encourages healthy growth.
How can I increase humidity for my Cattleya orchid?
Cattleya Orchid Care Made Easy suggests using a humidity tray, misting lightly, or placing a humidifier nearby to maintain the 50–70% humidity these orchids need.
Do Cattleya orchids need pruning?
Yes! Cattleya Orchid Care Made Easy includes pruning dead or damaged roots and cutting off spent flower spikes to encourage new growth.
How do I know if my Cattleya orchid is getting too much light?
Cattleya Orchid Care Made Easy states that yellowing or sunburned leaves indicate excessive light exposure. Moving the plant to a slightly shadier spot can help.
Can I grow Cattleya orchids in a terrarium?
While possible, Cattleya Orchid Care Made Easy advises against it due to the risk of poor air circulation, which can lead to rot. These orchids prefer open environments.
What’s the best way to encourage strong root growth?
Cattleya Orchid Care Made Easy highlights the importance of using a well-draining potting mix, providing good airflow, and avoiding overwatering to promote healthy roots.
Hi, I’m Steve, an orchid grower with 30+ years of hands-on experience caring for indoor and outdoor plants. I share practical, tested tips and beginner-friendly guides to help plant enthusiasts nurture healthy, thriving plants.