Orchids are one of the most fascinating and beautiful plants, and white moth orchids are no exception. With their stunning blooms and delicate appearance, white moth orchids make a stunning addition to any home or garden. However, for beginner growers, caring for these delicate plants can seem intimidating.In this guide, we’ll take you through everything you need to know about growing and caring for white moth orchids, from choosing the right location to watering and fertilising tips, pruning and propagation, and troubleshooting common problems.
Whether you’re a first-time orchid grower or looking to expand your collection, this guide will equip you with the knowledge and skills you need to successfully grow and maintain these stunning plants.With our easy-to-follow tips and tricks, you’ll be able to keep your white moth orchids healthy and thriving for years to come. So, let’s get started and discover the joys of growing these beautiful and fascinating plants

- 1 White moth orchid care
- 2 White moth orchid meaning
- 3 White moth orchid symbolism
- 4 White moth orchid varieties
- 5 White moth orchid potting mix
- 6 White moth orchid not blooming
- 7 light requirements for moth orchids
- 8 watering requirements for moth orchids
- 9 fertilizer requirements for moth orchids
- 10 humidity and temperature requirements for moth orchids
- 11 White moth orchid turning yellow
- 12 White moth orchid pests and diseases (cure)
- 13 FAQ
White moth orchid care
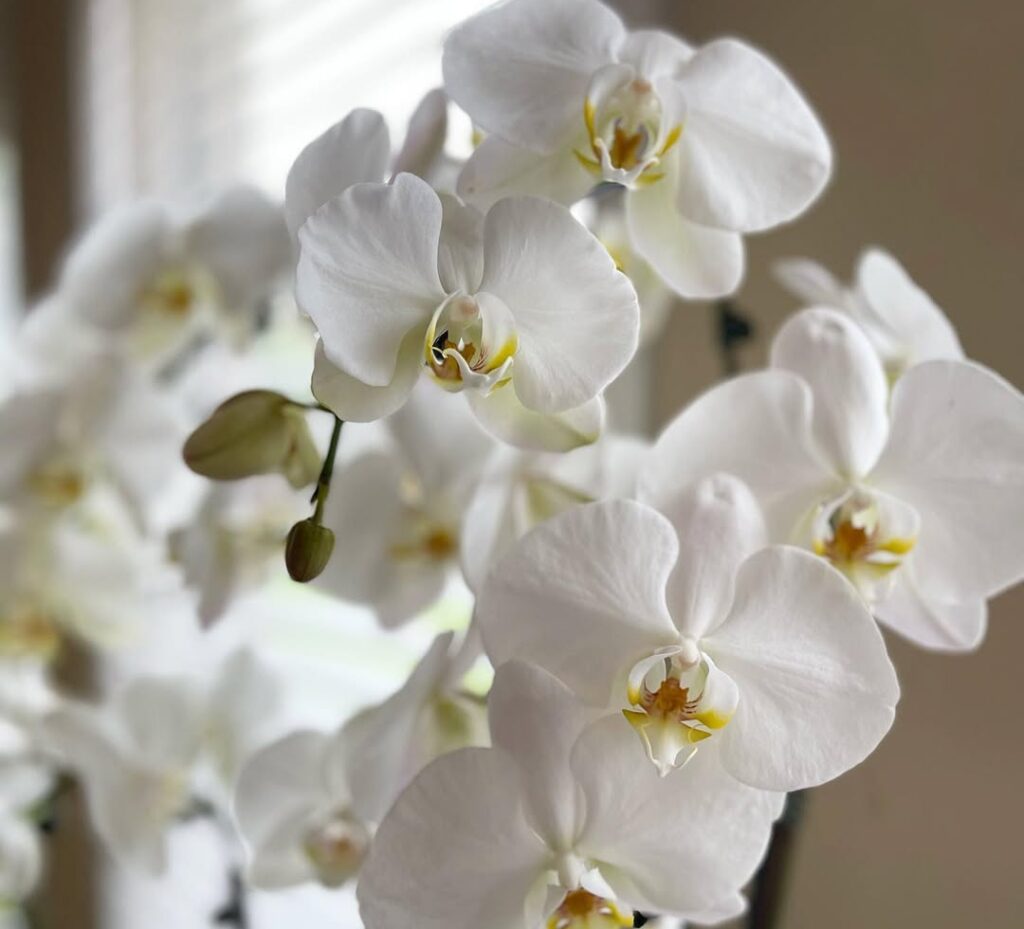
White moth orchids are beautiful and delicate plants that require proper care to thrive. These orchids are highly sought-after due to their striking white blooms and their ability to add elegance to any home or office space. To ensure that your white moth orchid stays healthy and vibrant, it is important to follow some key care tips.
First and foremost, white moth orchids require adequate light to grow and bloom. They prefer bright, indirect sunlight, so it is best to place them near a window that receives filtered light. In addition, it is important to keep the temperature and humidity levels consistent, as changes in these factors can cause stress to the plant.
Watering is also an important aspect of white moth orchid care. It is recommended to water them once a week, allowing the soil to dry out slightly between watering sessions. The health of the plant may suffer as a result of root rot brought on by overwatering.
Proper fertilisation is another key element of white moth orchid care. Using a balanced fertiliser every two weeks during the growing season can help provide the plant with the necessary nutrients to thrive.
Lastly, regular pruning and repotting can help keep white moth orchids healthy and vibrant. Pruning dead or damaged leaves and blooms can promote new growth, while repotting every two to three years can provide fresh soil and space for the plant to grow.
By following these care tips, you can ensure that your white moth orchid remains healthy and beautiful, providing you with stunning blooms for years to come.
White moth orchid meaning
The white moth orchid, also known as the Phalaenopsis orchid, is a beautiful and graceful flower that has long been associated with various symbolic meanings. One of the most prominent symbolic meanings of the white moth orchid is purity and innocence. Due to its pristine and delicate appearance, the white moth orchid is often used to represent purity, cleanliness, and perfection.
In addition to purity, the white moth orchid is also commonly associated with beauty and elegance. Its intricate and graceful structure, as well as its pure white color, make it a popular choice for weddings, formal events, and other occasions that celebrate beauty and grace.
Beyond its aesthetic qualities, the white moth orchid also carries a message of hope and optimism. Its delicate and fragile appearance is a reminder that even the most vulnerable things can still thrive and flourish under the right conditions. This symbolism is often used to encourage people to persevere through difficult times and to never give up on their dreams.
Overall, the white moth orchid is a powerful symbol of purity, beauty, and hope. Whether used in floral arrangements, as a gift, or simply admired in nature, this beautiful flower has the ability to inspire and uplift those who encounter it.
White moth orchid symbolism
White moth orchids are one of the most popular types of orchids and are often used as decorative plants in homes and gardens. They are not only admired for their beauty but also for their symbolic meaning. In many cultures, white moth orchids are seen as symbols of purity, innocence, and elegance. They are often used in weddings and other ceremonies to represent the pure and sacred nature of the occasion.
In addition to their purity and innocence symbolism, white moth orchids are also associated with spirituality and enlightenment. Some believe that the orchid’s intricate and delicate design represents the interconnectedness of all things in the universe and the constant cycle of life and death.
In Chinese culture, white moth orchids are particularly revered and are often given as gifts to express love and respect. They are believed to bring good luck, prosperity, and happiness to those who possess them. In Feng Shui, the white moth orchid is considered a powerful symbol of growth and renewal and is often placed in areas of the home or office to attract positive energy and good fortune.
Overall, the symbolism of the white moth orchid is rich and varied, making it a fascinating plant to study and appreciate. Its beauty and meaning have captured the hearts and minds of people all over the world, and it continues to be a beloved symbol of purity, spirituality, and prosperity.
White moth orchid varieties
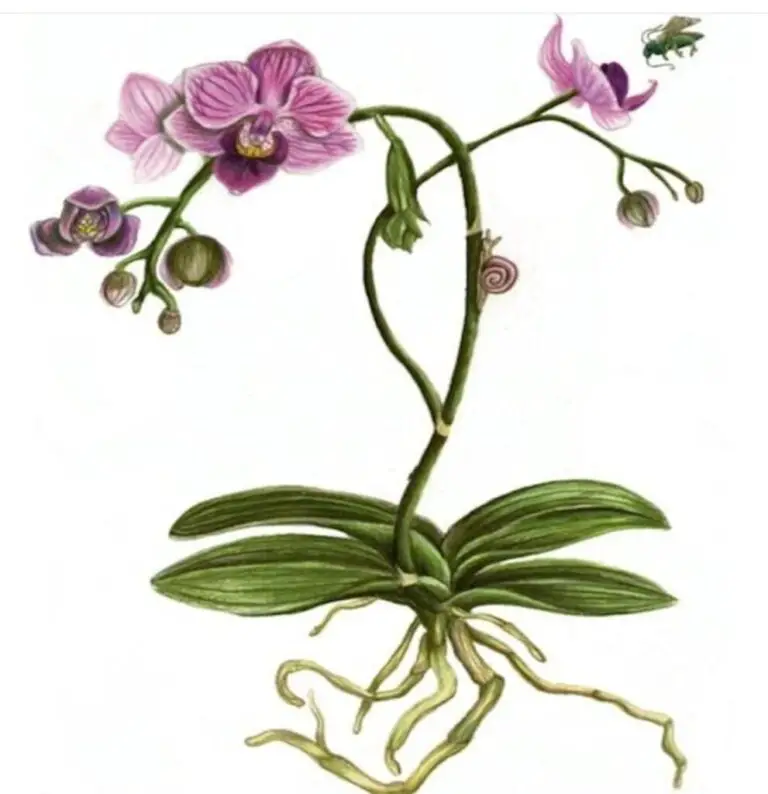
White moth orchids, also known as Phalaenopsis orchids, are a popular and sought-after plant among orchid enthusiasts and casual plant lovers alike. This orchid variety is known for its beautiful, delicate white flowers that resemble the wings of a moth, hence its name. While the white moth orchid is the most common variety, there are many other types that come in different shades of white, as well as pink, purple, and even yellow.
One popular white moth orchid variety is the Phalaenopsis “Doris,” which has large, white flowers with a yellow center and a slight pink tint on the outer edges of the petals. Another variety is the Phalaenopsis “Sogo Yukidian,” which has a pure white flower with a slightly ruffled edge, giving it a soft, feminine appearance.
White moth orchids are relatively easy to care for, making them an ideal plant for both novice and experienced gardeners. They require moderate light, regular watering, and a well-draining potting mix to thrive. With proper care, these beautiful flowers can bloom for several months, adding a touch of elegance and beauty to any space. So whether you’re a seasoned orchid collector or just starting your plant journey, the white moth orchid is definitely a variety worth considering.
White moth orchid potting mix
If you’re an avid gardener or just starting to dabble in the world of indoor plants, you may have come across the stunning White Moth Orchid. This delicate and elegant plant is a popular choice for many, with its unique and intricate blooms that can last for months on end. However, to ensure that your White Moth Orchid thrives, it’s essential to use the right potting mix.
The White Moth Orchid requires a well-draining and aerated potting mix to allow for proper root development and air circulation. A quality potting mix for this plant should consist of a blend of materials such as fir bark, sphagnum moss, perlite, and charcoal. This mix provides the perfect balance of moisture retention and drainage, ensuring that your orchid’s roots stay healthy and free from rot.
Additionally, the potting mix for the White Moth Orchid should be free of any additives or fertilizers, as these can harm the plant’s delicate roots. Instead, it’s best to fertilise the orchid with a balanced orchid fertiliser once a month during its active growing season.
In summary, the right potting mix is crucial for the success of your White Moth Orchid. With a well-draining and aerated mix, your orchid will have the best chance to thrive and produce those stunning blooms that will surely attract the attention of all who see them.
White moth orchid not blooming
White moth orchids are one of the most popular indoor plants, cherished for their delicate white blooms and elegant foliage. However, if you own a white moth orchid and notice that it’s not blooming, you may be left feeling disappointed and confused. Fortunately, there are several reasons why your white moth orchid may not be blooming, and many of these issues can be easily resolved with proper care and attention.
One common reason why a white moth orchid may not bloom is due to insufficient light. Orchids require bright, indirect sunlight to bloom properly, so if your orchid is not getting enough light, it may not produce flowers. Another reason for the lack of blooming could be improper watering or fertilizing. Orchids need to be watered regularly, but they should never be left standing in water. Over-fertilizing can also harm your orchid and prevent it from blooming.
In addition to light, watering, and fertilisation issues, your white moth orchid may not be blooming due to environmental factors. Changes in temperature or humidity can also affect the plant’s ability to produce flowers. It’s important to provide your orchid with a stable environment that is conducive to blooming.
, if you’re experiencing trouble getting your white moth orchid to bloom, there are several factors to consider. By addressing issues with light, water, fertilizer, and environmental conditions, you can help your orchid thrive and produce beautiful blooms. With proper care and attention, your white moth orchid can become a stunning centrepiece in your home, delighting you and your guests with its graceful beauty.
light requirements for moth orchids
Bright, indirect light: Moth orchids require bright, indirect light to grow well. Direct sunlight can burn their leaves, so it’s important to provide shade or filter the light through a sheer curtain or blinds. Place the orchid near a window that receives bright, indirect light for most of the day.
Avoid direct sunlight: As mentioned, direct sunlight can be harmful to moth orchids. If you live in an area with strong sunlight, consider placing your orchid near a north-facing window or a window that is shaded by trees or buildings.
Monitor light levels: Orchids need consistent light levels to grow and bloom. If your orchid is not receiving enough light, it may produce fewer flowers or not bloom at all. If it’s receiving too much light, it may develop brown spots or yellow leaves
Supplemental lighting: If you don’t have a suitable window for your orchid, you can supplement its light with artificial light. LED grow lights are a good option for orchids, as they provide the right spectrum of light for plant growth and are energy-efficient
Consider the season: The amount and intensity of sunlight varies throughout the year, so it’s important to adjust your orchid’s lighting accordingly. In the summer, when the sun is strongest, you may need to provide more shade or move your orchid further away from the window. In the winter, when the sun is weaker, you may need to move your orchid closer to the window or supplement its light with artificial light.
Use a light meter. A light metre is a tool that measures the intensity of light in a specific area. You can use a light metre to determine if your orchid is receiving the right amount of light. Aim for a light level of 1500–2500 foot-candles for moth orchids
Rotate your orchid: Moth orchids tend to grow towards the light source, so it’s a good idea to rotate your orchid once a week to ensure all parts of the plant receive equal light.
Watch for signs of light stress: If your orchid is not receiving enough light, it may develop elongated, thin leaves and a lack of blooms. If it’s receiving too much light, it may develop brown spots on its leaves. Adjust the lighting as needed to prevent light stress.
Use reflective surfaces: You can increase the amount of light your orchid receives by placing it near a white or reflective surface, such as a wall or piece of white paper.
watering requirements for moth orchids
Moth orchids, also known as Phalaenopsis, are a popular type of orchid that is native to Southeast Asia. Proper watering is crucial to the health and longevity of these plants. Here is some good information on watering requirements for moth orchids:
Water thoroughly, but do not overwater: Moth orchids prefer to be kept consistently moist, but not waterlogged. Water thoroughly, allowing excess water to drain away, and wait until the top inch of the potting mix feels dry before watering again.
Use tepid water: Cold water can shock the roots of moth orchids, so use tepid water that is around room temperature.
Water less in cooler months: In cooler months, when the orchid is not actively growing, it will require less water. Reduce watering frequency to prevent overwatering.
Use a well-draining potting mix: Moth orchids prefer a well-draining mix that allows water to flow freely through the pot. Avoid heavy soils that retain moisture.
Water from the bottom: You can also water your moth orchid from the bottom by placing the pot in a saucer of water and allowing it to soak up the water from the bottom. This can help prevent water from sitting on the leaves and causing damage
Avoid getting water on the leaves: Water left on the leaves can cause spots and rot. If you do get water on the leaves, gently wipe them dry with a soft cloth.
Watch for signs of overwatering. Overwatering can cause root rot, which can be fatal for your orchid. Watch for signs such as yellowing leaves, wilting, or a foul smell, and adjust your watering accordingly
fertilizer requirements for moth orchids
Moth orchids, also known as Phalaenopsis orchids, are popular houseplants that are known for their beautiful flowers and easy care. However, like all plants, they require nutrients to thrive and produce healthy foliage and blooms. Fertilizing moth orchids is important to ensure their continued growth and vitality.Here is some good information on fertiliser requirements for moth orchids:
Type of Fertilizer: Moth orchids require a balanced fertiliser that contains equal amounts of nitrogen (N), phosphorus (P), and potassium (K), such as a 20-20-20 or 15-15-15 fertilizer. They also require trace elements like iron, manganese, and zinc.
Frequency of Fertilization: Moth orchids should be fertilised every two weeks during the growing season, which is typically from spring to fall. During the winter months, when the plant is dormant, fertilisation can be reduced to once a month.
Dilution: Fertilizers should be diluted to half the recommended strength before being applied to the orchid. This is because moth orchids are sensitive to high levels of salts and nutrients, which can burn their roots and cause damage.
Application Method: Fertilizer can be applied to moth orchids in several ways. The most common method is to mix the diluted fertiliser with water and apply it to the plant’s roots. This can be done by either pouring the solution directly into the potting mix or by soaking the pot in the solution for about 10–15 minutes. Fertilizer can also be applied as a foliar spray, but this method should be used sparingly
Timing of Fertilization: Fertilizer should be applied to moth orchids after they have been watered, as applying fertiliser to dry roots can also cause root burn. It’s also best to avoid fertilising moth orchids when the temperature is extremely hot or cold, as this can cause damage to the plant.
Alternatives to Chemical Fertilizers: If you prefer to avoid chemical fertilizers, there are organic alternatives available, such as fish emulsion, bone meal, and compost tea. These natural fertilisers provide the necessary nutrients for moth orchids but may need to be applied more frequently than chemical fertilizers.
Overall, providing the right kind of fertiliser to your moth orchids and following the appropriate fertilisation schedule are crucial to maintaining the plant’s health and ensuring that it continues to produce beautiful blooms.
humidity and temperature requirements for moth orchids
Moth orchids, or Phalaenopsis orchids, are a popular choice among orchid enthusiasts due to their beautiful flowers and ease of care. Proper humidity and temperature are important factors in growing healthy moth orchids. Here’s what you need to know:
Humidity Requirements: Moth orchids are native to the humid rainforests of Southeast Asia, so they prefer a humid environment. In general, they require a relative humidity level of around 50% to 70%. You can increase humidity levels by using a humidifier, placing a tray of water near the orchid, or grouping orchids together to create a microclimate. It’s important to avoid misting the orchids, as this can lead to fungal and bacterial infections.
Temperature Requirements: Moth orchids are tropical plants and require warm temperatures to thrive. They prefer daytime temperatures between 70°F and 80°F (21°C and 27°C) and nighttime temperatures between 60°F and 65°F (16°C and 18°C). Avoid exposing the orchids to temperatures below 50°F (10°C), as this can cause damage to the plant.
It’s important to note that temperature fluctuations can stress the orchids and impact their growth and blooming. Try to maintain consistent temperatures by placing the orchids in a spot with stable temperatures, such as a room with central heating or air conditioning.
In summary, to grow healthy moth orchids, you need to provide them with a humid environment with relative humidity levels of 50% to 70% and warm temperatures between 70°F and 80°F (21°C and 27°C) during the day and between 60°F and 65°F (16°C and 18°C) at night. By meeting these requirements, you can help your moth orchids thrive and produce beautiful blooms.
White moth orchid turning yellow
A white moth orchid turning yellow can be a sign of several issues. Here are some possible reasons for this problem and some solutions:
Overwatering: Overwatering is one of the most common reasons for the yellowing of orchid leaves. If the orchid is sitting in water for too long, it can cause root rot, which will eventually lead to yellow leaves. Make sure you are not watering the orchid too frequently, and allow the top layer of soil to dry out before watering again.
Underwatering: Orchids need consistent watering to thrive. If you are not watering the orchid enough, the leaves can turn yellow and wilt. Make sure you are watering the orchid regularly and checking the soil moisture level before watering.
Lack of nutrients: If your orchid is not getting enough nutrients, it can cause the leaves to turn yellow. You can fertilise the orchid with a balanced orchid fertiliser to provide the necessary nutrients.
Exposure to direct sunlight: orchids need bright but indirect sunlight. If the orchid is exposed to direct sunlight, it can cause the leaves to turn yellow and burn. Move the orchid to a location with bright but indirect sunlight.
Orchids are sensitive to temperature variations, which can cause temperature stress. The leaves may turn yellow due to extremes in temperature, whether hot or cold. A steady temperature range between 60 and 80 °F should be present where the orchid is placed.
Pests or diseases: Yellowing leaves can also be a sign of pests or diseases such as spider mites, mealybugs, or fungal infections. Inspect the orchids regularly for any signs of pests or diseases, and treat them promptly if you notice any.
By identifying and addressing the underlying issue causing the yellowing of your white moth orchid, you can help ensure it stays healthy and vibrant.
White moth orchid pests and diseases (cure)
The white moth orchid, also known as the Phalaenopsis orchid, is a popular houseplant that is easy to care for and produces beautiful blooms. However, like all plants, it is susceptible to a range of pests and diseases that can damage or even kill the plant if left untreated. Here is some information on common white moth orchid pests and diseases and how to identify and treat them:
Scale Insects: Scale insects are small, oval-shaped insects that attach themselves to the leaves and stems of the orchid. They can be identified by their hard, waxy shells and their ability to blend in with the plant’s surface. Scale insects feed on the sap of the plant, causing wilting, yellowing, and stunted growth. To treat scale insects, you can use a cotton swab dipped in rubbing alcohol to remove them manually, or use an insecticidal soap spray to kill them
Spider Mites: Spider mites are tiny, red or brown pests that spin webs on the leaves of the orchid. They feed on the plant’s sap, causing yellowing and stunted growth. Spider mites thrive in dry conditions, so keeping the humidity level high can help prevent an infestation. You can also treat spider mites with an insecticidal soap spray or by using a miticide.
Mealybugs: Mealybugs are small, white, cottony pests that can be found on the leaves, stems, and flowers of the orchid. They feed on the sap of the plant, causing wilting and stunted growth. Mealybugs can be removed manually using a cotton swab dipped in rubbing alcohol, or you can use an insecticidal soap spray.
Fungal Diseases: White moth orchids are susceptible to a range of fungal diseases, including root rot, leaf spot, and powdery mildew. These diseases can be caused by overwatering, poor air circulation, or high humidity levels. To prevent fungal diseases, avoid getting water on the leaves or flowers of the orchid and make sure the soil is well-draining. If you notice any signs of fungal disease, such as yellowing or spotting on the leaves, you can treat it with a fungicide.
In conclusion, white moth orchids can be prone to a range of pests and diseases, but with proper care and attention, these issues can be prevented or treated. Regularly inspecting your plant for signs of pests or disease, maintaining good hygiene practices, and providing the right growing conditions can help keep your white moth orchid healthy and thriving.
FAQ
What is the best way to grow moth orchids?
Moth orchids, or Phalaenopsis, are popular houseplants known for their delicate flowers and ease of care. To grow moth orchids successfully, it’s best to provide them with bright but indirect light, keep the soil slightly moist, and fertilize regularly with a balanced fertilizer. It’s also important to avoid overwatering, provide proper drainage, and maintain a warm and humid environment. Pruning spent flowers and repotting every one to two years can also help keep your moth orchid healthy and encourage continued blooming.
What are tips for orchid beginners?
Tips for orchid beginners:
Choose an orchid species that is easy to care for, such as Phalaenopsis or Dendrobium.
Make sure your orchid is potted in a well-draining medium, such as bark or sphagnum moss.
Provide your orchid with the right amount of light, water, and temperature according to its species.
Don’t overwater your orchid. Let the medium dry out a bit before watering again.
Fertilize your orchid regularly with a balanced fertilizer designed for orchids.
What is the secret to growing orchids?
The secret to growing orchids: The secret to growing orchids is to understand their specific needs and mimic their natural growing conditions as closely as possible. This includes providing the right amount of light, water, temperature, humidity, and nutrients. Each orchid species has its own specific requirements, so it’s important to research and understand the needs of your particular orchid.
How do I look after my moth orchid?
Place your moth orchid in a bright, but indirect light location.
Water your moth orchid once a week or when the potting medium feels almost dry to the touch.
Provide your orchid with a humidity tray or mist it regularly to maintain the required humidity level.
Fertilize your moth orchid once a month with a balanced orchid fertilizer.
Keep your orchid away from cold drafts and extreme temperatures.
https://en.m.wikipedia.org/wiki/Phalaenopsis
