Orchid Root Health : Best 15 Essential Tips for Gardeners
Orchids are elegant and exotic flowering plants that have captured the hearts of gardeners around the world. Known for their mesmerising beauty and delicate blooms, these plants require special care, particularly when it comes to their root health. The health of an orchid’s roots plays a crucial role in its overall well-being and blooming success. In this blog post, we will explore best 15 essential tips that every gardener should know to ensure the longevity and vitality of their orchid’s root system.
Table of Contents 👈 Tap Here
Choose the Right Potting Medium:
Choosing the right potting medium is crucial for the health and well-being of your orchids. Orchids have unique root systems that require a well-draining and airy environment to thrive. The most common and recommended potting mix for orchids is a combination of bark, sphagnum moss, and perlite.Orchid Root Health : Best 15 Essential Tips for Gardeners
Bark: Orchid bark is an essential component of the potting mix. It comes in different sizes, such as fine, medium, or large. The bark provides stability to the plant and allows for good aeration around the roots. The size of the bark pieces will depend on the type of orchid you are growing, with finer bark generally preferred for smaller orchid species.
Sphagnum Moss: Sphagnum moss is an excellent addition to the potting mix, as it retains moisture and provides a humid environment for the roots. It also helps maintain proper moisture levels between watering sessions. However, it’s essential not to overuse sphagnum moss, as it can retain too much moisture, leading to root rot.
Perlite: Perlite is a lightweight, porous material that aids in drainage and aeration. It prevents the potting mix from becoming compacted, allowing air to reach the roots. The addition of perlite ensures that water flows freely through the potting medium, preventing waterlogging and root suffocation
It’s important to note that different types of orchids may have specific preferences when it comes to potting medium. Some orchids, like Phalaenopsis (moth orchids), prefer finer bark, while others, like Cattleyas, may thrive better in a coarser mix. Researching the specific requirements of your orchid species will help you choose the most suitable potting medium.
When repotting orchids, gently remove the old potting mix, taking care not to damage the delicate roots. Trim any unhealthy or rotted roots before placing the plant in a slightly larger pot with fresh potting mix. Repotting should be done when the plant has outgrown its current container or when the potting medium has broken down and no longer provides adequate drainage.
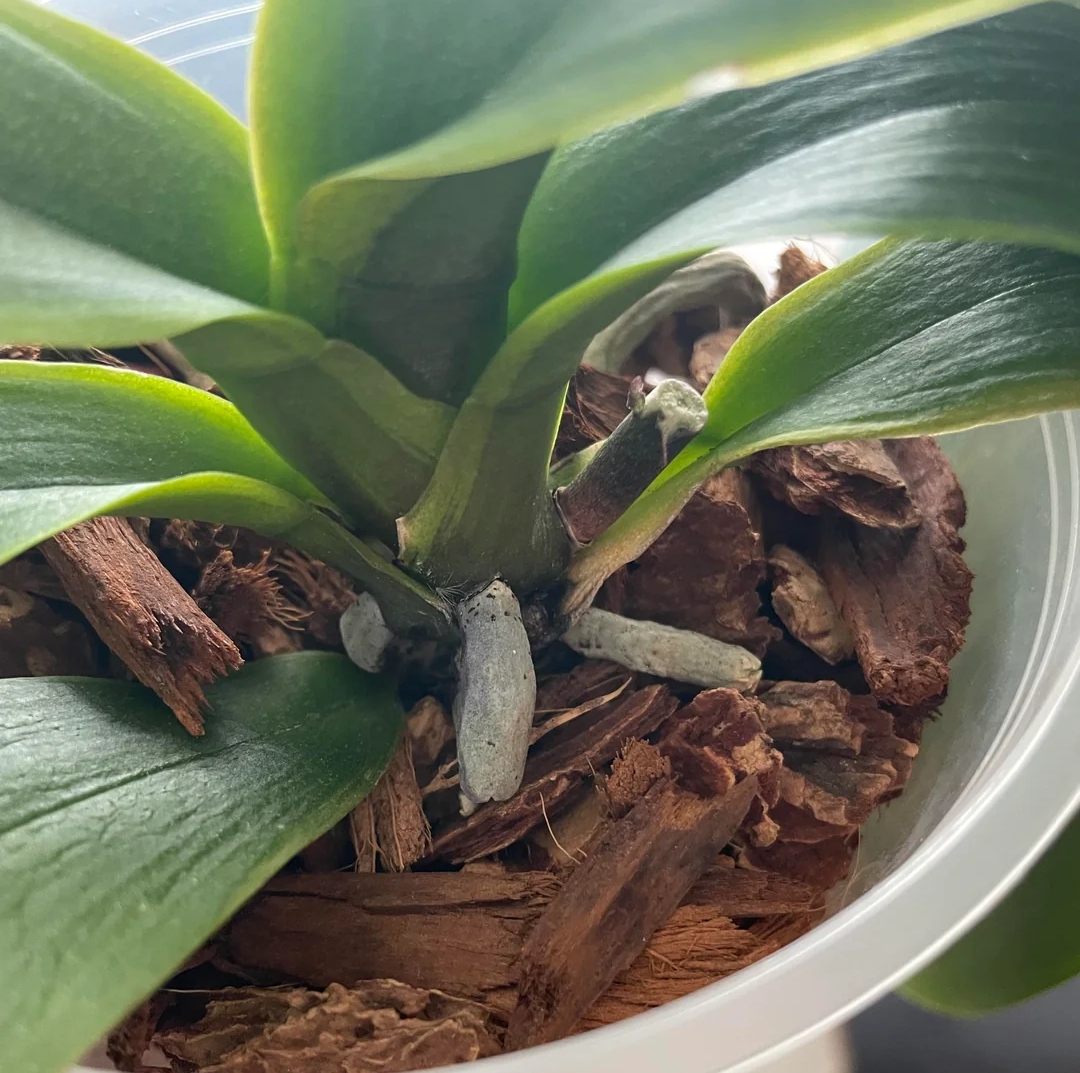
Tip: if your orchids has lost all its roots clean and put in clay balls after few months it will get roots
Optimal Watering Practises:
Optimal watering practises are essential for maintaining the health and vitality of your orchid’s root system. Overwatering is a frequent error that can result in root rot and other problems.Here are some key tips for watering your orchids effectively
Observe the Potting Mix: Before watering your orchid, check the potting mix’s moisture level. Stick your finger about an inch into the growing medium. If it feels dry to the touch, it’s time to hydrate. If it still feels damp, hold off on watering for a few more days.
Watering Frequency: The frequency of watering depends on various factors, such as the type of orchid, the pot size, and the environmental conditions. Orchids generally prefer to dry out slightly between waterings. For most orchids, watering once a week is a good starting point. However, it’s essential to adjust the watering schedule based on your specific orchid’s needs and the surrounding humidity levels.
Watering Technique: When watering your orchid, avoid drenching the foliage or the crown of the plant. Water should be directed at the base of the plant, aiming for the potting mix. Aiming the water directly at the roots helps prevent the risk of fungal or bacterial infections.
Allow for Proper Drainage: Ensure that the pot has drainage holes to allow excess water to escape. Waterlogged roots can quickly lead to root rot, so it’s crucial to provide good drainage. After watering, allow any excess water to drain completely.
Consider Soaking or Dunking: Some orchid varieties, such as Phalaenopsis, can benefit from a thorough soaking or dunking. To do this, remove the plant from its pot and submerge the entire potting mix and roots in water for a few minutes. This allows the roots to absorb water fully, promoting better hydration.
Observe Your Orchids: Pay attention to how your orchids respond to watering. Wilting or overly soft roots may indicate overwatering, while shrivelled or overly dry roots may indicate underwatering. Adjust your watering routine accordingly to meet the specific needs of each orchid.
Morning Watering: Watering your orchids in the morning allows any excess moisture to evaporate during the day, reducing the risk of fungal or bacterial growth. It also ensures that the orchids have enough water to sustain them throughout the day.
Remember that the watering needs of orchids can vary based on their species, growing environment, and stage of growth. Observing your plants closely and making adjustments to your watering routine as needed will help keep your orchid’s root system healthy and thriving, leading to beautiful blooms and robust growth
Monitor Humidity Levels:
Monitoring humidity levels is crucial for the well-being of your orchids, as these exotic plants thrive in high-humidity environments. Adequate humidity promotes healthy root growth, enhances blooming, and helps prevent various issues such as root desiccation and stress. Here are some tips to effectively monitor and maintain proper humidity levels for your orchids:
Invest in a Hygrometer: A hygrometer is a valuable tool that measures the humidity levels in your orchid’s growing area. Place the hygrometer near the plants to get an accurate reading of the humidity. Aim for a relative humidity level of around 50% to 70% for most orchid species, but some varieties may have specific requirements.
Create a Humidity Tray: Placing a humidity tray filled with water and pebbles beneath your orchids can significantly boost humidity levels around the plants. As the water evaporates, it creates a humid microenvironment, providing the orchids with the moisture they need.
Use a Humidifier: If your orchids are grown indoors or in a dry climate, consider using a humidifier to maintain the desired humidity levels consistently. A humidifier will release moisture into the air, creating a more suitable environment for your orchids.
Group Orchids Together: Orchids benefit from being grouped together as they naturally increase humidity levels by collectively releasing moisture through transpiration. Just ensure that there is sufficient space between plants for adequate air circulation.
Misting: Regularly misting the aerial roots and foliage of your orchids can provide a quick boost of humidity. However, avoid misting too frequently, as excess moisture on the leaves can lead to fungal and bacterial problems.
Monitor Environmental Conditions: Be aware of external factors that can affect humidity, such as heating and cooling systems, open windows, and the presence of fans. Adjust your humidity-regulating techniques accordingly to maintain a stable and optimal environment for your orchids.
Choose the Right Growing Area: When selecting a location for your orchids, consider areas with naturally higher humidity levels, such as bathrooms or kitchens. These spaces can provide a head start in maintaining the right moisture content around your plants.
By consistently monitoring and managing humidity levels, you can create an environment that fosters robust root health and overall well-being for your orchids. Adequate humidity, combined with proper watering and suitable potting mediums, will contribute to beautiful blooms and healthy growth, rewarding you with the captivating allure of these extraordinary flowering plants.
Provide Adequate Air Circulation:
Providing adequate air circulation is crucial for the overall health and well-being of your orchids. Good air circulation helps prevent the buildup of stagnant air, which can lead to various issues like fungal and bacterial infections. Here are some tips to ensure your orchids receive proper air circulation:
Spacing: Avoid crowding your orchids together. Provide sufficient space between each plant to allow air to flow freely around them. Proper spacing helps reduce the chances of disease transmission and allows each orchid to receive ample fresh air.
Fans: Consider using fans in the growing area to promote air movement. Gentle airflow around the orchids mimics natural conditions and helps prevent moisture from accumulating on leaves and in crevices, reducing the risk of rot and disease.
Open Windows and Doors: If you’re growing orchids indoors, open windows and doors periodically to let in fresh air. This practise not only encourages air circulation but also helps maintain a healthy indoor environment.
Avoid Draughts: While you want air circulation, be mindful of direct draughts that can be harmful to orchids. Avoid placing them in the path of strong winds or vents, as this can cause stress for the plants.
Oscillating Fans: If you have a large growing area or a greenhouse, consider using oscillating fans to ensure even air distribution. These fans move back and forth, providing a gentle breeze that reaches all parts of your orchid collection.
Outdoors in Good Weather: When the weather permits, consider moving your orchids outdoors. They will benefit from natural air movement, increased light, and exposure to natural elements.
Greenhouse Ventilation: If you have a greenhouse, ensure it has proper ventilation systems in place. Ventilation will help regulate temperature and humidity while promoting good air circulation for your orchids.
Regular Inspection: Regularly inspect your orchids for signs of poor air circulation, such as mould, mildew, or stagnant areas. Address any issues promptly to maintain a healthy growing environment.
Regularly Inspect for Pests and Diseases:
Regularly inspecting your orchids for pests and diseases is crucial to maintaining their health and preventing potential damage. Pests and diseases can quickly spread and weaken your plants if left untreated. Here are some important tips for conducting regular inspections and addressing any issues that may arise:
Visual Inspection: Routinely examine your orchids’ leaves, stems, flowers, and roots for any signs of pests or diseases. Look for unusual discoloration, wilting, spots, webbing, or visible insects.
Underside Inspection: Don’t forget to check the undersides of leaves, as pests like spider mites and aphids often hide in these protected areas.
Quarantine New Additions: When introducing new orchids to your collection, isolate them from your existing plants for a few weeks. This quarantine period allows you to observe the new plants for any signs of pests or diseases before they potentially spread to your other orchids.
Integrated Pest Management (IPM): Implement an IPM approach, combining preventive measures, cultural practises, and, if necessary, targeted and eco-friendly treatments for pest and disease control. Avoid relying solely on chemical pesticides unless absolutely necessary.
Natural Predators: Encourage the presence of beneficial insects, such as ladybirds or predatory mites, which can help keep pest populations in check.
Early Intervention: If you notice any signs of pests or diseases, take action immediately. Prompt intervention can prevent the problem from escalating and causing severe damage to your orchids.
Proper Sanitation: Practise good hygiene and sanitation in your orchid-growing area. Regularly clean pots, tools, and surfaces to minimise the risk of spreading pests and diseases.
Remove Affected Parts: If you identify any diseased or infested areas on your orchids, carefully remove and dispose of them to prevent further spread.
Seek Expert Advice: If you are uncertain about the nature of a pest or disease problem, consult with local orchid experts or horticulturists for guidance and appropriate solutions.
Keep Records: Maintain a record of your observations and treatments. This documentation can help you track the health of your orchids over time and make informed decisions for future care.
Repotting with Care
Repotting orchids with care is essential to ensuring the health and well-being of these delicate plants. Orchids may need repotting every 1-2 years, depending on their growth and the condition of their potting medium. Here are some important tips for repotting your orchids with care:
Choose the Right Time: The best time to repot your orchid is after it has finished flowering or during its dormant period. Avoid repotting while the plant is in bloom, as it may cause stress and disrupt the flowering process.
Select the Proper Pot: Choose a new pot that is only slightly larger than the current one. Orchids prefer to be somewhat root-bound, and a pot that is too large can lead to overwatering and root rot.
Gather Necessary Supplies: Prepare all the tools and materials you’ll need for repotting, including new potting mix, scissors or pruning shears, and a clean workspace.
Soak the Potting Mix: Before repotting, soak the new potting mix in water for a few hours to ensure it is thoroughly moistened. Avoid using regular garden soil, as it does not provide the necessary aeration for orchid roots.
Gently Remove the Orchid: Carefully remove the orchid from its current pot by gently loosening the roots with your fingers or a clean tool. Be mindful not to damage the delicate roots during this process.
Inspect and Trim the roots. Examine the roots for any signs of damage, rot, or overgrowth. Trim away any dead or unhealthy roots using clean and sharp scissors. Avoid removing more than one-third of the root mass.
Repot with New Mix: Place the trimmed orchid into the new pot, ensuring the roots are spread out evenly. Add the moistened potting mix around the roots, gently pressing it to secure the plant.
Avoid Overpacking: Refrain from packing the potting mix too tightly around the roots, as it can limit airflow and lead to waterlogged conditions.
Stake or Support: If your orchid requires support, provide stakes or ties to help keep it stable during the recovery period.
Water Sparingly: After repotting, water the orchid lightly to settle the potting mix. Avoid heavy watering immediately after repotting to prevent waterlogging.
Observe and Adjust: Monitor your orchid closely after repotting, ensuring it adapts well to its new environment. Adjust your watering and care routine as needed based on how the plant responds.
List of orchid root problems and solutions
Orchids can encounter various root-related problems due to factors like overwatering, poor drainage, pests, and disease. Here is a list of common orchid root problems and their corresponding solutions:
Root rot
Problem: Root rot occurs when orchid roots are continuously exposed to excess moisture, leading to fungal infections and decay.
Solution: Improve drainage by using a well-draining potting mix and ensuring the pot has drainage holes. Adjust your watering practises to allow the potting mix to dry slightly between waterings. Trim the affected roots and apply a fungicide if necessary.
Overwatering:
Problem: Overwatering suffocates orchid roots, leading to root rot and other issues.
Solution: Water orchids only when the potting mix is slightly dry. Use the “finger test” to check for moisture levels in the growing medium. Ensure proper drainage and avoid letting water sit in the saucer beneath the pot.
Underwatering:
Problem: Insufficient watering causes dehydration and stress to orchid roots.
Solution: Water orchids when the potting mix is dry to the touch. Adjust the watering schedule based on environmental conditions and the specific needs of your orchid species.
Root Desiccation:
Problem: Low humidity levels or prolonged dryness can lead to root desiccation.
Solution: Increase humidity around your orchids by using humidity trays, misting the aerial roots, or using a humidifier. Grouping orchids together can also create a more humid microenvironment.
Pests:
Problem: Pests like spider mites, aphids, mealybugs, and scale insects can attack orchid roots.
Solution: Regularly inspect your orchids for signs of pests and take immediate action if you detect any infestations. Use insecticidal soap or horticultural oils to treat affected plants.
Bacterial and Fungal Infections:
Problem: Bacteria and fungi can infect orchid roots, causing discoloration, softness, and decay.
Solution: Maintain good air circulation to prevent excess moisture around the roots. Avoid overwatering, and water in the morning to allow excess moisture to evaporate. Remove and destroy affected roots, and apply appropriate fungicides if necessary.
Root Bound:
Problem: Overgrown and overcrowded roots can become root-bound, leading to poor growth and limited flowering.
Solution: Repot orchids every 1-2 years to provide fresh potting mix and give the roots room to grow. Gently trim or untangle root masses during repotting, and use a pot that is slightly larger than the previous one.
Lack of Aeration:
Problem: Compacted or dense potting mix can limit airflow to the roots.
Solution: Use a well-draining potting mix with components like bark, sphagnum moss, and perlite to promote proper aeration. Avoid using garden soil, which can become too compacted.
FAQ
How often should I water my orchid’s roots?
Orchids generally prefer a well-draining medium, so water them when the top inch of the potting mix feels dry.
What is the best way to check the health of my orchid’s roots?
Gently remove the orchid from its pot and inspect the roots for firmness, a green or silvery colour, and the absence of mushy or discoloured sections.
Should I repot my orchid if I notice root issues?
Yes, if you observe root problems like root rot or overcrowding, repotting is essential to maintaining your orchid’s health.
How can I promote healthy root growth in my orchids?
Provide proper aeration, use a well-draining orchid mix, maintain appropriate humidity levels, and avoid overwatering to encourage robust root growth.
Hi, I’m Steve, an orchid grower with 30+ years of hands-on experience caring for indoor and outdoor plants. I share practical, tested tips and beginner-friendly guides to help plant enthusiasts nurture healthy, thriving plants.