Orchid Pseudobulb Rot: 10 Identification and Emergency Treatment Steps
Table of Contents 👈 Tap Here
Orchid pseudobulb rot is one of the most frustrating problems growers face, especially when a healthy plant suddenly begins to decline. Pseudobulbs store water and nutrients, so when they rot, the entire orchid is at risk. Understanding how to identify early signs and act quickly can mean the difference between saving your plant and losing it completely. This guide walks you through practical, proven steps to diagnose and treat the problem effectively.
1. What Is Orchid Pseudobulb Rot?
Pseudobulb rot is a condition where the thickened storage organs of certain orchids become infected, usually by fungi or bacteria, leading to tissue breakdown. These structures are essential for storing water and nutrients, so once rot sets in, the plant’s survival becomes uncertain. The infection often starts internally and spreads outward, making early detection difficult but extremely important for successful recovery.
2. Main Causes of Pseudobulb Rot
The most common cause of pseudobulb rot is overwatering, especially when combined with poor drainage and stagnant air. Excess moisture creates the perfect environment for pathogens to thrive. Other causes include contaminated potting media, unsterilized tools, and prolonged exposure to high humidity without ventilation. Understanding these triggers helps you prevent recurrence and maintain a healthier growing environment for your orchid.
3. Early Signs of Orchid Pseudobulb Rot
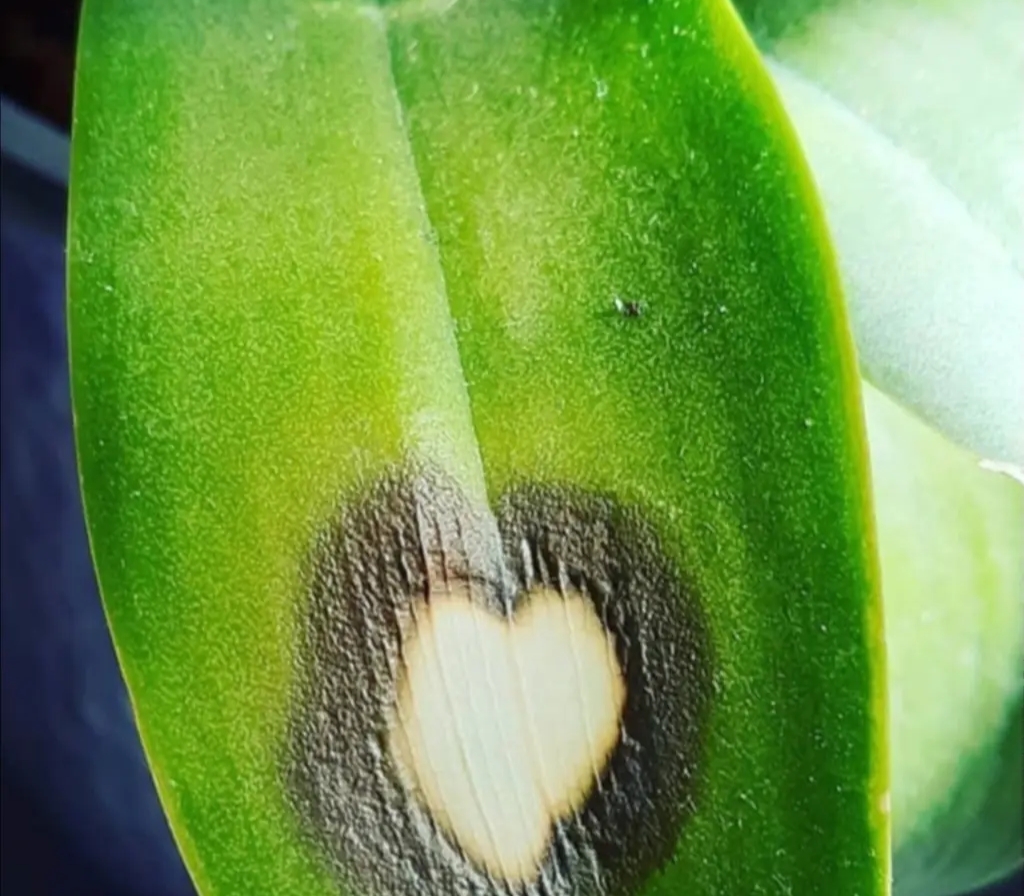
Early detection is crucial, and the first signs are often subtle. You may notice pseudobulbs becoming slightly soft or discolored, with yellow or brown patches forming on the surface. Sometimes the bulb may wrinkle despite adequate watering, indicating internal damage. A mild unpleasant odor can also develop, signaling the beginning of decay before it spreads to other parts of the plant.
4. Advanced Symptoms to Watch
As the condition worsens, symptoms become more obvious and severe. The pseudobulbs may turn dark brown or black and feel mushy to the touch. Leaves may start dropping, and the plant’s overall structure weakens. In advanced cases, the rot spreads to the roots and rhizome, making recovery much harder. At this stage, immediate intervention is critical to salvage any healthy portions.
5. Step 1: Isolate the Infected Orchid
The first emergency step is to isolate the affected orchid from your other plants. Pseudobulb rot can spread quickly, especially in humid conditions, and nearby orchids may become infected. Keeping the plant separate minimizes risk and allows you to focus on treatment without worrying about contamination. This simple step can protect your entire collection from potential damage.
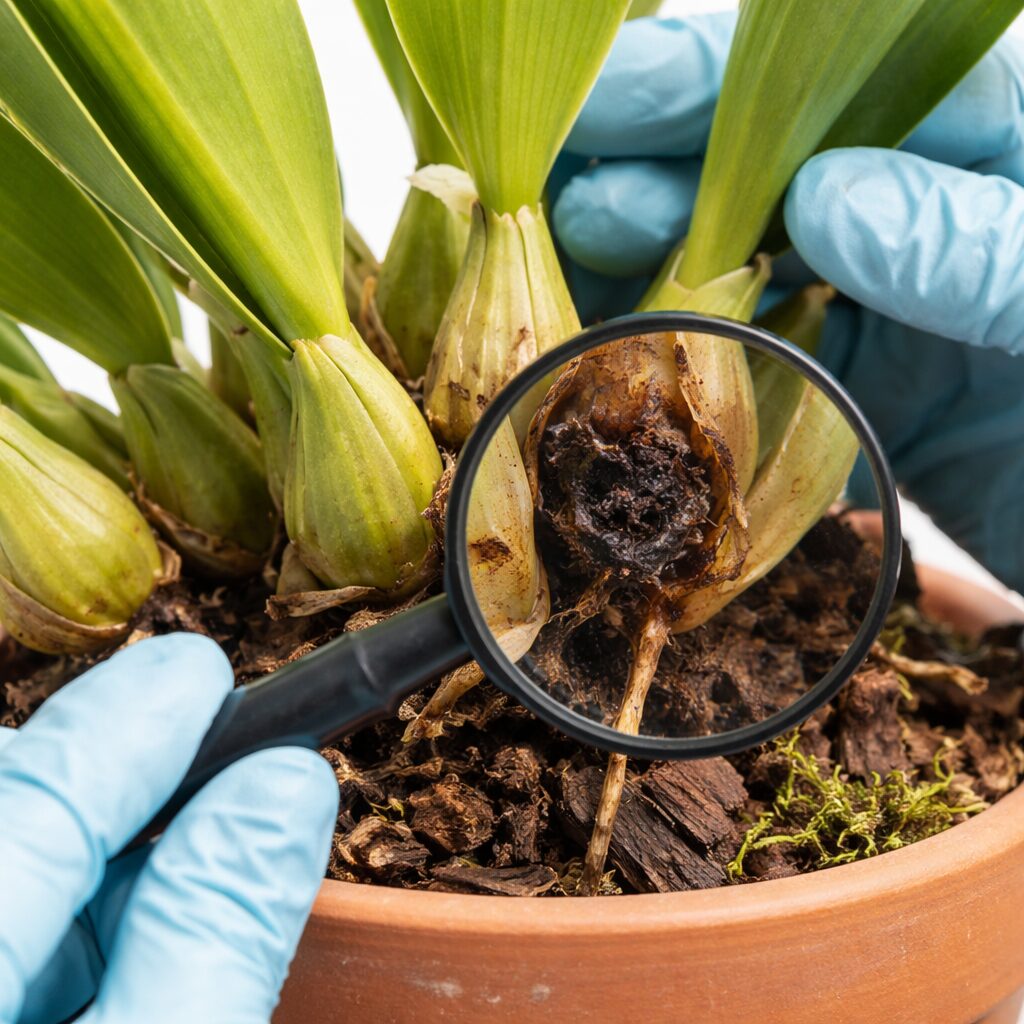
6. Step 2: Inspect the Entire Plant Thoroughly
Carefully examine the entire orchid, including pseudobulbs, leaves, roots, and rhizome. Look for any signs of discoloration, softness, or unusual texture. Identifying all infected areas ensures that you don’t leave behind hidden rot, which can cause the problem to return. A thorough inspection gives you a clear understanding of how severe the infection is and how aggressively you need to act.
7. Step 3: Remove Affected Pseudobulbs
Using a clean, sharp cutting tool, remove all infected pseudobulbs and any surrounding damaged tissue. Make clean cuts well into healthy areas to ensure that no rot remains. This step may feel drastic, but it is necessary to stop the spread of infection. Saving the healthy parts of the plant is more important than trying to preserve severely damaged sections.
8. Step 4: Sterilize Cutting Tools Properly
After each cut, sterilize your tools using alcohol, flame, or a disinfectant solution. This prevents transferring pathogens from one part of the plant to another. Many growers overlook this step, but it is essential for effective treatment. Proper tool hygiene ensures that your efforts to remove rot do not accidentally worsen the problem or introduce new infections.
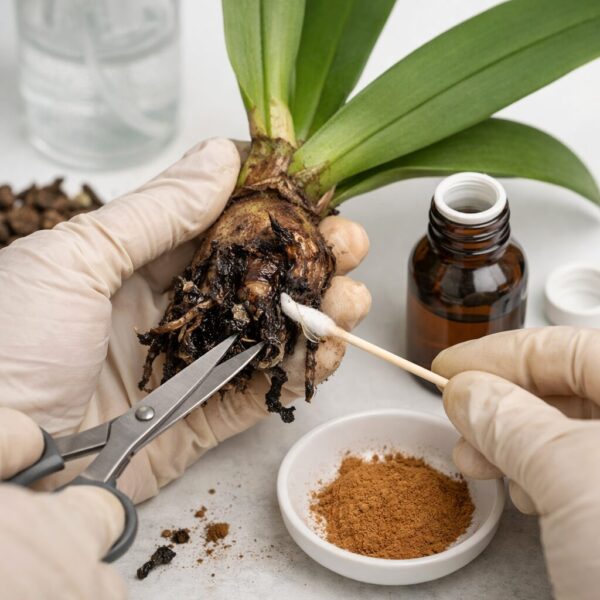
9. Step 5: Apply Fungicide or Natural Treatment
Once the infected parts are removed, treat the cut areas with a fungicide or a natural option like cinnamon powder or diluted hydrogen peroxide. These treatments help kill remaining pathogens and protect the plant from further infection. Applying a protective layer gives the plant a better chance to heal and prevents moisture from encouraging additional rot.
10. Step 6: Let the Plant Dry Before Repotting
Allow the orchid to dry out completely for several hours or even a full day before repotting. This drying period helps seal the cuts and reduces the risk of reinfection. Placing a wet plant directly into new media can trap moisture and undo your efforts. Patience during this stage plays a key role in successful recovery.
11. Step 7: Repot in Fresh, Well-Draining Medium
Repot the orchid in a fresh, sterile potting mix designed for orchids, such as bark or a well-aerated blend. Avoid reusing old media, as it may contain pathogens. A well-draining medium prevents water from accumulating around the roots and pseudobulbs, reducing the chances of future rot. Choosing the right pot and mix is essential for long-term plant health.
12. Step 8: Improve Air Circulation Around the Plant
Good airflow is critical in preventing fungal and bacterial growth. Place your orchid in a location with proper ventilation or use a fan to keep air moving. Stagnant conditions allow moisture to linger, which encourages rot. By improving air circulation, you create an environment that supports drying and discourages harmful pathogens.
13. Step 9: Adjust Your Watering Routine
Reevaluate how and when you water your orchid. Allow the growing medium to dry slightly between waterings and avoid letting water sit around the base of the plant. Overwatering is one of the leading causes of pseudobulb rot, so developing a balanced routine is key. Observing your plant’s needs rather than following a strict schedule can make a significant difference.
14. Step 10: Monitor Recovery and New Growth
After treatment, keep a close eye on your orchid for signs of recovery. Healthy new growth, firm pseudobulbs, and stable leaves indicate that your efforts are working. Continue maintaining proper care conditions and avoid stress factors. Regular monitoring helps you catch any recurring issues early and ensures that your orchid continues to improve over time.
15. Best Practices to Prevent Pseudobulb Rot
Prevention is always better than treatment, and consistent care plays a major role. Use clean tools, provide proper drainage, maintain airflow, and avoid overwatering. Regularly inspect your orchid for early warning signs and address issues promptly. By creating a balanced growing environment, you significantly reduce the risk of pseudobulb rot and keep your plant thriving.
16. When to Save or Discard the Orchid
In some cases, the damage may be too extensive to reverse. If the rot has spread through most of the plant, including the rhizome and roots, recovery may not be possible. However, if even a small healthy section remains, you can attempt to save it. Knowing when to let go allows you to focus your efforts on healthier plants and avoid unnecessary frustration.
17. Conclusion
Orchid pseudobulb rot can seem overwhelming, but with the right knowledge and quick action, it is often manageable. Identifying early signs, removing infected parts, and improving care conditions are the keys to saving your plant. By following these steps and maintaining a healthy environment, you can protect your orchids from future problems and enjoy strong, beautiful growth.
FAQS
1. What are the early signs of Orchid Pseudobulb Rot?
Orchid Pseudobulb Rot often starts with soft, mushy pseudobulbs that may turn yellow, brown, or black over time. You might also notice a foul smell or shriveling despite proper watering. Leaves can drop prematurely as the infection spreads. Identifying Orchid Pseudobulb Rot early helps you act quickly and prevent damage to the entire plant.
2. How can I treat Orchid Pseudobulb Rot effectively at home?
To treat Orchid Pseudobulb Rot, remove the affected parts using sterilized tools and ensure proper airflow around the plant. Repot the orchid in fresh, well-draining medium and reduce watering to avoid excess moisture. Applying a fungicide can also help control Orchid Pseudobulb Rot and protect healthy growth from further infection._
3. What causes Orchid Pseudobulb Rot in indoor plants?
Orchid Pseudobulb Rot is usually caused by overwatering, poor drainage, and lack of air circulation. When moisture sits around the roots and pseudobulbs for too long, it creates the perfect environment for fungal or bacterial growth. Understanding these causes of Orchid Pseudobulb Rot helps you adjust care routines and prevent future issues.
4. Can Orchid Pseudobulb Rot spread to other orchids?
Yes, Orchid Pseudobulb Rot can spread to nearby orchids if proper precautions are not taken. Contaminated tools, water splashes, or close contact can transfer the infection. Isolating the affected plant and maintaining hygiene are essential steps to stop Orchid Pseudobulb Rot from affecting your entire orchid collection.
5. Is Orchid Pseudobulb Rot reversible if caught early?
Orchid Pseudobulb Rot can be managed if detected early, but the damaged tissue cannot be restored. By trimming infected areas and improving growing conditions, you can stop Orchid Pseudobulb Rot from spreading. Healthy parts of the plant can recover and continue to grow with proper care.
6. How often should I water to prevent Orchid Pseudobulb Rot?
To prevent Orchid Pseudobulb Rot, water only when the potting medium is nearly dry. Overwatering is one of the main causes, so it’s important to strike a balance. Monitoring humidity and drainage will help reduce the risk of Orchid Pseudobulb Rot and keep your orchid healthy.
7. Which potting mix helps avoid Orchid Pseudobulb Rot?
A well-draining mix like bark, charcoal, or perlite works best to prevent Orchid Pseudobulb Rot. These materials allow air to circulate and prevent water from sitting around the roots. Choosing the right medium plays a key role in reducing the chances of Orchid Pseudobulb Rot.
8. Can sunlight help reduce Orchid Pseudobulb Rot?
By keeping the plant dry and inhibiting the formation of fungi, indirect sunlight can help lessen orchid pseudobulb rot. But an excessive amount of direct sunshine can harm the plant. In addition to promoting healing, balanced lighting reduces the likelihood of orchid pseudobulb rot.
9. Should I repot an orchid with Orchid Pseudobulb Rot ?
Yes, repotting is highly recommended when dealing with Orchid Pseudobulb ?Rot. Removing the old, infected medium and replacing it with fresh material helps eliminate harmful pathogens. Repotting also improves drainage, which is crucial for controlling Orchid Pseudobulb Rot.
10. What tools are needed to treat Orchid Pseudobulb Rot?
To treat Orchid Pseudobulb Rot, you’ll need sterilized scissors or pruning shears, fresh potting mix, and possibly a fungicide. Clean tools are important to avoid spreading the infection. Proper equipment ensures effective management of Orchid Pseudobulb Rot.
11. Can humidity levels affect Orchid Pseudobulb Rot?
Yes, high humidity combined with poor airflow can worsen Orchid Pseudobulb Rot. While orchids need humidity, stagnant air can trap moisture and promote rot. Maintaining balanced humidity with good ventilation helps prevent Orchid Pseudobulb Rot.
12. Are certain orchid types more prone to Orchid Pseudobulb Rot?
Orchids with thicker pseudobulbs, like Cattleya or Oncidium types, can be more susceptible to Orchid Pseudobulb Rot if overwatered. Their structure stores water, making them vulnerable when conditions are too wet. Proper care reduces the risk of Orchid Pseudobulb Rot in these varieties.
13. Can I use natural remedies for Orchid Pseudobulb Rot?
Natural remedies like cinnamon powder can help manage Orchid Pseudobulb Rot due to its antifungal properties. Sprinkling it on cut areas may reduce infection. While helpful, natural treatments should be combined with proper care practices to control Orchid Pseudobulb Rot effectively.
14. How long does it take to recover from Orchid Pseudobulb Rot?
Recovery from Orchid Pseudobulb Rot depends on the severity of the damage and how quickly treatment begins. In mild cases, new growth may appear within weeks, while severe cases take longer. Consistent care is key to overcoming Orchid Pseudobulb Rot.
15. Can fertilizer worsen Orchid Pseudobulb Rot?
Over-fertilizing can weaken the plant and make it more vulnerable to Orchid Pseudobulb Rot. Excess salts can damage roots and create stress conditions. Using a balanced fertilizer in moderation helps avoid triggering Orchid Pseudobulb Rot.
16. What role does airflow play in Orchid bulb Rot prevention?
Good airflow is essential to prevent Orchid bulb Rot, as it helps dry out excess moisture around the plant. Stagnant air encourages fungal growth, increasing the risk. Proper ventilation supports a healthy environment and reduces Orchid bulb Rot.
17. Can Orchid bulb Rot kill the entire plant?
If left untreated, Orchid bulb Rot can spread and eventually kill the entire plant. The infection can move from pseudobulbs to roots and leaves. Early intervention is critical to stop Orchid Pseudobulb Rot before it becomes fatal.
18. Should I cut all affected areas in Orchid bulb Rot?
Yes, removing all infected tissue is necessary when dealing with Orchid bulb Rot. Leaving any damaged part can allow the infection to spread further. Clean cuts and proper aftercare help control Orchid bulb Rot effectively.
19. Can reused pots cause Pseudobulb Rot?
Reusing pots without proper cleaning can introduce pathogens that lead to Orchid Pseudobulb Rot. Always disinfect pots before reuse to eliminate harmful bacteria or fungi. Clean containers reduce the chances of Pseudobulb Rot.
Hi, I’m Steve, an orchid grower with 30+ years of hands-on experience caring for indoor and outdoor plants. I share practical, tested tips and beginner-friendly guides to help plant enthusiasts nurture healthy, thriving plants.