Orchid Leaves Turning Yellow After Repotting: 20 Best Fixes That Actually Work
Table of Contents 👈 Tap Here
You did everything right. You bought fresh orchid bark, chose a clean pot, loosened the roots carefully, and gave your plant a fresh start. But now, just a few days later, the leaves are turning yellow and you are wondering whether you made things worse. This is one of the most unsettling things orchid owners experience, and it happens far more often than most plant guides admit. The good news is that in the vast majority of cases, yellowing leaves after repotting are a sign that your orchid is stressed, not dying. Stress is manageable. Stress has solutions. This post walks you through every fix that actually works.
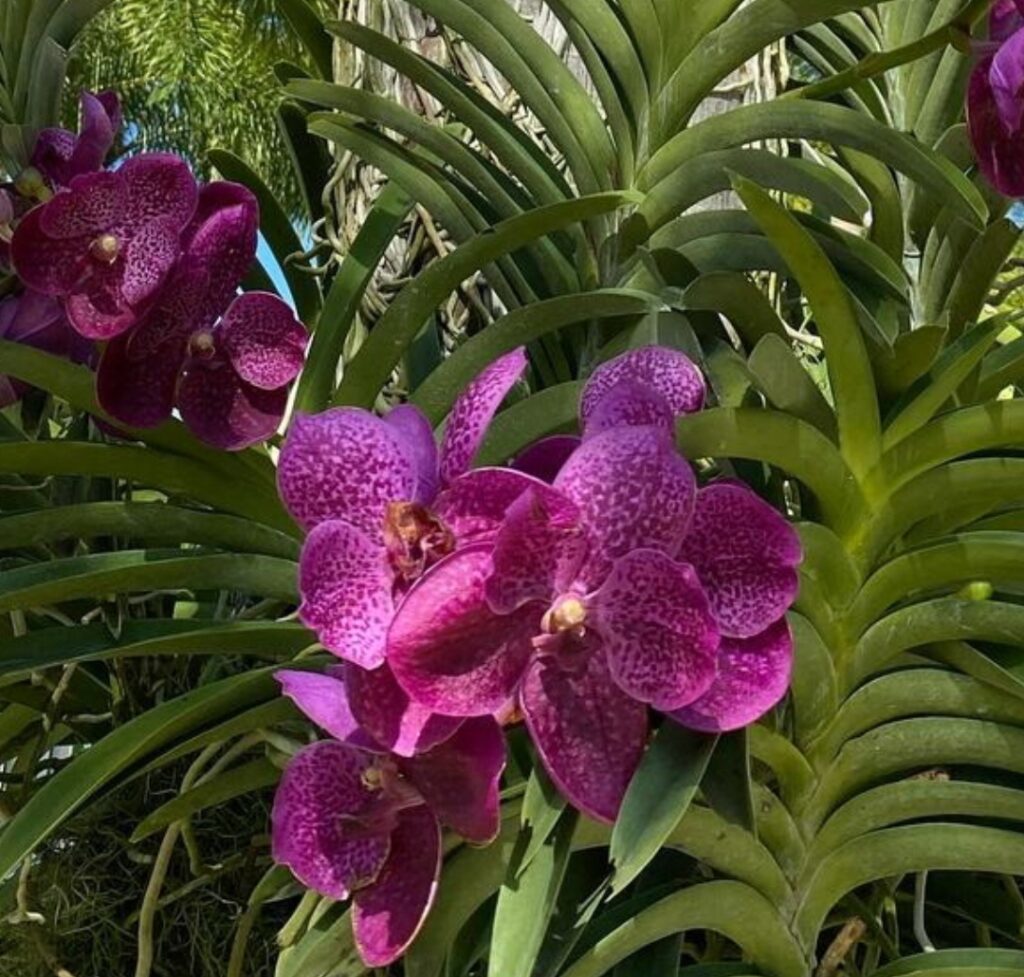
Orchid Leaves Turning Yellow After Repotting

1. Check the Roots Before You Do Anything Else
The single most important thing you can do right now is look at the roots. Pull the orchid gently out of the pot or peer through the drainage holes if you are using a clear container. Healthy roots are firm and white or silvery green. Rotten roots are dark brown, soft, and mushy to the touch. If you repotted into soggy medium without letting things dry out first, rot may have already set in. Catching this early is what separates a full recovery from a lost plant. Trim any dead roots using sterile scissors, dust the cuts with cinnamon, and start fresh with dry bark.
2. Stop Watering and Give the Roots a Break
The most common mistake people make after repotting is reaching for the watering can too soon. Your orchid has just been through a traumatic experience. Its roots have been disturbed, some have probably been trimmed, and the whole root system needs time to settle before it can absorb moisture efficiently again. Watering too soon drowns a compromised root system and accelerates the very rot you are trying to prevent. After repotting, leave the orchid completely dry for 24 to 48 hours. This lets any small root cuts callus over and reduces the chance of rot taking hold in fresh medium.
3. Use the Soak and Drain Method Instead of Pouring Water on Top
Once the waiting period is over and you are ready to water, do not simply pour water over the top and leave it sitting. Instead, submerge the pot in a bowl of room temperature water for 10 to 15 minutes, then lift it out and let every drop drain completely before returning it to its spot. This method ensures the roots actually absorb what they need without leaving the medium waterlogged for days. Orchids that sit in standing water after repotting are far more likely to develop root rot, which is one of the leading causes of post-repotting yellowing.
4. Make Sure You Are Using the Right Potting Medium
Orchids are not like most houseplants. They evolved to grow on trees, not in soil, which means they need a medium that drains fast and allows air to reach the roots constantly. If you repotted into regular potting soil, peat moss, or anything that holds moisture for a long time, that is very likely causing the yellowing. The right medium for most orchids is coarse fir bark, which drains well and dries out between waterings. Some growers add a small amount of perlite for airflow, but the mix must still dry out within a few days of watering or root problems will follow.
5. Downsize the Pot If It Is Too Large for the Root System
Bigger pots are not better for orchids. When you repot into a container that is too large, the excess medium around the roots retains moisture that the roots cannot absorb fast enough. This creates a constantly wet environment that rots roots even when you are watering correctly. A good rule is to choose a pot where the roots fit comfortably with just one to two inches of space around them. If the pot is clearly oversized, do not hesitate to move the orchid into a smaller one. A slightly snug fit is always better than a cavernous container that holds far more moisture than the plant can use.
6. Treat Root Rot With Hydrogen Peroxide If You Find It
If your inspection reveals root rot, the fastest and most effective treatment is a diluted hydrogen peroxide solution. Mix one part 3% hydrogen peroxide with four parts water and use it to rinse the roots thoroughly. The solution releases oxygen when it contacts organic matter, which kills anaerobic bacteria responsible for rot without harming healthy root tissue. After rinsing, trim away all the mushy roots, let the plant air dry for a couple of hours, then repot into fresh dry bark. Do not water again for at least two full days after treatment to give the root system a chance to stabilise.
7. Move the Orchid to Bright Indirect Light
After repotting, orchids are more sensitive to light than usual. Direct sunlight on a stressed plant will scorch the leaves and speed up yellowing considerably. At the same time, placing the plant in a dark corner while it is trying to recover slows everything down and deprives it of the energy it needs to push out new roots. The sweet spot is a bright windowsill with no direct sun hitting the leaves. East-facing windows work beautifully for recovering orchids. The light should be strong enough to read by comfortably but never harsh enough to cast sharp shadows across the leaves.
8. Keep the Temperature Stable and Away From Drafts
Temperature swings are something orchids tolerate poorly even when they are perfectly healthy. After repotting, when the plant is already stressed, sudden changes in temperature can trigger further yellowing and slow down recovery considerably. Keep your orchid away from air conditioning vents, heating vents, open windows during cold weather, and exterior doors that let in cold blasts of air. The ideal temperature range for most Phalaenopsis orchids is between 65 and 80 degrees Fahrenheit during the day with a gentle drop at night. Consistency is the key word — a stable temperature lets the plant focus its energy on root regeneration rather than constant adjustment.
9. Raise the Humidity Around the Plant
Orchids are tropical plants and they thrive in humidity levels between 50 and 70 percent. Most homes sit well below that, especially in winter when heating systems dry the air significantly. After repotting, when the root system is compromised, the plant cannot pull moisture from the medium as efficiently as it normally would. Higher ambient humidity helps it absorb some moisture directly through the leaves, buying the root system precious time to recover. Set the pot on a tray filled with pebbles and water, keeping the base of the pot above the waterline, or run a small humidifier nearby. Mist only in the morning so leaves dry before evening.
10. Hold Off on Fertilizer for Four to Six Weeks
Fresh bark already contains some nutrients, and a freshly stressed root system cannot process fertilizer effectively anyway. Applying fertilizer too soon after repotting is one of the more counterintuitive causes of yellowing — the salts in fertilizer draw moisture out of damaged root tissue through osmosis, essentially burning the roots from the inside. Hold off on any feeding for at least four weeks. When you do resume, start at half the recommended strength and use a balanced orchid fertilizer. This gentle reintroduction allows the recovering root system to handle nutrients without being overwhelmed by a full dose all at once.
11. Switch to a Clear Pot to Monitor Root Health
One of the smartest changes you can make as an orchid grower is switching to clear plastic nursery pots. When your orchid sits in an opaque container, you are completely blind to what is happening underground — and that is where every problem begins. Clear pots let you see root color, moisture levels in the medium, and early signs of rot without ever disturbing the plant. If the roots look white and dry, it is time to water. If they look green and plump and the bark is still visibly damp, you wait. This removes nearly all the guesswork from orchid watering and dramatically reduces the risk of overwatering.
12. Remove Yellow Leaves Cleanly to Prevent Fungal Spread
A yellow leaf will not turn green again. Once the chlorophyll breaks down, the process is irreversible, and leaving a dying leaf attached does not help the plant recover. What it does do is create an entry point for fungal disease, especially in humid conditions. Use sterile scissors to remove yellowed leaves at the base, cutting as close to the stem as possible without cutting into it. Wipe your blade with rubbing alcohol between each cut to avoid transferring pathogens. Dust each wound with a small pinch of ground cinnamon, which acts as a natural antifungal and helps the cut dry and seal cleanly without the need for chemical treatments.
13. Apply Cinnamon or Charcoal to All Cut Root Tips
Every time you trim a root, whether to remove rot or tidy up a damaged tip, you create an open wound that bacteria and fungi can enter easily. Cinnamon has genuine antifungal properties and is completely safe for orchid tissue — simply dip the cut end lightly in ground cinnamon before the root dries. Activated charcoal works in a similar way and also absorbs toxins in the potting medium over time. You will find activated charcoal in most garden centres or aquarium shops. Neither product is expensive, but both make a meaningful difference to how successfully your orchid roots recover and resist infection after a repotting
14. Do Not Move the Plant Around During Recovery
It’s easy to forget about this straightforward repair. Every time you move the orchid to a new location after repotting, you simultaneously alter the temperature, light intensity, ventilation, and occasionally the humidity. That continuous adjustment is taxing for a plant that is already under stress and attempting to restore its root system. For at least four to six weeks, place the plant in a good spot with bright indirect light, a steady temperature, and a manageable humidity level. When guests arrive, resist the urge to relocate it, transfer it to the kitchen, or rotate it. Maintaining stability during the healing process is crucial.
15. Check for Pests Hiding at the Root Level
After repotting, take a close look not just at the roots but at the medium itself and the base of the stem. Mealybugs often hide in the potting mix or at the junction between the stem and the pot rim. Scale insects appear on the underside of leaves or along the pseudobulb.
Spider mites leave fine webbing in dry corners near the base. Any of these pests can cause or accelerate yellowing, especially when the plant is already weakened from repotting stress. If you spot any pest activity, treat immediately with diluted neem oil or insecticidal soap, keeping the solution well away from open root cuts.
16. Give the Plant a Gentle Two-Week Recovery Window
Even if your orchid normally thrives in a bright spot with direct morning sun, it needs gentler conditions while it recovers. Think of it like a person returning from surgery — rest and reduced stimulation before returning to normal life. For the first two weeks after repotting, keep the orchid in a slightly shadier location than usual and do not rush it back to full-strength conditions. Once you start to see new root tips appearing — they will be pale green or white and slightly pointed — that is your signal that the plant has re-established itself and is ready to handle its regular environment again without setback.
17. Try Aerial Root Misting If the Root System Is Severely Damaged
If the root system is significantly damaged and cannot pull moisture through the medium reliably, misting the aerial roots and the lower leaves in the morning can help keep the plant hydrated while new roots develop underground.
Do this early enough that everything dries completely by evening, since water sitting on leaves overnight invites fungal rot. You can also place a damp paper towel loosely around the base of the stem, above the medium level, to provide slow surface moisture to any roots near the top. This is a bridge measure, not a permanent solution, but it buys the plant important time during a difficult recovery.
18. Use a Rooting Hormone to Speed Up New Root Growth
This is one of the lesser-known tricks in the orchid grower’s toolkit, but it genuinely works for plants that are struggling to push out new roots after repotting. Rooting hormones contain auxins, which are natural plant growth regulators that specifically stimulate root cell division and accelerate the formation of new root tips.
Look for a liquid rooting hormone designed for houseplants and dilute it to a lower concentration than the label suggests, since orchid roots are sensitive. Apply it as a gentle root drench once, about one week after repotting. You should start to see new root activity within two to three weeks.
19. Be Patient Because Recovery Takes Longer Than You Expect
This is perhaps the hardest fix of all because it requires doing nothing when every instinct is telling you to intervene. Orchids are slow plants. They grow slowly, they recover slowly, and they reward growers who understand that and resist the urge to constantly water, move, and prod.
After repotting, a healthy recovery timeline is typically four to eight weeks before you see meaningful new root growth. Some leaves may continue to yellow during this period and that is completely normal — it does not mean the plant is failing. Stay the course, keep conditions stable, and trust the plant to do what it has been doing for millions of years.
20. Re-Pot Again Into Fresh Dry Medium If the Current Mix Is Wrong
Some growers are apprehensive about this recommendation since it seems to put the plant under needless stress. However, a thorough second repotting is significantly less damaging than leaving an orchid in an inappropriate medium, such as soil that is too dense, old bark that has decomposed into mush, or a mix that remains damp for weeks.
If you think the medium is the main issue and the root structure is still sturdy enough to withstand handling, repot into fresh, fully dry bark, handle the roots as gently as you can, and don’t water for 48 hours. Every time, a fresh start in the appropriate medium surpasses the brief tension.
How to Prevent This From Happening Next Time
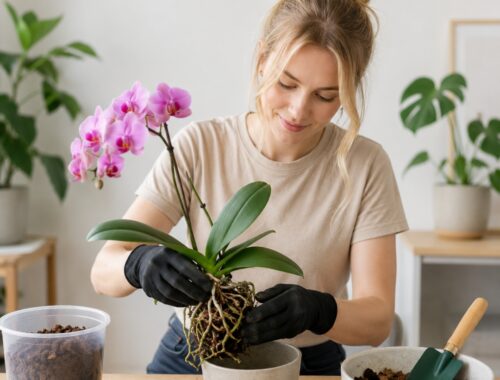
Prevention is always easier than recovery. The best time to repot an orchid is right after it finishes blooming, when the plant naturally redirects energy from flowers toward root development. Always sterilise your scissors, pot, and tools before you begin. Handle the roots with the same care you would give a healing wound.
Choose a pot only slightly larger than the current one, have your fresh dry bark ready before removing the plant, and resist the urge to water immediately. These simple habits eliminate the majority of post-repotting problems before they ever start and give your orchid the best possible foundation for a healthy new growing season.
What to Do Right Now If Your Orchid Is Already Yellowing
Start with the roots. Every other fix on this list depends on understanding what is happening underground. If the roots look firm, white, and healthy, your orchid is almost certainly going through normal transplant adjustment and time will resolve it. If you find rot, act immediately — trim, treat, and repot into fresh dry medium.
Adjust your watering, hold the fertilizer, stabilise the environment, and then leave the plant alone to do its work. The orchid that looks worst right after repotting is often the one that makes the most spectacular comeback. Give it the right conditions, step back, and let it recover on its own terms.
Conclusion
Seeing orchid leaves turn yellow after repotting can feel alarming, but in many cases it is simply your plant reacting to stress while adjusting to its new environment. The key is not to panic. Most orchids recover beautifully once the roots settle and proper care is restored. Common problems such as overwatering, poor drainage, root disturbance, excess sunlight, or low airflow can usually be corrected with small changes in care.
By using a well-draining orchid mix, watering only when the roots need it, keeping the plant in bright indirect light, and avoiding fertilizer overload, you give your orchid the best chance to bounce back quickly. Healthy orchids often replace old yellow leaves with fresh new growth once the stress passes.
FAQS
Why are my orchid leaves turning yellow after repotting?
After repotting, orchid leaves frequently turn yellow as the plant acclimates to its new surroundings. The orchid’s ability to absorb water and nutrients may be temporarily hampered by repotting, which can upset sensitive roots. With the right care and steady conditions, the orchid may spontaneously recover in a few weeks if the yellowing is minor and only affects older leaves.
2. Can overwatering cause orchid leaves to turn yellow after repotting?
Yes, Orchid Leaves Turning Yellow After Repotting is commonly linked to overwatering. Fresh potting bark holds moisture differently than old media, and many growers continue watering too often. Excess water suffocates roots and encourages rot, preventing the orchid from taking in oxygen. Allow the potting mix to dry slightly between waterings to help the roots recover and stay healthy.
3. Is yellowing normal after repotting an orchid?
In many cases, Orchid Leaves Turning Yellow After Repotting is a normal stress response. Orchids are sensitive plants that dislike sudden environmental changes. A single older leaf turning yellow is usually harmless, especially after root disturbance. However, rapid yellowing across several leaves may indicate deeper issues like root damage, poor drainage, or incorrect watering habits that need immediate attention.
4. How long does orchid repotting stress last?
Orchid Leaves Turning Yellow After Repotting can continue for several days or even a few weeks depending on the orchid’s health and growing conditions. Healthy orchids usually bounce back quickly once the roots settle into the new potting mix. Keeping humidity stable, avoiding direct sunlight, and limiting watering during recovery can help reduce stress and encourage fresh root growth.
5. Should I remove yellow orchid leaves after repotting?
When Orchid Leaves Turning Yellow After Repotting appears, avoid removing leaves too early. Yellow leaves still provide stored nutrients to the orchid until they dry completely. Pulling them off prematurely can create wounds and increase plant stress. Wait until the leaf becomes fully yellow or brown and separates easily from the stem before removing it carefully with clean hands.
6. Can damaged roots cause yellow orchid leaves?
Indeed, damaged roots during the repotting procedure are frequently the reason of orchid leaves turning yellow. When old bark is removed or bad parts are trimmed, orchid roots are brittle and easily cracked. Dehydration and discoloured leaves result from damaged roots’ inability to adequately absorb water. To reduce transplant shock, always handle roots carefully and with sterile instruments.
7. Does too much sunlight affect orchids after repotting?
It is possible for orchid leaves to become yellow after repotting if the orchid is exposed to strong sunshine right away. Orchids that have been repotted are weaker and more vulnerable to heat stress. It is best to have bright indirect light while recovering. If the roots are still getting used to the new growing medium, intense afternoon sun can scorch the leaves and exacerbate yellowing.
8. Can poor drainage make orchid leaves yellow?
Poor drainage is a major reason behind Orchid Leaves Turning Yellow After Repotting. If water collects at the bottom of the pot, the roots remain constantly wet and begin to rot. Rotten roots cannot support healthy leaves, causing yellowing and softness. Using orchid bark, slotted pots, and proper airflow around the roots greatly improves drainage and overall orchid health.
9. Should I fertilise my orchid right after repotting?
Avoid heavy fertilising when Orchid Leaves Turning Yellow After Repotting becomes noticeable. Freshly repotted orchids are already stressed, and strong fertiliser can burn sensitive roots. It is better to wait at least two to three weeks before feeding lightly with a balanced orchid fertiliser. Gentle care during recovery helps the plant regain strength without adding unnecessary stress.
10. Can cold temperatures cause yellow leaves after repotting?
Yes, Orchid Leaves Turning Yellow After Repotting may worsen if the orchid is exposed to cold drafts or sudden temperature drops. Orchids prefer warm, stable environments and become more vulnerable after repotting. Cold air slows root activity and stresses the plant further. Keeping temperatures consistent helps reduce yellowing and encourages the orchid to adapt more smoothly to its new pot.
11. Why is only one orchid leaf turning yellow after repotting?
When Orchid Leaves Turning Yellow After Repotting affects only one lower leaf, it is usually part of the orchid’s natural aging process. Orchids sometimes sacrifice older leaves while focusing energy on root recovery and new growth. As long as the remaining leaves stay firm and green, the plant is likely healthy and simply adjusting after repotting stress.
12. Can using the wrong potting mix cause yellow leaves?
Yes, Orchid Leaves Turning Yellow After Repotting often happens when the wrong potting mix is used. Regular soil holds too much moisture and blocks airflow around orchid roots. Orchids need chunky bark, charcoal, or sphagnum moss designed specifically for epiphytic plants. A poor mix can suffocate roots and quickly lead to yellow leaves, root rot, and slow growth.
13. Should I water my orchid immediately after repotting?
Many growers water too soon when Orchid Leaves Turning Yellow After Repotting begins. After repotting, damaged roots need time to heal before being exposed to excess moisture. Waiting one or two days before watering can help prevent infections and root rot. Light misting and moderate humidity are often safer during the orchid’s early recovery period.
14. Can low humidity affect orchids after repotting?
Yes, Orchid Leaves Turning Yellow After Repotting may develop if humidity levels are too low. Orchids naturally thrive in humid environments, and dry indoor air can stress the leaves while roots recover. Low humidity increases moisture loss from the leaves, making yellowing worse. Using a humidity tray or keeping the orchid in a humid room can support healthier recovery.
15. What are signs of root rot in repotted orchids?
Orchid Leaves Turning Yellow After Repotting combined with mushy roots, black spots, and a foul smell usually points to root rot. Healthy orchid roots should feel firm and appear green or silvery white. Rotting roots collapse easily and stop supplying water to the leaves. Immediate repotting into fresh bark and removing dead roots can save the orchid.
Hi, I’m Steve, an orchid grower with 30+ years of hands-on experience caring for indoor and outdoor plants. I share practical, tested tips and beginner-friendly guides to help plant enthusiasts nurture healthy, thriving plants.