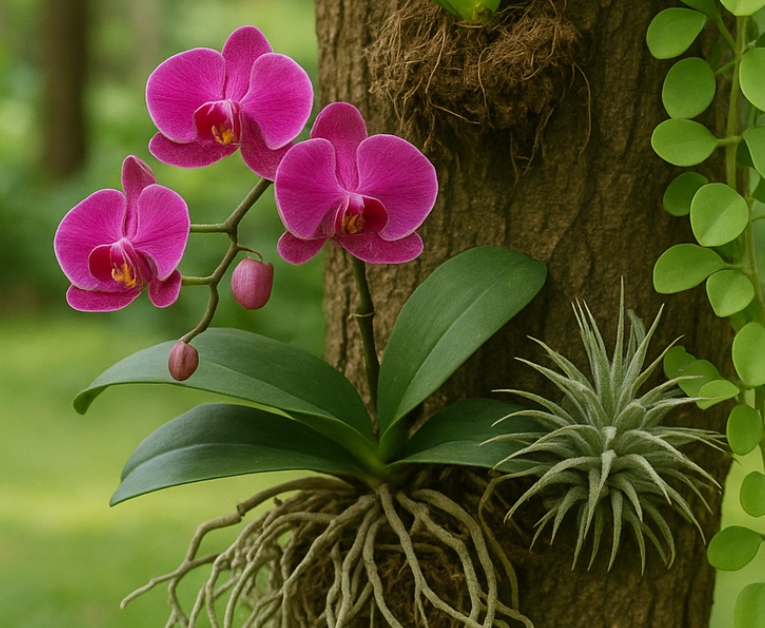
Mounting an orchid is an exciting way to grow these stunning plants, mimicking how they naturally thrive in the wild. Instead of sitting in a pot, mounted orchids attach their roots to a surface, absorbing moisture and nutrients from the air. While this method offers excellent airflow and a more natural aesthetic, many beginners make mistakes that can lead to dehydration, poor growth, or even plant loss. In this guide, we’ll explore the seven most common mounting mistakes and how to avoid them, ensuring your orchid flourishes in its new home.
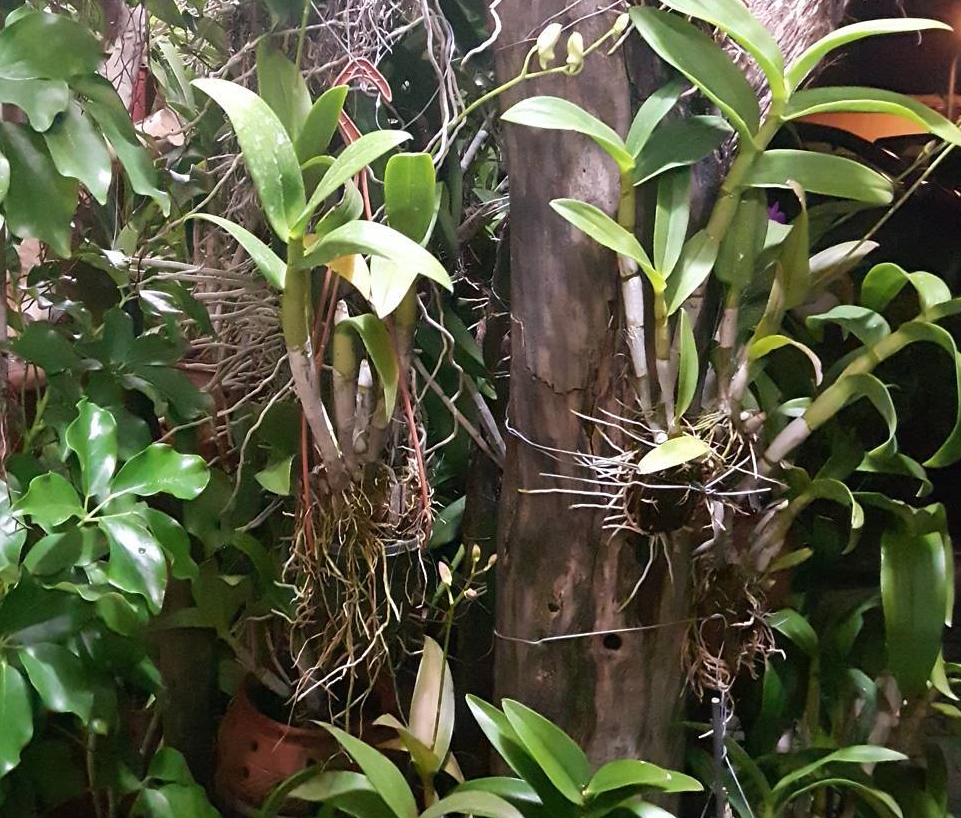
Tip: Before mounting, consider the specific needs of your orchid species. Some orchids adapt well to mounts, while others struggle with the increased drying time.
- 1 Choosing the Wrong Mounting Material
- 2 Ignoring Proper Orchid Positioning
- 3 Using the Wrong Type of Moss or Padding
- 4 Skipping the Secure Attachment Step
- 5 Not Considering Humidity & Watering Needs
- 6 Placing the Orchid in the Wrong Environment
- 7 Forgetting Regular Maintenance
- 8 How to Properly Mount an Orchid
- 9 FAQs on Mounting an Orchid
Timetable for Your Post
| Problem | Solution |
|---|---|
| Wrong Wood Choice (Rots Quickly or Holds Too Much Moisture) | Use rot-resistant woods like cork bark, cedar, or tree fern. Avoid pine, fir, or treated wood. |
| Orchid is Mounted Upside Down or Incorrectly | Position the orchid with roots facing downward and the crown slightly tilted to prevent water accumulation. |
| Orchid Dries Out Too Quickly | Increase humidity with regular misting or soak the mount in water weekly. Use moss sparingly for moisture retention. |
| Roots Won’t Attach to the Mount | Secure the orchid with soft twine or fishing line. Ensure the mount is rough enough for roots to grip. |
| Orchid Suffers from Rot Due to Too Much Moisture | Use minimal moss, improve airflow, and avoid overly damp environments. Ensure proper drainage. |
| Mount is Placed in the Wrong Environment (Too Much Sun or Dry Air) | Keep mounted orchids in bright, indirect light with good humidity and airflow. Avoid dry indoor areas. |
| Orchid Becomes Loose Over Time | Check regularly and reattach any loose roots. Replace old moss and secure with fresh ties if needed. |
Choosing the Wrong Mounting Material
The type of mount you use plays a significant role in the health of your orchid. Some materials rot quickly, while others retain too much moisture or fail to provide the necessary stability. Soft woods like pine, fir, and spruce decay too fast, leading to an unstable mount. Additionally, chemically treated wood can release toxins that harm your plant. Smooth materials, such as plastic or polished wood, also make it difficult for roots to attach properly.
Best Wood Choices for Mounting:
Cork Bark – Rot-resistant, lightweight, and perfect for orchids.
Cedar –Naturally impervious to pests and deterioration.
Tree Fern Slabs – Excellent water retention and airflow.
Driftwood (non-salty) – Aesthetic and durable for long-term growth.
Tip: Avoid pressure-treated or painted wood, as the chemicals can harm your orchid. Opt for rough, natural surfaces that mimic tree bark.
Ignoring Proper Orchid Positioning
Where and how you position your orchid on the mount can affect its long-term health. If mounted incorrectly, the plant may struggle to absorb light, and excess water can accumulate in the crown, leading to rot. To prevent this, angle the orchid slightly downward so that water drains away from the crown and does not pool inside. Additionally, ensure the plant faces the light source properly, allowing its leaves and roots to receive adequate exposure. Proper positioning also improves airflow around the plant, reducing the risk of fungal infections and promoting healthier growth.
Tip: Always mount orchids with the roots facing downward and slightly outward. This encourages proper water drainage and allows the plant to attach more securely.
Using the Wrong Type of Moss or Padding
Moss or padding materials help retain moisture around the roots, but using the wrong type can do more harm than good. Sphagnum moss is a popular choice, but if packed too tightly, it holds excess moisture, leading to root rot. On the other hand, using no moss at all in a dry climate can result in dehydration. The key is to use moss sparingly, wrapping it loosely around the roots to maintain the right balance of moisture and airflow. Tree fern fiber or coconut husk can also be great alternatives, especially for orchids that prefer drier conditions.
Tip: In humid environments, use minimal moss to prevent excessive moisture buildup. If your home is dry, mist the moss regularly to maintain consistent hydration.
Skipping the Secure Attachment Step
A common mistake beginners make is failing to attach the orchid securely to the mount. If the plant is loosely tied, it may shift or fall off before its roots have a chance to attach properly. Using materials like fishing line, nylon thread, or natural fiber twine ensures a strong hold without damaging the plant. Avoid using metal wires, as they can cut into the orchid’s delicate tissue over time. The goal is to secure the orchid firmly while allowing for some natural movement, encouraging its roots to grip the mount tightly as they grow.
Tip: Use soft materials like raffia or biodegradable twine to tie the orchid. These will naturally break down over time as the orchid’s roots secure themselves.
Not Considering Humidity & Watering Needs
Mounted orchids dry out much faster than their potted counterparts, making humidity and watering adjustments essential. If the surrounding environment is too dry, the orchid may struggle to absorb enough moisture, leading to shriveled roots and poor growth. Depending on your climate, you may need to mist your orchid daily or soak the entire mount in water for a few minutes several times a week. If you live in a humid environment, watering may not be as frequent, but regular monitoring is still necessary to ensure the plant receives adequate hydration.
Tip: Increase humidity around mounted orchids by using a humidity tray, grouping plants together, or running a humidifier nearby.
Placing the Orchid in the Wrong Environment
Choosing the right location for your mounted orchid is just as important as the mounting process itself. These plants thrive in areas with good airflow, indirect light, and consistent temperatures. Placing a mounted orchid in a dark corner, near dry air vents, or under direct harsh sunlight can lead to stress and poor growth. Ideal locations include bright bathrooms, covered patios, greenhouses, or shaded outdoor areas where they can receive natural humidity. If growing indoors, consider using a humidifier or placing a water tray nearby to maintain the right moisture levels.
Tip: Avoid mounting orchids near heating vents, fans, or air conditioners, as these can cause excessive drying.
Forgetting Regular Maintenance
Unlike potted orchids, mounted orchids require more hands-on care to stay healthy. Many growers forget that over time, moss dries out, attachments loosen, and roots may need additional support. Regularly check your orchid for signs of dehydration, pests, or fungal infections. If the moss starts breaking down or drying out too quickly, replace it with fresh material. Loose roots may need gentle reattachment to prevent them from breaking off. Keeping up with maintenance ensures your orchid continues to thrive on its mount for years to come.
Mounting an Orchid: Daily & Weekly Care Timetable
| Task | Frequency | Details |
|---|---|---|
| Misting | Daily (if needed) | Light misting in the morning to maintain humidity. Adjust based on climate. |
| Watering (Soaking the Mount) | 2-3 times a week | Submerge the entire mount in water for 5-10 minutes. Reduce in winter. |
| Spraying Liquid Fertilizer for Root Growth | Once a week | Use a diluted orchid fertilizer (e.g., 1/4 strength) to encourage root growth and attachment to the wood. Apply to roots in the morning. |
| Checking Root Attachment | Weekly | Ensure roots are attaching properly and adjust ties if needed. |
| Inspecting for Pests & Diseases | Weekly | Look for pests, mold, or fungal issues, especially in humid conditions. |
| Trimming Dead Roots or Leaves | As needed | Remove any dried-out or rotten roots and leaves to keep the plant healthy. |
| Replacing Moss or Padding | Every 3-6 months | If using moss, replace it when it starts breaking down. |
Tip: Set a reminder to check your mounted orchid every two weeks for dryness, pests, and loose roots.
How to Properly Mount an Orchid
Choose a suitable mount (cork bark, tree fern, or cedar).
Position the orchid so its roots face downward and slightly outward.
Attach the orchid using fishing line or soft twine, securing it firmly but not too tight.
Add a small amount of sphagnum moss around the roots if needed.
Mist regularly and monitor humidity levels to prevent dehydration.
Tip: Allow the orchid time to adjust by keeping it in a humid environment for the first few weeks.
Worst Orchids for Mounting & Best Varieties to Choose
Orchids That Struggle with Mounting:
Paphiopedilum (Lady’s Slipper) – Requires more moisture than mounts can provide.
Cymbidium – Large root systems make mounting impractical.
Miltoniopsis – Prefers consistent moisture and dislikes drying out.
Best Orchids for Mounting:
Phalaenopsis – Easy to grow and adapts well.
Dendrobium – Naturally epiphytic and thrives on mounts.
Cattleya – Prefers good airflow and works well with mounts.
Vanda – Loves air circulation and absorbs water quickly.
Tip: Start with Phalaenopsis or Dendrobium if you’re new to mounting orchids, as they are more forgiving.
Mounting an orchid can be a rewarding way to grow these beautiful plants, but only if done correctly. By choosing the right mount, positioning the orchid properly, maintaining humidity, and providing ongoing care, you can ensure your mounted orchid thrives for years. Have you tried mounting an orchid before? Share your experience in the comments below!
FAQs on Mounting an Orchid
What is mounting an orchid?
Mounting an orchid is the process of attaching an orchid to a solid surface such as cork bark, driftwood, or a tree fern slab instead of planting it in a pot. This technique replicates how epiphytic orchids naturally grow in the wild, clinging to tree trunks and absorbing moisture from the air. Mounting an orchid allows its roots to breathe better, preventing problems like root rot that often occur in traditional potting methods. It also enhances airflow around the plant, which helps in keeping diseases and fungal infections at bay.
What are the benefits of mounting an orchid?
There are several benefits to mounting an orchid, making it a preferred method for orchid enthusiasts. Firstly, mounting an orchid promotes healthier root growth by allowing them to spread freely and attach to a natural surface, just as they would in their native environment. Secondly, it prevents issues such as overwatering and stagnant moisture, which are common in potted orchids. Additionally, mounting an orchid gives your plant a unique and aesthetic display, making it an attractive addition to indoor or outdoor spaces. It also encourages stronger and more resilient growth over time.
What materials can I use for mounting an orchid?
Choosing the right material for mounting an orchid is essential for its long-term health. Some of the best materials include cork bark, tree fern slabs, cedar planks, and driftwood. These materials provide a stable and breathable surface for the orchid’s roots to attach to. Avoid using softwood or treated wood, as they may rot quickly or release harmful chemicals. Mounting an orchid on natural, durable materials ensures it can thrive and remain securely attached for years.
How do I secure an orchid while mounting it?
When mounting an orchid, you need to secure it properly to ensure the roots can gradually adhere to the surface. Use fishing line, biodegradable twine, or cotton string to gently tie the orchid in place without damaging the roots. Avoid using wire or harsh materials that might cut into the plant’s delicate roots. Over time, as the orchid acclimates to its new environment, its roots will firmly attach to the mount, making additional support unnecessary. Properly mounting an orchid in this way ensures stability while allowing natural growth.
Can any orchid be mounted?
Not all orchids can thrive when mounted. The best candidates for mounting an orchid are epiphytic species like Phalaenopsis, Cattleya, Dendrobium, and Vanda. These orchids naturally grow attached to trees in the wild, making them well-suited for mounting. Terrestrial orchids, which grow in soil, do not adapt well to being mounted, as their roots require more moisture and stability. Before mounting an orchid, research its species to ensure it will thrive in this setup.
How do I water a mounted orchid?
Watering a mounted orchid differs from watering potted orchids since the roots are exposed. A mounted orchid dries out faster, so frequent watering is necessary. The best way to water a mounted orchid is by misting the roots daily or soaking the entire mount in water for a few minutes. You might need to water more regularly in hot or dry conditions. Proper hydration is key when mounting an orchid, as dry roots can cause slow growth or even death.
Do mounted orchids need fertilizer?
Yes, mounted orchids require regular fertilization since they do not have access to stored nutrients like potted orchids. When mounting an orchid, apply a balanced orchid fertilizer at half strength once a week. You can mist the fertilizer directly onto the roots or soak the entire mount in a diluted solution. Providing essential nutrients helps a mounted orchid develop strong roots, lush foliage, and vibrant blooms.
Where should I place a mounted orchid?
Placement is crucial when mounting an orchid. A mounted orchid should be positioned where it receives bright, indirect sunlight and good airflow. Avoid placing it in direct sunlight, as this can cause leaf burn. If mounting an orchid indoors, consider attaching it to a wooden board or hanging it near a window with filtered light. For outdoor mounting, choose a shady tree or a protected spot where the orchid can receive dappled sunlight.
How long does it take for an orchid to attach when mounted?
It typically takes a few months for an orchid to fully attach to its mount. After mounting an orchid, its roots will begin to explore the surface and gradually cling to it. To encourage attachment, keep the orchid’s roots moist and avoid disturbing it. Once securely attached, the orchid will rely less on external ties for support. Mounting an orchid successfully requires patience, but the results are worth it.
Can I mount an orchid indoors?
Yes, mounting an orchid indoors is possible, but maintaining humidity levels is important. Orchids that are mounted indoors may dry out faster due to lower humidity, so regular misting or the use of a humidifier is recommended. When mounting an orchid inside, ensure it is placed in a spot with proper ventilation and bright, indirect light. This helps the orchid stay hydrated while preventing mold or fungal growth.
What is the best time of year for mounting an orchid?
The ideal time for mounting an orchid is during its active growing season, which is typically in spring or early summer. At this time, the orchid is producing new roots, making it easier for it to attach to the mount. Avoid mounting an orchid in winter when growth slows down, as this may delay its ability to establish itself.
Do mounted orchids need repotting?
Unlike potted orchids, mounted orchids do not need frequent repotting. However, over time, the mount may degrade, or the orchid may outgrow it. If this happens, remounting an orchid onto a fresh surface is necessary. This ensures continued support and prevents issues related to deteriorating mounting material.
