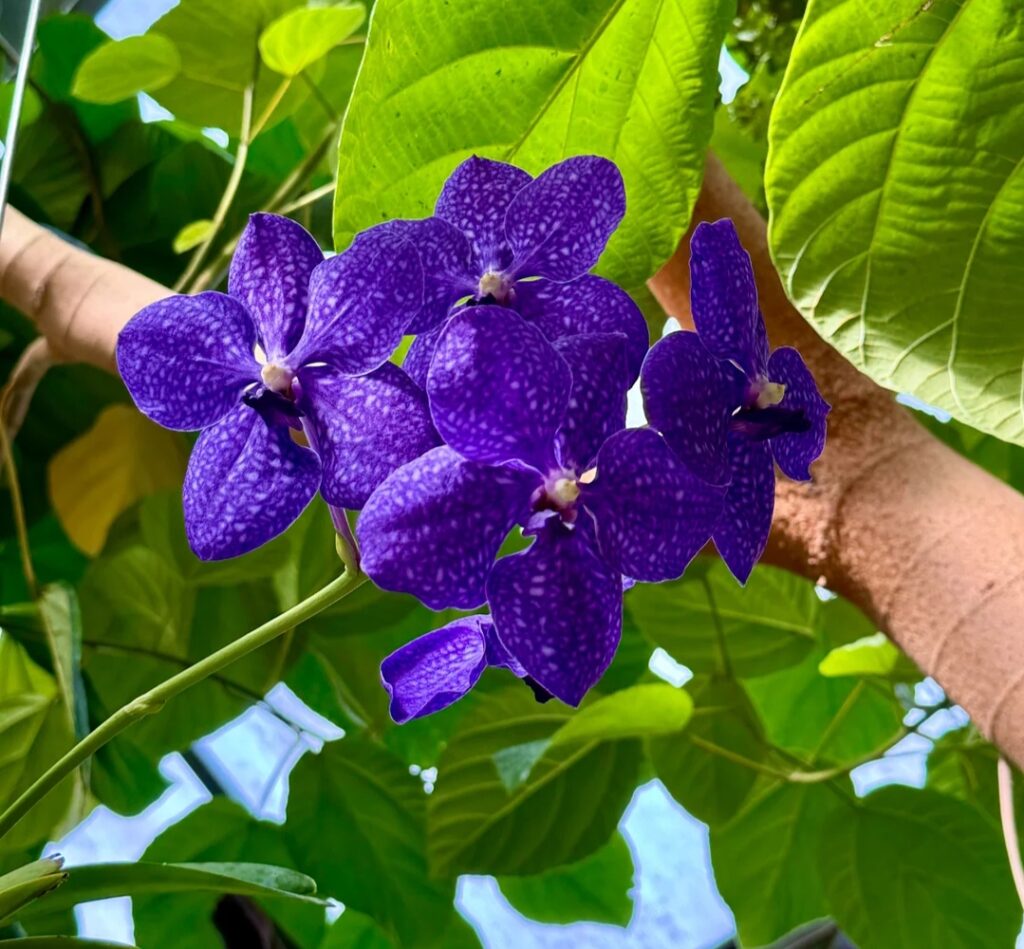
Vanda orchids growing mistakes can be frustrating for beginners, as these orchids require specific care to thrive. Common Vanda orchids growing mistakes include improper watering, inadequate light, and poor air circulation, all of which can hinder their growth. Vanda orchids are among the most breathtaking orchids, known for their vibrant, long-lasting blooms and exotic appeal. However, for many new gardeners, growing these stunning plants can be a challenge. Unlike other orchids, Vandas require specific care conditions to flourish, and even a small Vanda orchids growing mistake can lead to stunted growth, lack of blooms, or even plant loss.
Many beginners unknowingly make critical Vanda orchids growing mistakes that hinder their plant’s health. Overwatering, insufficient light, improper air circulation, and incorrect potting methods are just a few common errors. Without the right guidance, these mistakes can be frustrating and disheartening. But don’t worry—every problem has a solution!
In this guide, we’ll uncover the top mistakes new Vanda growers make and provide expert-backed solutions to help you cultivate thriving, vibrant orchids. Whether you’re just starting your orchid journey or struggling to get your Vanda to bloom, these essential tips will set you on the right path. By avoiding these pitfalls and following the right care techniques, you can enjoy healthy, lush Vanda orchids that bloom beautifully year after year.

- 1 1. Choosing the Wrong Growing Environment
- 2 2. Overwatering or Underwatering
- 3 3. Using the Wrong Water Quality
- 4 4. Neglecting Humidity Needs
- 5 5. Improper Fertilization
- 6 6. Ignoring Root Health
- 7 7. Incorrect Temperature Management
- 8 8. Not Encouraging Blooming
- 9 9. Failing to Repot or Adjust Growth Setup
- 10 10. Ignoring Pests and Diseases
- 11 FAQs: Vanda Orchids Growing Mistakes
1. Choosing the Wrong Growing Environment
Mistake:
New gardeners often place Vanda orchids in unsuitable locations, such as low-light areas, enclosed pots, or environments with poor airflow. Vandas are epiphytic orchids, meaning they grow naturally on trees with their roots exposed to air. Placing them in regular orchid pots filled with soil or moss suffocates their roots, leading to poor health and eventual decline.
Solution:
To ensure a healthy growing environment, keep your Vanda orchids in bright, indirect sunlight for at least six hours a day. The best placement is near a south- or east-facing window, in a greenhouse, or in an outdoor space with filtered light. Additionally, Vanda orchids need ample air circulation, so they should be grown in hanging baskets or on wooden slats with their roots exposed. Providing proper ventilation reduces the risk of fungal infections and promotes stronger root growth.
2. Overwatering or Underwatering
Mistake:
A common issue new gardeners face is either overwatering or underwatering their Vanda orchids.Stunted growth and dehydration can result from underwatering, whereas root rot can be caused by overwatering. Many beginners assume that because Vanda orchids grow without traditional potting mix, they do not need frequent watering, leading to dry, shriveled roots.
Solution:
Vanda orchids require daily watering in warm climates and every two to three days in cooler conditions. Their aerial roots should turn green when hydrated and silvery-gray when dry. If you live in an arid climate or have indoor heating that dries out the air, mist the roots between waterings to maintain moisture levels. To prevent overwatering, ensure that excess water drains freely, and never let the roots sit in standing water.
3. Using the Wrong Water Quality
Mistake:
Water quality is often overlooked, but using hard tap water with high chlorine or mineral content can cause root damage, slow growth, and leaf discoloration. Some gardeners unknowingly use softened water, which contains high sodium levels that can be harmful to orchids.
Solution:
To keep your Vanda orchids healthy, use rainwater, distilled water, or reverse osmosis (RO) water whenever possible. If you must use tap water, allow it to sit for 24 hours to let chlorine evaporate before watering. Avoid using water with a high salt content, as it can lead to mineral buildup on the roots, affecting their ability to absorb nutrients. Regularly flushing the roots with clean water will help remove any accumulated salts.
4. Neglecting Humidity Needs
Mistake:
Vanda orchids require high humidity levels, and failing to provide enough moisture in the air can cause wrinkled leaves, slow root growth, and reduced flowering. Many beginners try to grow them in dry indoor conditions without taking additional measures to increase humidity, leading to poor health.
Solution:
Maintain 60–80% humidity around your Vanda orchids to ensure they thrive. This can be achieved by using a humidifier, placing a humidity tray with pebbles and water beneath the plant, or grouping plants together to create a microclimate. If growing Vanda orchids indoors, misting their aerial roots frequently can also help increase moisture levels, but be careful not to let water sit on the leaves, as this can encourage fungal diseases.
5. Improper Fertilization
Mistake:
New gardeners either over-fertilize their Vanda orchids, leading to salt buildup and burned roots, or they under-fertilize, resulting in slow growth and weak blooms. Without proper nutrition, Vanda orchids may not flower as often or as vibrantly as they should.
Solution:
Use a balanced orchid fertilizer (20-20-20) diluted to half-strength and apply it weekly using the “weekly, weakly” method. This means lightly misting the roots with liquid fertilizer once a week to provide consistent nutrients. For long-term feeding, you can use a slow-release fertilizer every two to three months. Additionally, flush the roots with clean water every few weeks to prevent mineral buildup that can damage the roots.
6. Ignoring Root Health
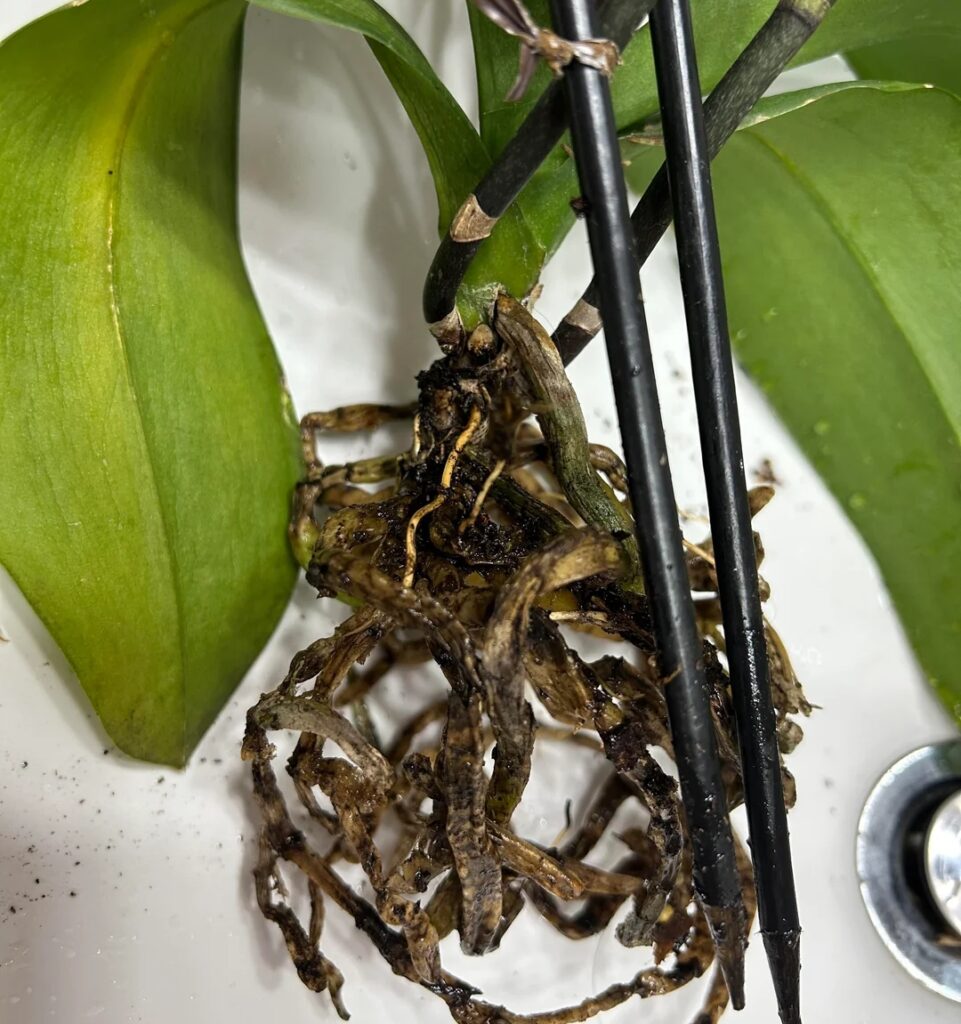
Mistake:
Many new Vanda orchid growers neglect root health, leading to issues such as dehydration, fungal infections, and decay. Since Vanda orchids do not grow in traditional potting mix, their roots are more exposed and require extra care to remain healthy.
Solution:
Regularly inspect your orchid’s roots and trim away any black, mushy, or dead roots with sterilized scissors to prevent the spread of rot. Keep the roots exposed to air and never force them into pots or tight spaces. If the roots appear dry, soak them in water for 20–30 minutes before watering normally to restore hydration. Providing occasional misting can also help maintain their moisture levels.
7. Incorrect Temperature Management
Mistake:
Vanda orchids are sensitive to temperature fluctuations, and sudden changes can cause bud drop, stunted growth, or weak blooms. Exposing them to cold drafts, excessive heat, or temperature extremes can stress the plant, making it more susceptible to disease.
Solution:
To prevent temperature-related issues, maintain temperatures between 65–85°F (18–29°C). Avoid placing your orchid near cold windows, air conditioners, or direct heat sources such as radiators. If growing Vanda orchids outdoors, bring them inside when temperatures drop too low, and provide shade during extreme heat waves. A stable environment will encourage healthy growth and better flowering.
8. Not Encouraging Blooming
Mistake:
Some new gardeners struggle to get their Vanda orchids to bloom, often due to insufficient light, improper fertilization, or poor watering habits. Without the right conditions, these orchids may remain healthy but fail to produce flowers.
Solution:
To encourage blooming, provide bright, indirect sunlight for at least six to eight hours a day.If needed, add grow lights to enhance natural light. Ensure your orchid receives consistent fertilization and proper humidity levels, as both are essential for flower production. If your mature Vanda orchid refuses to bloom, try inducing flowering by lowering nighttime temperatures by 10°F to mimic natural seasonal changes.
9. Failing to Repot or Adjust Growth Setup
Mistake:
Keeping Vanda orchids in the same basket or setup for too long can cause overcrowded roots, reduced nutrient absorption, and poor air circulation, all of which can negatively impact growth.
Solution:
Inspect the roots at least once a year and trim any dead or rotting parts to keep the orchid healthy. If your plant outgrows its current setup, move it to a larger basket or mount that allows better airflow. Avoid using compact potting materials, as Vandas prefer an open-root growing method that mimics their natural environment.
10. Ignoring Pests and Diseases
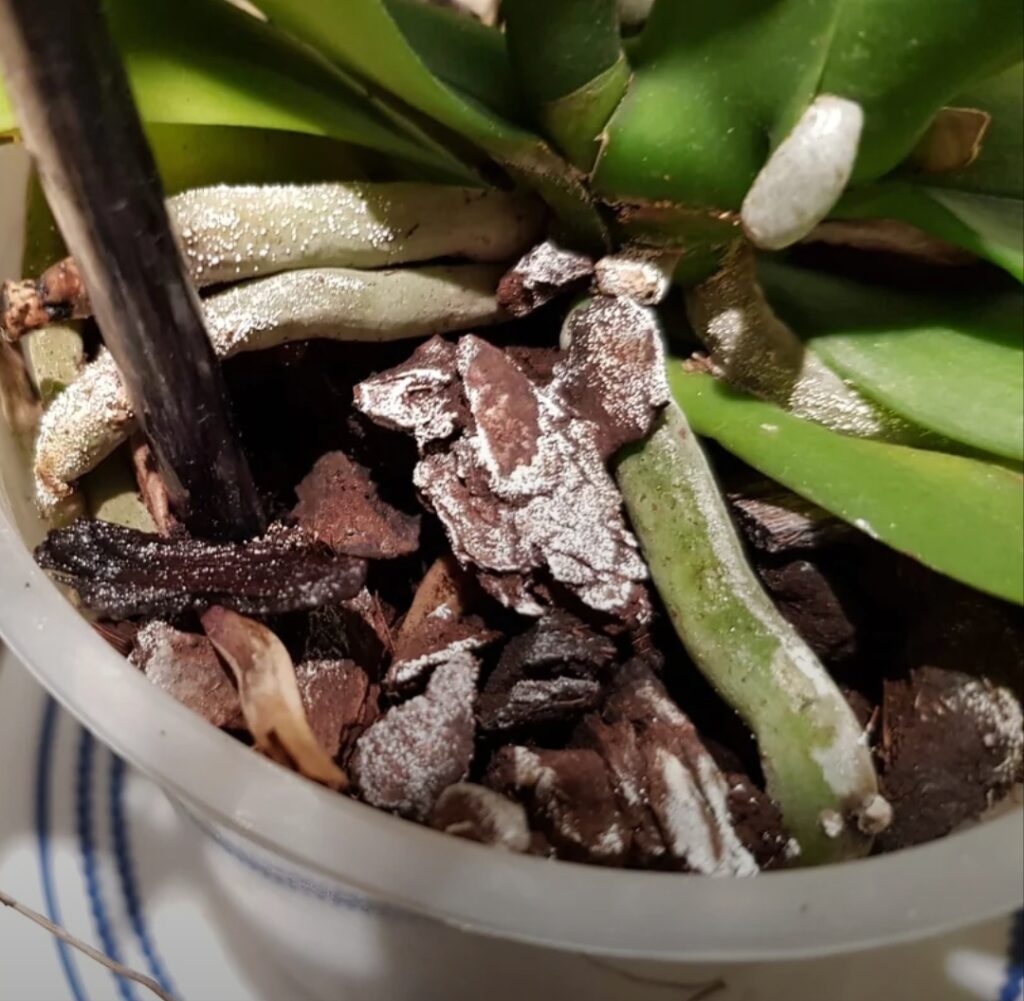
Mistake:
Many beginners fail to monitor their orchids for pests and diseases, leading to infestations that can quickly weaken the plant. Common pests include spider mites, mealybugs, and scale insects, while fungal infections often develop in humid but poorly ventilated conditions.
Solution:
Regularly check leaves and roots for signs of pests, such as sticky residue, small webs, or cotton-like masses. Treat infestations with insecticidal soap, neem oil, or diluted rubbing alcohol. Ensure proper air circulation and avoid overwatering to prevent fungal diseases like black rot.Pests and illnesses can’t harm healthy plants as easily.
Vanda orchids require patience and specialized care, but avoiding these common mistakes will help them thrive. By providing the right environment, proper watering, and consistent fertilization, you can enjoy healthy, vibrant blooms year after year.
FAQs: Vanda Orchids Growing Mistakes
What are the most common Vanda orchids growing mistakes?
The most common Vanda orchids growing mistakes include improper watering, inadequate light, poor air circulation, and using the wrong potting method. Vanda orchids need high humidity, bright indirect light, and frequent watering. If any of these conditions are not met, the orchid may suffer from stunted growth, weak roots, or lack of blooms. Beginners often struggle with overwatering or underwatering, which can lead to root rot or dehydration.
How does overwatering affect Vanda orchids?
One of the most harmful Vanda orchids growing mistakes is overwatering. Since Vanda orchids have aerial roots, they do not thrive in constantly wet conditions. Excess water can cause root rot, which prevents the plant from absorbing nutrients. This leads to yellowing leaves, weak stems, and even plant death. To avoid this mistake, water your Vanda orchid early in the morning and ensure good airflow around the roots.
Why do Vanda orchids fail to bloom?
A common Vanda orchids growing mistake is not providing enough light. Vandas require bright, indirect sunlight for at least 6–8 hours a day. If they don’t receive sufficient light, their blooming cycle will be delayed. To fix this, place your orchid in a bright spot, such as near a south-facing window, or use grow lights to supplement natural light.
Can poor ventilation harm Vanda orchids?
Yes, poor ventilation is one of the overlooked Vanda orchids growing mistakes that can lead to fungal infections and weak growth. Vanda orchids thrive in well-ventilated spaces where air circulates freely around their roots and leaves. Without proper airflow, moisture accumulates, encouraging mold, fungus, and bacterial infections. Use a fan or keep the plant in an open space to improve air circulation.
Is using the wrong fertilizer a major Vanda orchids growing mistake?
Absolutely! One of the Vanda orchids growing mistakes is using the wrong fertilizer or not fertilizing at all. Vandas require regular feeding with a balanced orchid fertilizer, such as 20-20-20, diluted to half strength. Failing to fertilize can result in weak stems, small flowers, and slow growth. For best results, fertilize once a week during the growing season and reduce feeding during dormancy.
Can temperature fluctuations impact Vanda orchids?
Yes, sudden temperature changes are among the major Vanda orchids growing mistakes that can stress the plant. Vanda orchids prefer warm temperatures between 70–90°F (21–32°C) during the day and slightly cooler at night. If temperatures drop too low or fluctuate drastically, the orchid may stop growing or drop its buds. Keep your plant in a stable, warm environment to prevent stress.
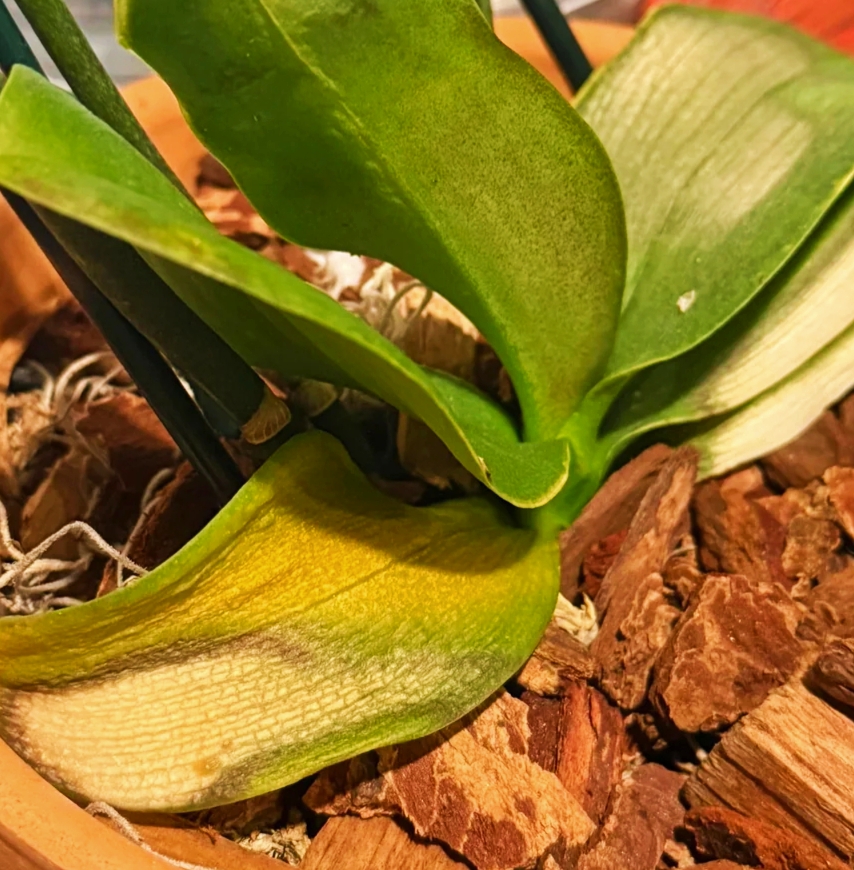
Why do Vanda orchid leaves turn yellow?
Yellowing leaves are often caused by several Vanda orchids growing mistakes, including overwatering, nutrient deficiencies, or too much direct sunlight. If the leaves turn yellow and feel mushy, root rot may be the cause. If they are dry and scorched, the plant might be getting too much direct sun. Adjust your watering schedule and move the plant to a spot with bright but indirect light.
Should Vanda orchids be grown in pots or hanging baskets?
One of the common Vanda orchids growing mistakes is choosing the wrong growing method. Unlike other orchids, Vandas do best in hanging baskets or mounted setups where their roots are exposed to air. Growing them in pots with regular potting mix can suffocate the roots and lead to rot. If you must use a container, ensure it has excellent drainage and avoid compact soil.
How often should Vanda orchids be watered?
A frequent Vanda orchids growing mistake is watering too much or too little. Vanda orchids need to be watered daily in hot, dry climates and about 3–4 times a week in humid environments. The key is to soak the roots until they turn green, then let them dry before the next watering. Using a spray bottle or dunking the roots in water for a few minutes can help maintain proper hydration.
Can repotting too often harm Vanda orchids?
Yes, unnecessary repotting is another Vanda orchids growing mistake that can cause stress to the plant. Vanda orchids do not require frequent repotting since they grow best when their roots are left undisturbed. If you must repot, do so only when the plant outgrows its basket or the roots are rotting. Be gentle to avoid damaging the roots.
Why do Vanda orchid roots dry out?
Drying roots are usually caused by Vanda orchids growing mistakes like insufficient watering or low humidity. Vanda orchids have thick, aerial roots that need constant moisture. If they become dry and brittle, increase watering frequency and provide humidity by misting or placing a humidity tray nearby.
Can direct sunlight damage Vanda orchids?
Yes, exposing Vanda orchids to intense, direct sunlight is one of the Vanda orchids growing mistakes that can lead to leaf burn. While these orchids love bright light, too much direct sun can scorch their leaves. Keep them in bright but indirect light to prevent sun damage.
What happens if I don’t prune my Vanda orchid?
Failing to prune is another Vanda orchids growing mistake that can lead to overcrowded roots and weak growth. Pruning helps remove dead roots and leaves, encouraging healthy development. Use sterilized scissors to trim dead parts and keep the plant in optimal condition.
How can I prevent pests on my Vanda orchid?
Ignoring pest problems is a serious Vanda orchids growing mistake that can harm the plant. Common pests like spider mites, aphids, and scale insects attack Vanda orchids. Regularly inspect your plant and treat infestations with neem oil or insecticidal soap to keep it healthy
Why do my Vanda orchid flowers drop prematurely?
One of the major Vanda orchids growing mistakes that causes flowers to drop is sudden environmental changes. Temperature fluctuations, insufficient humidity, or moving the plant frequently can stress the orchid, leading to bud blast. Maintain stable conditions to ensure long-lasting blooms.


