
Orchids are delicate yet resilient plants, and even when they seem beyond saving—without roots and leaves—there is still hope. Many orchid growers have faced this challenge, and with the right approach, you can revive your struggling plant. The process requires patience, consistency, and the right techniques to encourage new growth.
Orchids are known for their ability to bounce back under the right conditions, so don’t give up on your plant too soon. In this guide, we’ll go through expert strategies to help you save an orchid without roots and leaves, providing a problem-solving approach that beginners and experts alike can follow. With dedication and care, you can nurture your orchid back to life. This guide will also focus on how to save an orchid with no roots, ensuring that the keyword is naturally incorporated throughout the content.

- 1 Understanding Why Orchids Lose Roots and Leaves
- 2 Step 1: Trim and Sterilize Damaged Areas
- 3 Step 2: Provide a Humid Recovery Environment
- 4 Step 3: Use a Rooting Hormone or Growth Stimulant
- 5 Step 4: Provide Gentle Light and Warmth
- 6 Step 5: Hydration Through Misting or Water Therapy
- 7 Step 6: Encourage Leaf Growth with a Balanced Fertilizer
- 8 FAQ
Understanding Why Orchids Lose Roots and Leaves
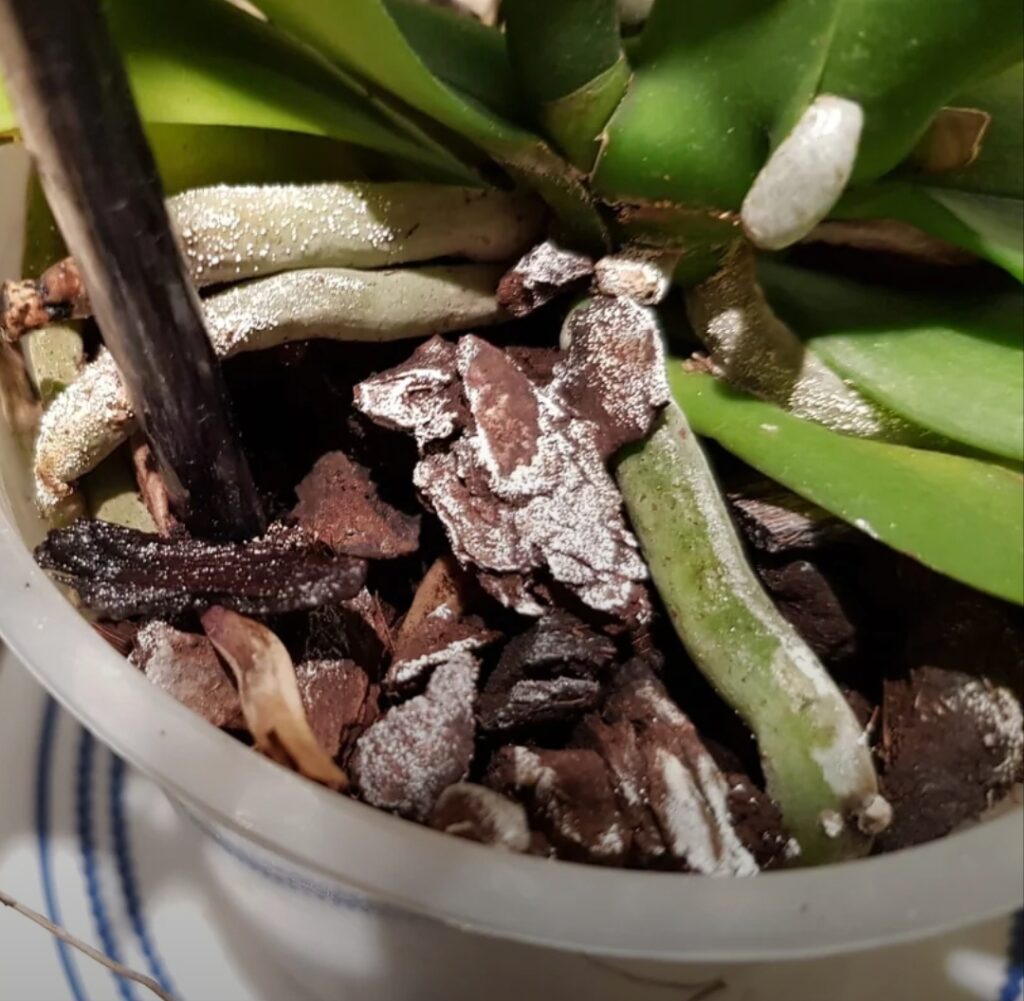
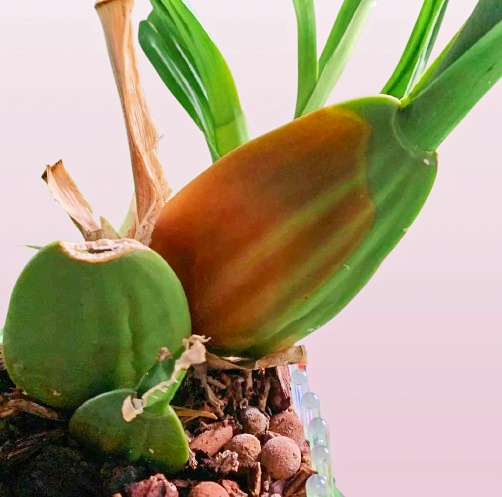
Before diving into the recovery process, it’s essential to understand why your orchid has lost its roots and leaves. Some common reasons include overwatering, which leads to root rot, dehydration from underwatering, pest infestations that attack the plant’s structure, and fungal or bacterial infections that spread quickly if left untreated.
Identifying the cause of the problem will help you tailor your recovery strategy accordingly. By assessing the current state of your orchid and noting any signs of disease or stress, you can determine the best course of action to revive it. Knowing how to save an orchid with no roots is essential in preventing future issues.
Tip: Examine your orchid carefully to determine the cause of root and leaf loss before starting the recovery process. Look for soft, mushy areas, discoloration, or signs of pests.
Step 1: Trim and Sterilize Damaged Areas
The first step in saving an orchid without roots and leaves is removing all dead and rotting parts. Use sterilized scissors or a sharp blade to trim away blackened roots, dried stems, and any remaining unhealthy tissue. This prevents the spread of infection and allows the orchid to focus its energy on healing. After trimming, use a fungicide or diluted hydrogen peroxide to disinfect the wounds and stop potential fungal growth. A clean cut will also promote faster healing and reduce stress on the plant.
Proper trimming plays a crucial role in how to save an orchid with no roots, as infected areas can prevent recovery.
Tip: Always sterilize your cutting tools with rubbing alcohol or a flame before and after each use to prevent the spread of infections.
Step 2: Provide a Humid Recovery Environment
Orchids need high humidity to promote new root and leaf growth. One effective method is the sphag-and-bag technique, where you place the orchid in a clear plastic bag with damp sphagnum moss. The increased humidity creates a microclimate that encourages new growth while protecting the orchid from excessive moisture loss.
Keep an eye on condensation levels to ensure that mold does not develop inside the bag. Consistent humidity will create the ideal conditions for the orchid to regenerate new roots and leaves over time. This technique is one of the best strategies for how to save an orchid with no roots.
Tip: Keep the humidity around 70-80%, but ensure air circulation to prevent mold growth. Open the bag occasionally to let in fresh air.
Step 3: Use a Rooting Hormone or Growth Stimulant
Applying a rooting hormone like KLN or seaweed extract can significantly improve the chances of root regrowth. These products contain auxins, which stimulate new root development and encourage the orchid to start absorbing nutrients again. Soaking the orchid base in a diluted rooting solution for 30 minutes before placing it in a recovery environment can give it a much-needed boost. Some growers also use honey or cinnamon as natural alternatives to synthetic rooting hormones.
Using a rooting stimulant is an essential step in how to save an orchid with no roots, as it accelerates the regeneration process.
Tip: Use a gentle, diluted concentration of rooting hormone to avoid overwhelming the plant. Repeat the application every two weeks for best results.
Step 4: Provide Gentle Light and Warmth
A struggling orchid without roots and leaves needs bright, indirect light and warmth to recover. Direct sunlight can be too harsh and may dehydrate the fragile plant further. Instead, place your orchid in a warm, shaded area with indirect light exposure. The optimal temperature range is between 21 and 27°C (70 and 80°F). This ensures that the orchid receives the warmth it needs without experiencing excessive stress from high temperatures. Proper lighting conditions help in how to save an orchid with no roots effectively.
Tip: If you don’t have enough natural light, use a grow light to supplement. Keep it at a safe distance to prevent overheating.
Step 5: Hydration Through Misting or Water Therapy
Since your orchid has no roots, you need to provide moisture in a controlled way. Misting the base lightly every day or using water therapy (placing it in shallow water for a few hours) can help keep it hydrated. However, too much moisture can cause rot, so it is crucial to monitor your orchid closely. Balancing hydration without waterlogging the plant is key to preventing further damage and promoting recovery.
Hydration techniques are fundamental when learning how to save an orchid with no roots.
Tip: Avoid excessive moisture to prevent further rot. Always let the orchid dry between mistings and ensure proper airflow around the plant.
Step 6: Encourage Leaf Growth with a Balanced Fertilizer
Once you notice signs of new growth, introduce a diluted orchid fertilizer high in nitrogen (such as 20-10-10) to encourage leaf production. Fertilizing too early can stress the plant, so wait until you see small leaf nubs forming. Applying the right nutrients at the right time can make a big difference in how quickly your orchid recovers. Start with a weak dilution and gradually increase as the plant shows signs of strength. This is another crucial step in how to save an orchid with no roots.
Tip: Feed your orchid once every two weeks using a weak fertilizer solution to avoid overfeeding and burning delicate new growth.
Recovery Time Table
| Stage | Expected Timeframe | Action Needed |
|---|---|---|
| Trimming & Sterilizing | Day 1 | Remove rot and dead tissue |
| Creating Humid Environment | Day 2-7 | Place in a bag with moss |
| Rooting Hormone Application | Day 3-10 | Stimulate root growth |
| Hydration & Misting | Ongoing | Keep moisture levels balanced |
| Leaf and Root Emergence | 1-2 Months | Monitor and adjust care |
| Repotting | 2-3 Months | Move to a suitable potting medium |
| Full Recovery | 6-12 Months | Maintain consistent care routine |
By following this expert advice, you can successfully revive an orchid without roots and leaves. With patience, persistence, and proper care, your orchid can return to full health, rewarding you with new growth and even future blooms. Understanding how to save an orchid with no roots will help you become a more confident and skilled orchid grower.
FAQ
How to save an orchid with yellow leaves Can you root an orchid stem in water?
Phalaenopsis orchid care for beginners How to clean orchid roots Orchid with no aerial roots Orchid root rot Sick orchid leaves
How to save an orchid with yellow leaves ?
Yellow leaves on an orchid can be a sign of a few different issues, including overwatering, underwatering, or disease. To save an orchid with yellow leaves, first identify the underlying issue and address it. If the plant is overwatered, reduce watering and allow the soil to dry out between waterings. If the plant is underwater, increase watering and make sure the soil is moist but not waterlogged. If the issue is disease, remove any infected leaves and treat the plant with a fungicide.
Can you root an orchid stem in water?
While it is possible to root some orchid stems in water, it is not recommended as it can lead to the plant developing root rot. It is best to propagate orchids by dividing the plant or by using a rooting hormone and planting the stem directly into the growing medium.
Phalaenopsis orchid care for beginners ?
Phalaenopsis orchids, also known as moth orchids, are a popular type of orchid for beginners due to their ease of care. They prefer bright, indirect light and should be watered when the top inch of the soil is dry. It is also important to fertilise the plant regularly and to avoid exposing it to extreme temperatures or drafts
How to clean orchid roots ?
To clean orchid roots, first remove the plant from its pot and gently shake off any loose soil. Next, use a soft-bristled brush or toothbrush to gently scrub the roots and remove any old, dead roots. Avoid breaking or damaging healthy roots.
Orchid with no aerial roots ?
If your orchid has no aerial roots, it may be a sign that the plant is not getting enough moisture or nutrients. You can try misting the plant regularly or increasing the frequency of watering to see if this encourages the growth of new aerial roots.
Orchid root rot ?
Orchid root rot is a fungal disease that can be caused by overwatering or poorly draining soil. To prevent root rot, make sure your orchid is planted in a well-draining growing medium and avoid overwatering. If your orchid has root rot, remove any infected roots and repot the plant in fresh
Can an orchid survive without roots?
Yes, an orchid can survive without roots if given the right care. Learning how to save an orchid with no roots involves using a humid recovery setup, applying rooting hormones, and providing indirect light to encourage new growth.
How do I encourage my orchid to grow new roots?
To understand how to save an orchid with no roots, trim off dead tissue, apply a rooting hormone like seaweed extract, and place the orchid in a high-humidity environment such as a sphag-and-bag setup to stimulate root growth.
How often should I mist an orchid with no roots?
If you’re learning how to save an orchid with no roots, mist lightly once or twice a day to maintain humidity, but avoid overwatering, which can lead to rot. Proper airflow is essential to prevent mold growth.
Should I fertilize an orchid without roots?
No, avoid fertilizing until new roots begin to grow. A crucial step in how to save an orchid with no roots is waiting until roots appear before applying a diluted orchid fertilizer (20-10-10) every two weeks.
What is the best medium for repotting an orchid after root growth?
A key part of how to save an orchid with no roots is repotting in a well-draining mix of bark and sphagnum moss once new roots reach 1-2 inches to provide stability and proper aeration.
How long does it take for an orchid with no roots to recover?
Recovery can take anywhere from a few weeks to several months, depending on the orchid’s health and care routine. Patience and consistency are key when learning how to save an orchid with no roots.
Can I save an orchid with no roots in water?
Yes, water therapy (placing the base in shallow water for a few hours daily) can help hydrate the plant and encourage root regrowth. However, in how to save an orchid with no roots, it’s essential to avoid prolonged soaking to prevent rot.
What temperature is best for reviving an orchid without roots?
A vital part of how to save an orchid with no roots is maintaining a temperature between 70-80°F (21-27°C) with indirect light to create optimal conditions for recovery and new root formation.


