
- 1 Understanding the Issue: When Orchids Lose Their Leaves
- 2 The Natural Leaf Cycle of Healthy Orchids
- 3 Environmental Factors Causing Orchid’s Leaf Drop
- 4 Watering Mistakes That Lead to Leaf Loss
- 5 Nutrient Deficiencies and Fertilization Problems
- 6 Potting Issues Contributing to Orchid Stress
- 7 Common Diseases Causing Orchid’s Leaf Drop
- 8 Pest Infestations and Their Impact
- 9 Rescue Strategies for Severely Affected Plants
- 10 Preventive Care to Avoid Future Leaf Drop
- 11 Species-Specific Considerations for Leaf Health
- 12 Maintaining Vibrant, Healthy Orchid Foliage
Orchid’s leaf drop is a common issue that can leave growers feeling frustrated and uncertain about their plant’s health. When an orchid suddenly starts shedding its leaves, it’s often a sign that something is wrong with its environment or care routine. While some leaf loss is natural, excessive or premature leaf drop usually indicates an underlying problem that needs immediate attention. Understanding the root causes can help you take corrective action before the damage becomes irreversible.
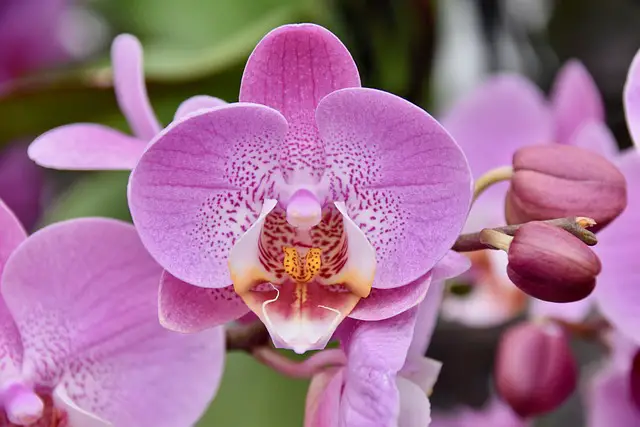
Orchids are known for their resilience and stunning blooms, but their leaves play a crucial role in photosynthesis and overall plant vitality. Healthy leaves store nutrients and water, supporting the orchid through its natural growth cycle. When these leaves begin to yellow, wilt, or drop unexpectedly, it can be a distressing sign that your orchid is struggling. Factors such as improper watering, poor humidity, temperature fluctuations, or even pests can contribute to this problem. Identifying the cause early on is the key to restoring your orchid’s health.
In this guide, we will explore the 12 most common causes of orchid leaf drop and provide proven solutions to help you revive and maintain your plant. Whether you’re a beginner or an experienced grower, these expert tips will ensure your orchids remain vibrant, healthy, and flourishing all year round.

Orchid leaf drop can be natural or a sign of care issues.
Common causes include improper watering, temperature swings, or pests.
Early action stops minor leaf loss from becoming severe.
Proven fixes address root rot, humidity needs, and light exposure.
Prevent future problems by learning why orchids drop leaves and how to adapt care routines.
Understanding the Issue: When Orchids Lose Their Leaves
Orchids shed leaves as part of their growth cycle. It’s important to know the difference between normal and unhealthy leaf loss. This helps in taking proper care of your orchid.
Normal vs. Problematic Leaf Shedding
| Normal Leaf Drop | Problematic Leaf Drop |
|---|---|
| Old leaves yellowing at tips, falling gradually | Multiple leaves dropping at once |
| Occurs once yearly during dormancy | Leaves turn black or brown before falling |
How to Identify Concerning Patterns
Look out for these signs of orchid leaf problems:
Yellowing from base to tip
Leaf edges curling inward
Spots or lesions before shedding
The Impact on Overall Plant Health
Leaf loss weakens photosynthesis and slows nutrient absorption. Unhealthy leaf loss can stop flowering and root growth. Watch for new growth to see if your orchid is recovering.

The Natural Leaf Cycle of Healthy Orchids
Knowing how orchid leaves grow and change is crucial. Healthy orchids shed leaves as part of their growth cycle. This lets new leaves get the energy they need. Old leaves turn yellow and fall off, making room for new growth.
Each type of orchid has its own way of growing. Phalaenopsis orchids keep their leaves for 1–2 years before they fall. Dendrobiums shed leaves every year from their mature canes. Cattleya orchids drop leaves with the seasons, showing they’re resting.
“Natural orchid leaf shedding peaks during growth spurts or seasonal transitions,” note horticultural experts. “Old leaves signal their end by turning yellow at the base, contrasting with sudden browning linked to disease.”
Seasons play a big role in when orchids shed leaves. In winter, many orchids slow down and shed more leaves. Healthy orchids drop 1–3 leaves at a time. If many leaves fall quickly and turn brown, it’s a sign of stress, not just natural shedding.
Watching your orchid closely helps you understand its needs. Keep track of when leaves fall and new ones grow. This way, you can make sure your orchid gets the right care at the right time.
Environmental Factors Causing Orchid’s Leaf Drop
Orchids do best in stable environments. But, changes in temperature, light, humidity, and air can harm them. Even small changes can cause stress, like yellow leaves or sudden drop.
Proper air circulation is the number one problem solver for orchid health.FreePlantsCare.com
Temperature Fluctuations and Extremes
Extreme orchid temperature stress happens with sudden cold or heat. Most orchids don’t like temps below 55°F or above 90°F. Use a thermometer to check; tropical types like Phalaenopsis need 60–85°F.
Light Exposure Problems
Wrong orchid light requirements are common issues. Too little light weakens stems, while too much sun burns leaves. A light meter helps: 1,000–3,000 foot-candles are best. Brown tips mean too much sun.
Humidity Concerns
Low humidity for orchids dries out leaves, while too much causes rot. Keep humidity at 50–70% with pebble trays or humidifiers. A hygrometer helps; curled leaves often mean it’s too dry.
Air Quality Issues
Stagnant air traps moisture, leading to mold. Make sure air circulation orchids need by placing them near open windows or using fans. Stay away from cigarette smoke or chemicals, which harm orchids.
Watering Mistakes That Lead to Leaf Loss
Keeping your orchid hydrated is key to its health. Mistakes like too much water or poor water quality can harm it. Knowing how to water your orchid right can prevent problems like overwatered orchid symptoms or underwatered orchid leaves.
Overwatering Damage
Too much water can kill your orchid’s roots, causing rot and starving it of nutrients. Overwatered orchid symptoms include:
Yellowing leaves starting at the base
Black, mushy roots
Soft, translucent leaf edges
Use pots with holes to let water drain. Before watering the soil once more, let it totally dry out.If roots turn silvery-gray, soak the plant briefly.
Underwatering Stress
Not enough water can make your orchid’s leaves wrinkle and get hard. Signs include:
Pseudobulbs shrinking
Leathery texture on older leaves
Leaf edges curling inward
Check the roots weekly to adjust watering. Plump, green roots mean you’re doing well. But if roots are brittle and white, it’s time to act.
Water Quality Considerations
Chemicals in tap water, like chlorine, can harm your orchid’s leaves over time. Poor water quality for orchids shows as:
Brown leaf tips
Stunted new growth
Use filtered or distilled water to improve quality. Let tap water sit for 24 hours to reduce chemicals. Test the pH level monthly to keep it between 5.5–6.5.

Nutrient Deficiencies and Fertilization Problems
Orchids do best when they get the right food. But, orchid nutrient deficiency can cause leaves to drop. A good orchid fertilizer guide helps plants get all the nutrients they need.
Look out for signs like yellow older leaves (nitrogen), purple undersides (phosphorus), or yellow edges (potassium).
Nitrogen deficiency: Older leaves turn yellow from the base.
Phosphorus shortage: Leaves show dark green with purple undersides.

Potassium deficiency: Yellow margins and scorched leaf tips.
Calcium issues: Stunted new growth and distorted leaves.
Too much fertilizer can harm an over-fertilized orchid. It can burn the roots, making leaves wilt. Stick to a orchid feeding schedule—use diluted fertilizer (¼-½ strength) every 2-4 weeks.
Also, flush pots monthly to get rid of salt buildup. Adjust feeding based on growth or dormant phases. Choose fertilizers that match the plant’s needs. Always check the potting media: bark-based mixes dry faster than sphagnum, affecting nutrient absorption.
Orchid Leaf Color Changes: Causes, Solutions, and Timetable
1. Red Leaves:
Cause:
Red or purple tinges on orchid leaves can indicate stress due to environmental factors. It’s commonly seen when orchids are exposed to too much light or temperature changes. However, it could also be due to nutrient deficiencies, particularly a lack of nitrogen or phosphorus.
Solution:
Reduce Light Exposure: Ensure your orchid is not in direct sunlight or too bright a location. Move it to a more shaded area.
Increase Humidity: Ensure the environment is not too dry, as orchids can react to dry air with red-tinted leaves.
Adjust Temperature: Ensure the orchid isn’t exposed to sudden temperature fluctuations. Orchids thrive in a stable temperature range of 65°F to 75°F (18°C to 24°C).
Check Fertilization: Use a balanced, water-soluble orchid fertilizer with adequate nitrogen and phosphorus.
2. Yellow Leaves:
Cause:
Yellowing leaves are often caused by overwatering, poor drainage, or a lack of nutrients, especially nitrogen and potassium. In some cases, it could be a sign of a fungal or bacterial infection.
Solution:
Watering Practices: Ensure the orchid is not overwatered. Let the roots dry out before watering again. Always use a well-draining pot and medium.
Improve Drainage: Check that the pot has proper drainage holes.
Nutrient Balance: Use a balanced fertilizer (with adequate nitrogen) to promote healthy green foliage.
Remove Affected Leaves: If leaves are heavily yellowed, cut them off to prevent disease spread.
3. Purple Leaves:
Cause:
Purple coloration can occur when orchids are exposed to colder temperatures, or it can indicate a phosphorus deficiency. This is a more common issue in Phalaenopsis orchids.
Solution:
Warm Environment: Keep orchids in a warm environment, especially during nighttime. Ensure the room temperature doesn’t drop below 60°F (16°C).
Fertilization: Use a fertilizer that contains higher levels of phosphorus, which helps in root and bloom development.
Light Management: Ensure adequate but not excessive light. Purple leaves can also result from too much direct sunlight.
Timetable for Orchid Care:
| Week | Action | Notes |
|---|---|---|
| Week 1 | Assess Light & Temperature | Adjust light exposure and temperature if needed. |
| Week 2 | Check Watering Schedule | Avoid overwatering. Ensure proper drainage. |
| Week 3 | Fertilize with Balanced Formula | Use a balanced fertilizer to correct deficiencies. |
| Week 4 | Monitor Humidity & Room Environment | Ensure humidity levels (50-70%) are ideal for orchids. |
| Week 5 | Evaluate New Growth | Look for new healthy leaves and roots. If the problem persists, reassess nutrients or environmental factors. |
| Week 6 | Check for Signs of Disease or Infection | Remove any infected leaves and treat the plant as needed. |
Additional Tips:
Repot if Necessary: If the orchid is showing signs of nutrient lockout (yellow or red leaves), it may need a fresh growing medium. Repot with fresh, well-draining orchid mix.
Maintain Consistency: Orchids like a stable environment. Avoid drastic changes in temperature, humidity, and light exposure.
This structure should help guide you through understanding and solving orchid leaf color changes while staying on top of regular care!
Potting Issues Contributing to Orchid Stress
Choosing the right potting media and repotting techniques is key to prevent stress. The wrong materials or poor root care can harm your orchid. This can lead to a lack of oxygen or moisture, causing it to decline.
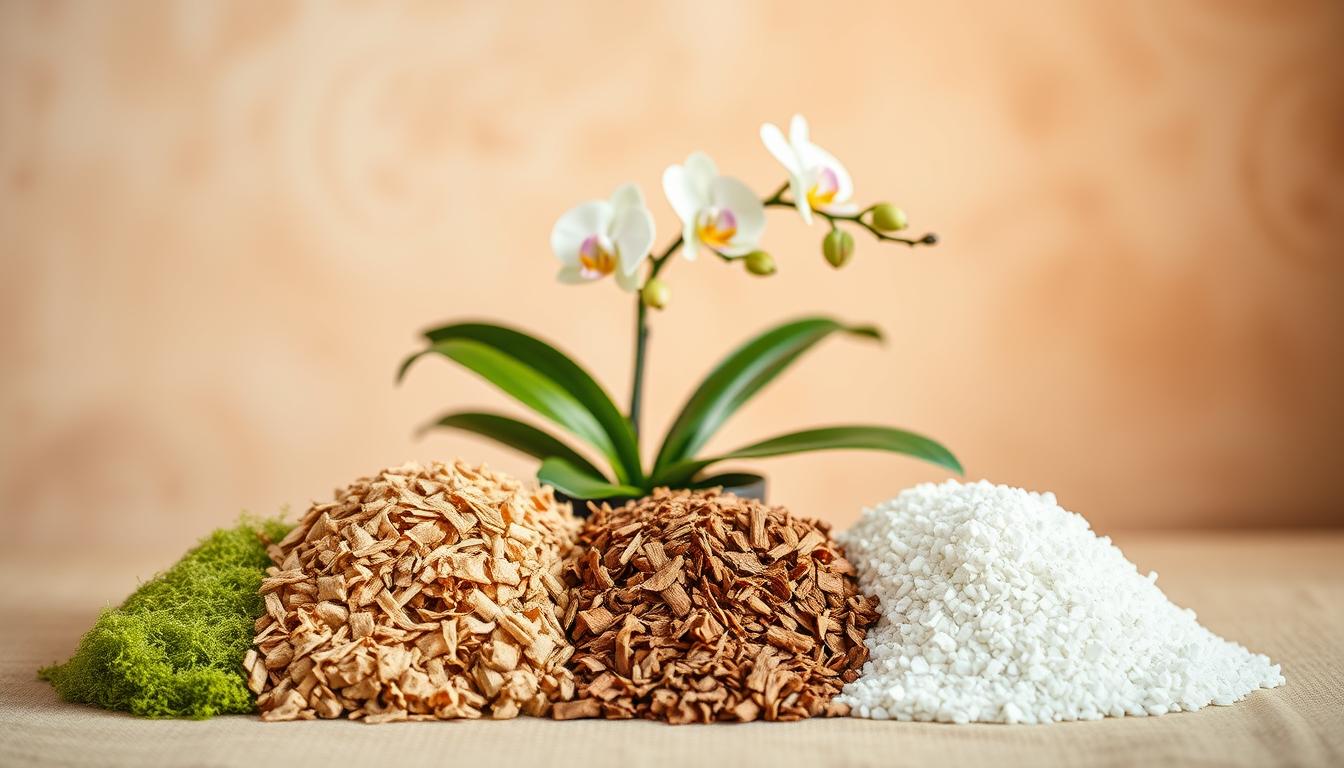
Wrong Potting Medium
Orchids do best inorchid potting mediathat matches their natural environment. Terrestrial orchids need mixes that hold moisture well. On the other hand, epiphytic types like Phalaenopsis prefer bark-basedbest potting mix for orchids.
Using garden soil can cause rot, while dry media can dehydrate your orchid.
Epiphytes: Fir bark or tree fern fibers
Terrestrials: Sphagnum moss blends with perlite
Semi-epiphytes: Coconut husk chips
Repotting Shock
Repotting can causeorchid repotting stressif done too roughly. Look out for sudden yellowing or leaf drop. To avoid this, repot when your orchid is most energetic, after it has bloomed.
Choose pots that are only 1-2″ wider than the current one. Trim any damaged roots before planting. After repotting, keep your orchid in a shaded area and water less for 2-3 weeks.
Root Compression
Compacted orchid rootscan be a problem when they’re too crowded. Look for roots that are escaping through drainage holes or forming dense mats. Repotting every 1-3 years into the right-sized container helps prevent this.
Signs of overcrowding include:
Roots circling pot interior
Slow new growth
Yellowed lower leaves
Make sure your pots have enough drainage holes. This allows for airflow and helps prevent moisture buildup.
Common Diseases Causing Orchid’s Leaf Drop
Orchid leaf diseases can cause serious damage quickly. Bacterial infections, fungal growths, and viruses are major threats. Acting fast can prevent major leaf loss and plant decline.
Bacterial Infections
Orchid bacterial infection starts with water-soaked spots that turn brown or black, edged in yellow. Bacteria like Erwinia and Pseudomonas thrive in wet conditions. Spread occurs through splashing water or unsanitized tools. Action steps:
Remove infected leaves immediately
Apply copper-based bactericides
Disinfect tools with 10% bleach solution
Fungal Problems
Orchid fungal problems include black rot (Pythium), anthracnose, and leaf spots. Overly humid environments and poor airflow worsen these issues. Symptoms range from dark lesions to leaf shriveling. Control measures:
Trim infected areas and dispose of debris
Use fungicides like thiophanate-methyl
Improve air circulation and reduce humidity spikes
Viral Diseases
Orchid virus symptoms appear as mosaic patterns, color breaks, or stunted growth. Unlike bacterial or fungal issues, viruses permanently damage plants. Infected plants must be isolated or destroyed. Prevention tips:
Disinfect tools before each cut
Quarantine new plants for 2 weeks
Avoid reusing pots without sterilization
Pest Infestations and Their Impact
Orchid pests like scale insects, spider mites, and mealybugs can really hurt orchids, causing leaves to drop. These pests hide in secret spots, sucking sap and spreading diseases. It’s very important to catch them early to avoid serious damage.
Scale on orchids look like small brown bumps, often found in clusters on stems. Spider mites leave faint webs and cause leaves to look stippled. Mealybugs form cotton-like colonies in leaf joints. Aphids and thrips also threaten by eating tender growth.
Scale: Sapsuckers that block nutrient flow, causing yellowing and leaf drop.
Spider mites: Tiny pests that distort leaves with yellowing spots before defoliation.
Mealybugs: Spread fungal infections while feeding; requires thorough mealybugs orchid treatment.
Regular checks help find pests early. Isolate plants with problems and cut off infested parts. For mealybugs, dab alcohol on the colonies. Use insecticidal soap or neem oil for scale and spider mites. Severe cases might need horticultural oils. Keep new plants isolated and maintain humidity to fight spider mites.
Keep a close eye on your plants to stop pests from getting worse. Act fast to save your orchids and prevent them from getting sick.
Rescue Strategies for Severely Affected Plants
When orchids lose their leaves, quick action is crucial. Follow these orchid rehabilitation steps to help them survive:
Emergency Assessment: Check the roots and stems. Use clean shears to cut off any rotting roots.Clean the cuts with a 1:10 bleach solution.
Stabilize Environment: Move the plant to a shaded, well-ventilated spot. Mist it every day to keep humidity at 60-70%. Keep it away from direct sunlight for two weeks.
Nutrient Support: Start using a weak orchid fertilizer (1/4 strength) every three weeks. Wait until new roots start growing.
| Condition | Timeline | Key Signs |
|---|---|---|
| Mild stress (some roots intact) | 3-6 months | New roots emerge within 4-6 weeks |
| Severe damage (no green roots) | 6-12+ months | Bud formation on pseudobulbs indicates recovery |
For revive dropped leaves orchid efforts, patience is essential. Slowly return to normal care after four weeks of steady growth. If no new growth shows after two months, think about propagation:
Find sections with plump pseudobulbs or keikis (baby plants)
Cut 3-inch stem segments with at least 2 nodes
Plant in sphagnum moss with 50% humidity, mist daily
Some plants might not recover. Focus on caring for new sections—this turns loss into a chance to learn. Even save dying orchid efforts take time, but with consistent care, success rates improve. Monitor progress weekly and adjust your approach as needed.
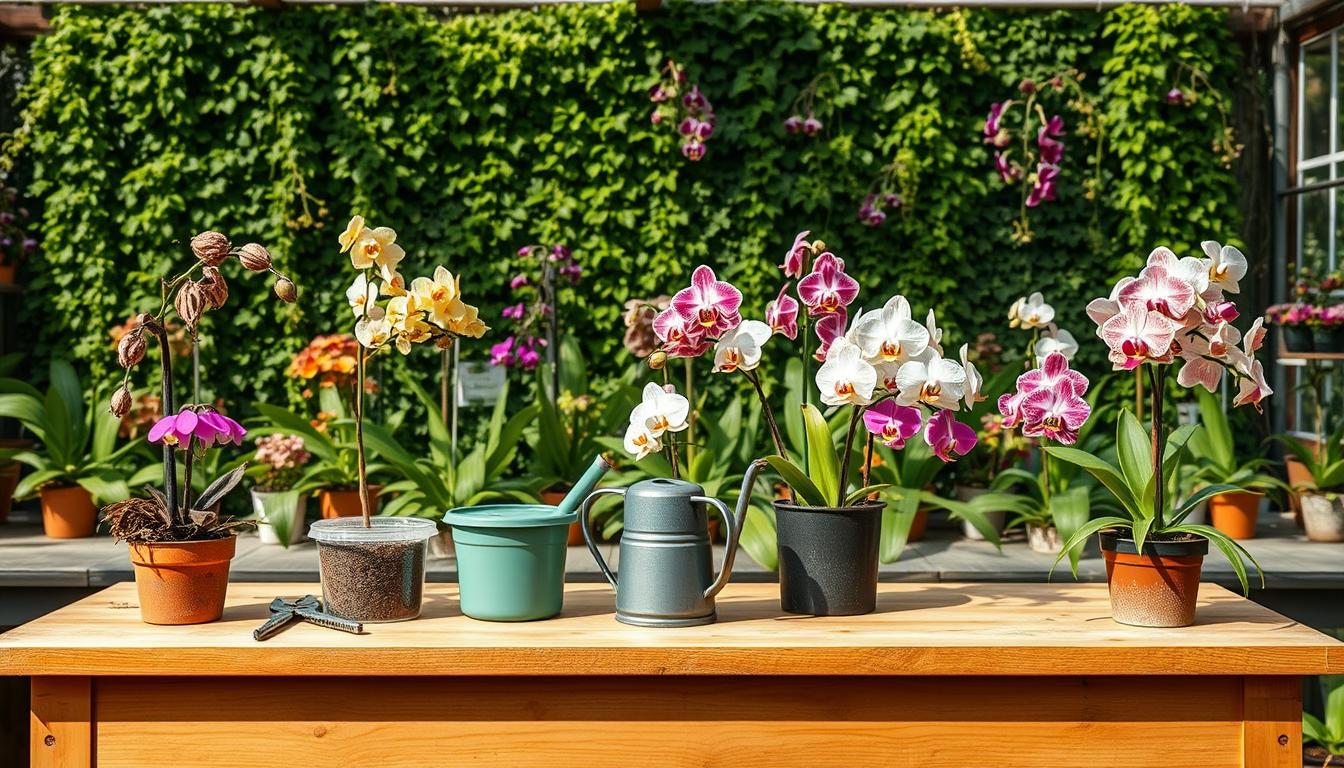
Preventive Care to Avoid Future Leaf Drop
Start with . Watch for health signs. Follow a orchid care schedule to keep leaves healthy all year.
A little care now saves your orchid from big problems later. FreePlantsCare.com
Seasonal Maintenance Routines
Change your care with the orchid care schedule below:
| Season | Key Tasks |
|---|---|
| Spring | Increase watering frequency, repot if media breaks down |
| Summer | Adjust humidity to 60-70%, shade from intense sun |
| Fall | Reduce fertilizer use, check for pest buildup |
| Winter | Cut back watering, maintain 55-65°F (13-18°C) temps |
Early Warning Signs to Watch For
Spot issues early with these orchid leaf health tips:
Yellowing leaf bases
Leathery texture loss
Sticky residues (pest signs)
Soft, translucent roots
Use this troubleshooting guide:
| Sign | Possible Cause | Action |
|---|---|---|
| Brown leaf tips | Low humidity | Use pebble trays |
| Translucent spots | Overwatering | Adjust watering frequency |
| Wilting new growth | Poor drainage | Repot with fresh medium |
Species-Specific Considerations for Leaf Health
Orchids come in many shapes and sizes, each with its own care needs. By tailoring care to each type, you can help them grow their best. Here’s a quick guide to some of the most common types:
Phalaenopsis leaf care: These orchids have wide, water-storing leaves. Water them at the roots, not the leaves, to prevent crown rot. If the leaves turn yellow in the middle, it’s a sign of too much water.
Dendrobium leaf drop: Some Dendrobiums shed leaves when they’re dormant. Others might drop leaves if they’re stressed, like from very hot or cold temperatures. Water them less during these times.
Oncidium orchid leaves: Oncidium leaves are long and thin. They wrinkle if they’re not getting enough water. Mist them often to keep them from getting pleated. They also need medium light to avoid getting sunburned.
Cattleya leaf problems: Cattleya leaves are thick and can get brown spots from too much fertilizer. To prevent this, rinse your pots with water every month to get rid of fertilizer salts.
Monopodial orchids like Phalaenopsis grow up and naturally shed lower leaves. Sympodial types, like Cattleya, grow sideways and shed leaves yearly. Paphiopedilum likes indirect light, while Vanda needs lots of humidity and water.
Adjust how you prune and where you place your orchids based on their growth patterns. This helps avoid stressing them out.
Maintaining Vibrant, Healthy Orchid Foliage
To keep orchid leaves healthy, you need to balance care. Watering, light, and humidity are key. Also, check for pests and adjust care to keep leaves green for a long time.
When leaves drop, it’s a sign you need to change something. Improve air flow or repot to prevent damage. Following these steps keeps your orchid strong and healthy.
When you take good care of your orchid, it will reward you with beautiful leaves. This effort is worth it. It turns problems into chances for your orchid to grow and thrive.
FAQS
What causes Orchid’s Leaf Drop?
Orchid’s Leaf Drop can be caused by overwatering, underwatering, low humidity, temperature stress, or pests like spider mites and scale insects.
How can I prevent Orchid’s Leaf Drop?
To prevent Orchid’s Leaf Drop, maintain proper watering habits, keep humidity levels between 50-70%, and provide consistent temperatures without sudden fluctuations.
Is Orchid’s Leaf Drop normal?
Some Orchid’s Leaf Drop is normal as older leaves naturally shed. However, excessive or sudden leaf loss may indicate a problem that needs attention.
Can repotting cause Orchid’s Leaf Drop?
Yes, repotting can sometimes lead to Orchid’s Leaf Drop due to transplant shock. Minimize stress by using fresh, well-draining orchid mix and watering appropriately.
Does overwatering lead to Orchid’s Leaf Drop?
Yes, overwatering is one of the main causes of Orchid’s Leaf Drop. Too much moisture can cause root rot, leading to weak and dropping leaves.
How does underwatering affect Orchid’s Leaf Drop?
Underwatering can dry out the roots, preventing the orchid from absorbing nutrients and water properly, which often results in Orchid’s Leaf Drop
Can pests cause Orchid’s Leaf Drop?
Absolutely! Pests like mealybugs, aphids, and spider mites can damage leaves and weaken the plant, contributing to Orchid’s Leaf Drop
Will a sudden temperature change lead to Orchid’s Leaf Drop?
Yes, orchids are sensitive to sudden temperature shifts, which can cause Orchid’s Leaf Drop. Keep them in stable conditions with moderate warmth.
Can low humidity trigger Orchid’s Leaf Drop?
Yes, orchids need humidity levels around 50-70%. If the air is too dry, their leaves may dry out and fall, leading to Orchid’s Leaf Drop.
How can I revive an orchid suffering from Orchid’s Leaf Drop?
To revive an orchid experiencing Orchid’s Leaf Drop, adjust its watering, increase humidity, provide indirect light, and check for pests or diseases
Does fertilizing help prevent Orchid’s Leaf Drop?
Yes, a balanced orchid fertilizer can strengthen leaves and roots, reducing the chances of Orchid’s Leaf Drop due to nutrient deficiencies.
Should I cut off leaves after Orchid’s Leaf Drop?
Only remove completely dead or yellowed leaves after Orchid’s Leaf Drop. Avoid cutting healthy parts to prevent further stress to the plant.
Can fungal infections cause Orchid’s Leaf Drop?
Yes, fungal infections like black rot and leaf spot can damage foliage and contribute to Orchid’s Leaf Drop if not treated promptly.
How do I know if my orchid will recover from Orchid’s Leaf Drop?
If healthy roots and new growth are present, your orchid can recover from Orchid’s Leaf Drop with proper care and environmental adjustments.
Is there a specific orchid type more prone to Orchid’s Leaf Drop?
Some orchid species, like Phalaenopsis and Dendrobium, are more sensitive to care mistakes, making them prone to Orchid’s Leaf Drop if not maintained properly.


