Feel free to share!
Table of Contents 👈 Tap Here
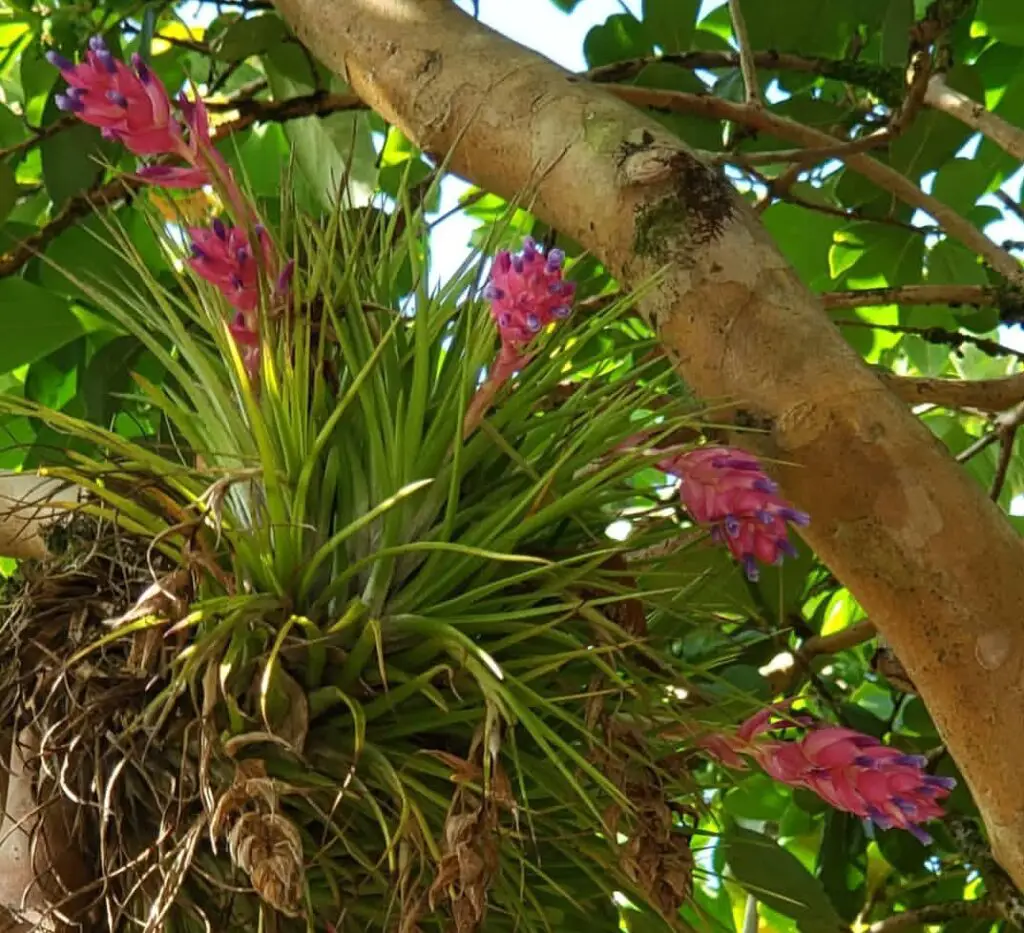
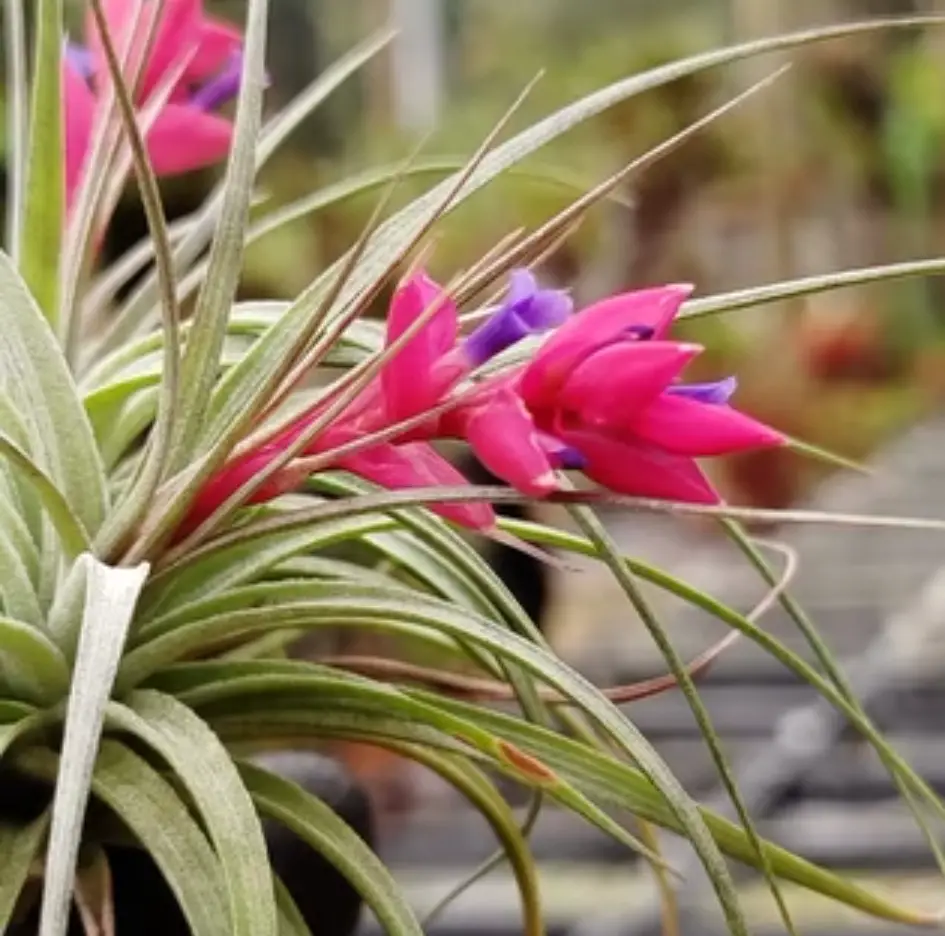
Tillandsia Stricta, a striking air plant with soft, silvery-green leaves and a beautiful bloom cycle, is popular among plant lovers for its low-maintenance charm. But even hardy plants like this can face occasional problems that frustrate beginners and even experienced collectors. From browning leaves to failed blooms, many issues have simple solutions—if you catch them early. In this guide, we cover the 20 most common problems Tillandsia Stricta owners face and provide expert-approved fixes to help your plant flourish in any environment.
Whether you’re just starting your air plant journey or you’ve been growing them for years, this article will give you the confidence and knowledge to identify problems fast and keep your Tillandsia Stricta healthy all year round.

Leaves Turning Brown
When your Tillandsia Stricta develops brown leaves, it’s often a sign that the plant is experiencing dehydration or excessive sun exposure. The plant’s soft, silvery trichomes are sensitive and can dry out if not given enough moisture, especially in dry climates or during hot weather.
Fix: Soak your plant in clean, room-temperature water for about 20 to 30 minutes once a week. If your home is especially dry, increase the frequency slightly. After watering, make sure the plant dries completely within 4 hours to avoid rot. Place it in an area with bright, indirect sunlight, like near an east-facing window, to prevent further browning.
Leaf Tips Drying Out
If you notice the tips of the leaves becoming crispy and brown, it typically means your air plant is suffering from low humidity levels. This is especially common during the winter when indoor heating dries out the air.
Fix: Misting the plant 2 to 3 times per week helps maintain adequate moisture in low-humidity conditions. You can also group air plants together or use a humidity tray nearby. Just remember to let the plant dry fully between waterings to avoid rot while keeping the air moist.
Fungal Spots on Leaves
Black or brown specks or patches on the leaves are often signs of a fungal infection, which is typically caused by poor air circulation and excess moisture. These infections can spread quickly if not addressed.
Fix: Improve airflow around the plant by placing it in a breezy spot or using a fan. Water your plant early in the day so it has time to dry completely by nightfall. If spots persist, use a diluted fungicide or trim off infected leaves using sterile scissors to stop the spread.
Rotting Base or Crown
One of the most serious issues for air plants is rot, which usually begins at the base or crown. It happens when the plant stays wet for too long, allowing bacteria or fungus to invade.
Fix: Remove the plant from its display and inspect the base. If it feels mushy or discolored, use sterile scissors to cut away the soft tissue until only firm, healthy material remains. Let the plant dry upside down for a day before resuming light misting. Moving forward, always dry the plant completely within 3–4 hours after soaking.
Leaves Curling Inward
When a Tillandsia’s leaves begin curling or rolling inward, it’s typically a response to underwatering. This curling is a survival mechanism, reducing the surface area exposed to air and preserving internal moisture.
Fix: Rehydrate the plant with a longer soak—up to an hour—and continue with regular weekly waterings. If your area has low humidity, consider misting between soaks. Also, check that your water is chlorine-free, as chemicals in tap water can worsen dehydration symptoms.
Leaves Turning Pale or Yellow
If your plant’s vibrant green or silvery leaves start fading to a pale or yellow tone, this could be a result of too much direct sunlight or lack of nutrients. Excessive sun can bleach the trichomes, while nutrient deficiencies may reduce chlorophyll levels.
Fix: Keep the plant out of direct sunlight, particularly during the middle of the day. The best location is one that has some shade or filtered light. To replenish nutrients during the growing season, apply a diluted fertiliser that is safe for bromeliads once a month.
No Growth Over Time
If your Tillandsia Stricta hasn’t grown or changed for months, it might not be getting enough light or nutrients. Air plants are slow growers, but they should still show new leaf tips or base expansion over time.
Fix: Relocate the plant to a brighter area that gets natural but indirect light. Supplement its diet with a monthly spray of diluted fertilizer. Avoid over-fertilizing, as this can damage the plant’s delicate tissues.
Plant Falling Apart or Splitting
A healthy Tillandsia should feel firm and cohesive. If it begins to fall apart into pieces or leaves detach easily, you may be dealing with advanced rot or physical damage.
Fix: Separate the healthy parts from any soft, mushy sections.On a mesh surface or inverted, let them completely dry.If rot is the cause, reduce watering and increase air movement. Damaged but intact sections can sometimes regrow with proper care.
Plant Not Blooming
Tillandsia Stricta typically blooms once in its lifetime, producing beautiful pink or purple flowers. However, if your plant is mature and still hasn’t bloomed, the issue could be environmental stress or insufficient care.
Fix: Provide consistent light, humidity, and monthly feeding. You can also stimulate blooming by placing the plant in a closed paper bag with a ripe apple or banana for a few days. These fruits release ethylene gas, which helps trigger flowering in mature air plants.
Brown or Black Leaf Tips After Misting
Chemical buildup from hard tap water can cause discoloration on your Tillandsia’s leaf tips after misting or soaking.
Fix: Switch to filtered, rainwater, or aquarium water. Long-term avoid distilled water since it is deficient in vital minerals.Rinse your plant thoroughly once a month to remove any mineral residue and keep the trichomes healthy.
Soft or Limp Leaves
Soft, floppy leaves usually indicate either overwatering or severe dehydration. It’s important to identify which one is the cause before proceeding.
Fix: Feel the base—if it’s mushy, it’s likely rot. Cut off the affected part and reduce watering. If it’s dry and wrinkled, soak the plant for up to an hour and resume regular care. Always let it dry completely afterward.
Red Leaves with No Bloom
When Tillandsia Stricta is ready to bloom, it frequently becomes crimson.However, if the color change happens without flowers, it could be a stress response.
Fix: Evaluate recent changes in care—did the plant receive too much sun, too little water, or a sudden temperature shift? Move it to a shadier, more stable location and maintain consistent moisture and feeding.
Pest Infestation (Mealybugs, Spider Mites)
Small insects like mealybugs or spider mites may attack air plants, especially if other houseplants are nearby. You may notice a sticky substance, fine webbing, or yellow spots.
Fix: Isolate the affected plant and spray with a diluted neem oil solution. Let it sit for an hour, then rinse thoroughly with water. Repeat weekly until pests disappear. Steer clear of harsh chemicals that could damage the surface of the plant.
White Fuzz on Leaves
Air plants have a natural layer of white fuzz—these are called trichomes, and they help the plant absorb moisture and nutrients. However, some plant owners mistake them for mold or pests.
Fix: If the fuzz is dry, doesn’t move, and appears evenly distributed, it’s just the plant’s natural armor. Don’t scrub or wipe it off. But if the white layer appears wet or patchy, inspect closely for mealybugs.
Roots Growing from the Base
Seeing roots form on your air plant may seem strange, but it’s completely normal. These are anchor roots, not nutrient-absorbing ones.
Fix: You can leave them as-is, especially if you plan to mount the plant. If you prefer a cleaner look, trim the roots with sterile scissors—they won’t harm the plant’s health.
No Pups Forming
Air plants naturally reproduce by growing pups (offsets) at the base after blooming. If you haven’t seen pups, your plant may not be mature enough or may lack proper growing conditions.
Fix: Make sure it gets monthly nutrients, frequent hydration, and plenty bright light.After the plant blooms and finishes its life cycle, pups may appear slowly over the next few months.
Pups Dying After Separatio
Separating pups too early or providing poor post-separation care can lead to wilting or death.
Fix: Wait until the pup is at least one-third the size of the mother before separating. Let any cut edges dry for 24 hours. Keep the young pup in a warm, bright, and humid environment to encourage recovery and growth.
Air Plant Keeps Falling from Display
Many air plant owners enjoy creative displays, but if the plant keeps slipping off its mount, it could be due to weak adhesives or an awkward shape.
Fix: Use non-toxic glue (like E6000 or aquarium-safe silicone) or secure with soft wire.Steer clear of hot glue as it can harm fragile leaf bases. Ensure airflow isn’t blocked by the display.
Dust Build-Up on Leaves
Your air plant’s capacity to absorb moisture and nutrients may be diminished if dust clogs the trichomes.
Fix: Rinse the plant gently under lukewarm water once a month to keep it clean. You can also gently shake the plant or use a soft paintbrush to remove debris between soakings.
Wilting After Shipping or Purchase
It’s common for new Tillandsias to appear limp or discolored after travel. They may have been kept in dry, dark conditions for days.
Fix: When you first arrive, soak your new air plant for half an hour. Allow it to dry entirely upside down and give it a few days to wake up. Don’t fertilise until it stabilises and starts growing again.
Final Tips for Tillandsia Stricta Success
Light: Bright, filtered light is essential. Avoid hot, direct sun.
Water: Soak weekly, mist as needed. Always allow to dry fully.
Airflow: Make sure there is enough fresh air for your plant.
Fertilizer: Every month, apply a ¼-strength diluted fertiliser that is safe for bromeliads.
Temperature:Avoid exposure to frost; the ideal temperature range is 15°C to 30°C (59°F to 86°F).
With a little attention and the right knowledge, Tillandsia Stricta is one of the most rewarding air plants you can grow. By catching issues early and applying these expert solutions, you can enjoy a thriving plant that not only looks stunning but also rewards you with blooms and pups over time.
