Swallowtail Butterfly Plants Care Guide: How to Grow Christia obcordata Indoors
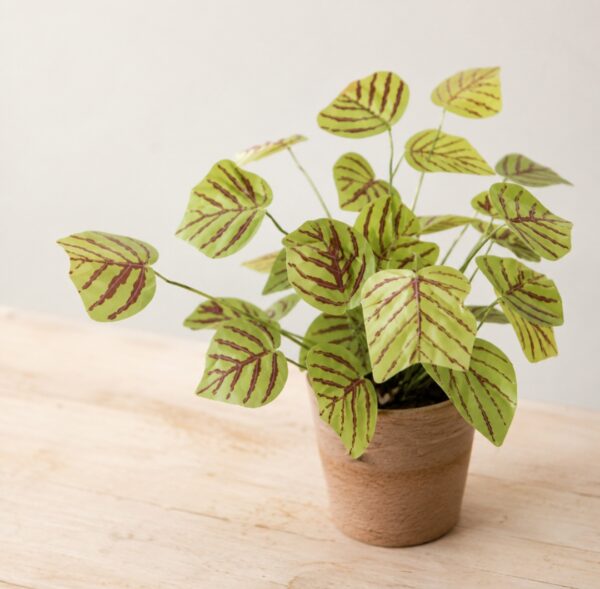
If you’ve ever seen a Christia obcordata in person, you understand the obsession. The triangular leaves — banded with deep maroon stripes on a pale green base — genuinely look like a row of resting butterflies. And when evening falls, those leaves fold shut on their own. It’s one of the few houseplants that moves with a rhythm you can actually observe day to day.
Table of Contents 👈 Tap Here
But here’s the catch: most people struggle to keep it alive past the first season. Not because it’s finicky in some mysterious way, but because a few specific needs — humidity, soil drainage, and light — have to be right simultaneously. Get those three right, and this plant is remarkably easy. Get even one wrong, and the leaves will droop, yellow, or drop before you figure out why.
This guide covers everything you need for long-term success with Christia obcordata, from the right potting mix to propagation, troubleshooting, and seasonal adjustments.
Swallowtail Butterfly Plants
What Is Christia obcordata?
Christia obcordata is a tropical perennial in the legume family (Fabaceae), native to Southeast Asia — particularly India, Sri Lanka, and parts of China. It goes by several common names: swallowtail butterfly plant, butterfly wing plant, and butterfly leaf plant.
What makes it genuinely unusual among houseplants is nyctinasty — the leaves fold downward along their midrib at night and reopen by morning. This is a light-triggered movement driven by changes in turgor pressure inside the leaf cells, the same mechanism legumes like Mimosa use. You don’t need to do anything to trigger it; it happens automatically in response to your room’s light cycle.
The plant stays relatively compact — typically 30 to 60 cm (12–24 inches) tall indoors — and produces small, insignificant pale flowers. The foliage is the entire show.
Light Requirements
Christia obcordata needs bright, indirect light for at least 4–6 hours per day. This is the single most important variable for keeping the leaf markings bold and the plant growing steadily.
In practice, the best positions indoors are:
- East-facing window — morning sun is gentle enough to be direct without scorching; this is the ideal spot
- North-facing window with a supplemental grow light — workable if you add 6–8 hours of LED light daily
- A metre back from a south or west-facing window — the light is bright but diffused enough to avoid leaf scorch
What happens when light is wrong:
- Too little light → leaves fade to pale green, markings disappear, stems become leggy, plant stops moving (no leaf-folding)
- Too much direct sun → white or brown scorch patches appear on the leaf surface, usually within 2–3 days of moving the plant
If you’ve lost the deep maroon banding on your plant’s leaves, move it somewhere brighter before anything else. Light is almost always the cause.
Watering: The Most Common Mistake
Most Christia obcordata problems come down to incorrect watering — but the mistake isn’t always overwatering. Both under- and over-watering produce similar symptoms (drooping, yellowing), which causes people to misdiagnose and make the problem worse.
The correct approach: Water when the top 2–3 cm (about 1 inch) of soil feels dry to the touch. The soil should feel lightly moist through most of the pot, but never waterlogged or bone dry.
A few practical habits that prevent problems:
- Always use a pot with drainage holes. There is no workaround for this — standing water at the base of the pot will rot the roots within weeks.
- After watering, let excess water drain fully before putting the pot back on a saucer.
- In summer, this may mean watering every 3–5 days. In winter, it may stretch to 10–14 days.
- Lift the pot. A pot that feels light is usually ready to water; one that feels heavy still has moisture in the soil.
Water quality matters more than most guides admit. Christia obcordata is sensitive to fluoride and chlorine. If your tap water is heavily treated, use filtered water or leave tap water in an open container overnight before using it. Brown leaf tips on otherwise healthy leaves are often a water quality issue, not a humidity problem.
Humidity: Why This Plant Dries Out Indoors
Christia obcordata comes from humid tropical environments and prefers relative humidity of 50–70%. Most indoor environments — especially in air-conditioned or centrally heated spaces — sit at 30–40%, which is too dry for this plant.
Signs of low humidity: brown, crispy leaf edges, curling leaves, and accelerated soil drying.
Practical ways to raise humidity:
- Pebble tray — place a shallow tray filled with pebbles and water beneath the pot. As water evaporates, it raises local humidity. Keep the pot above the waterline.
- Group your plants — clustering tropical plants together creates a microclimate with naturally higher humidity.
- Small humidifier — if you have multiple humidity-loving plants, a room humidifier (running a few hours a day) is the most effective solution.
- Misting — light leaf misting works temporarily, but avoid wetting leaves heavily, as prolonged moisture on the leaf surface can invite fungal issues.
Avoid placing the plant near air vents, radiators, or fans, as moving dry air will stress it rapidly.
Soil Mix and Drainage
Standard potting soil used straight from the bag is too dense for Christia obcordata. It retains too much moisture and compacts over time, cutting off the oxygen roots need.
A reliable DIY mix:
- 50% standard potting soil
- 30% perlite
- 20% coco coir
This combination holds enough moisture to keep roots hydrated between waterings while draining excess water quickly. The coco coir improves structure and resists compaction over time.
If you don’t want to mix your own, an aroid mix or a mix labelled for tropical houseplants (often sold for Calathea or Philodendron) will work well.
What to avoid: dense potting mixes with a lot of peat or bark, which stay wet too long; garden soil, which compacts heavily in containers; and soilless mixes with no structure, which drain too fast.
Temperature
Christia obcordata thrives in temperatures between 18°C and 30°C (65°F–86°F). It is not frost tolerant. Temperatures below 13°C (55°F) cause growth to stop and can damage or kill the plant.
Keep it away from:
- Air conditioning vents (cold drafts stress it quickly)
- Open windows in winter
- Windowsills where temperatures drop significantly at night in cold climates
In India and other tropical climates, this plant can be grown outdoors year-round in partial shade. In temperate climates, it must come indoors before autumn.
Fertilising
During the active growing season (spring and summer), feed with a balanced liquid fertiliser — something with roughly equal NPK ratios, such as 10-10-10 or 20-20-20 diluted to half strength. Apply once every 3–4 weeks.
Do not fertilise in winter when growth slows. Feeding a dormant plant causes salt buildup in the soil, which can burn roots and cause leaf tip browning.
One practical tip: flush the soil thoroughly with plain water every 2–3 months to wash out accumulated fertiliser salts. Run water through the pot until it drains freely, then let it drain fully before returning to your normal watering schedule.
Repotting
Repot when you see roots growing out of the drainage holes or circling the top of the soil — usually every 1–2 years.
Move up only one pot size (typically 2–5 cm / 1–2 inches larger in diameter). A pot that’s too large holds excess moisture the roots can’t use, increasing rot risk.
The best time to repot is early spring, just as new growth begins. Use fresh potting mix — old mix compacts over time and loses drainage capacity
After repotting, water the plant thoroughly and move it to a slightly shadier spot for 1–2 weeks while it recovers. Some leaf drooping immediately after repotting is normal and will resolve on its own.
Pruning
Christia obcordata doesn’t require heavy pruning. Trim leggy or damaged stems back to just above a leaf node using clean scissors or pruning shears. This encourages branching and produces a fuller, bushier plant over time.
Remove dead or yellowed leaves at the base as they appear — this is mostly cosmetic, but it also improves airflow and reduces the chance of fungal issues settling on decaying material.
Avoid cutting back more than one-third of the plant at once.
Propagation
From stem cuttings (easiest method)
- Take a cutting 8–12 cm long with at least two nodes.
- Remove the lower leaves, leaving one or two at the top.
- Dip the cut end in rooting hormone powder (optional but speeds things up).
- Place in a jar of water or push into a small pot of damp perlite or coco coir.
- Keep in bright indirect light at 22–28°C. Change the water weekly if water-propagating.
- Roots appear in 3–5 weeks. Once roots are 3–4 cm long, pot up into the standard mix.
From seeds
Sow seeds shallowly (about 3–5 mm deep) in warm, moist seed compost. Cover the tray with a clear plastic lid or plastic wrap to maintain humidity. Keep at 24–28°C in bright indirect light. Germination typically takes 2–3 weeks. Remove the cover once seedlings are visible to prevent damping off.
Common Problems and How to Fix Them
Leaves drooping
The most common cause is underwatering, but overwatering (root rot) produces the same symptom. Check the soil: if it’s bone dry, water immediately; if it’s wet and the pot smells musty, the roots may be rotting. Unpot the plant, trim any black or mushy roots, let them dry slightly, and repot in fresh mix.
Other causes: sudden temperature drop, root disturbance, or moving the plant to a new location.
Leaves losing their markings / turning plain green
Almost always a light problem. Move the plant to a brighter position. The maroon banding is pigment produced in response to sufficient light — without it, the plant reverts to plain green.
Brown leaf tips or edges
Could be low humidity, fluoride/chlorine sensitivity in tap water, or fertiliser salt buildup. Check each one systematically: switch to filtered water, flush the soil, and raise humidity.
Yellowing leaves
Natural if it’s one or two old leaves at the base — the plant sheds old growth. If widespread yellowing is occurring, the cause is usually overwatering, poor drainage, or too little light.
Leaves not folding at night
The nyctinastic movement stops or slows in very low light conditions. If your plant’s leaves have stopped folding, it’s a sign the plant isn’t getting enough light during the day to drive the movement.
Pests
Christia obcordata is generally pest-resistant in healthy conditions, but watch for:
- Spider mites — stippled surface, thin webbing on the undersides of leaves. Raise the humidity and use a moist cloth to clean the leaves. If an infestation is persistent, treat it using neem oil spray.
- Aphids —tiny insect clusters on fresh growth. Use a powerful water jet to get rid of them, and if they come again, use insecticidal soap.
- Whiteflies — visible on undersides of leaves, fly up when disturbed. Yellow sticky traps catch adults; neem oil disrupts the life cycle.
Check the undersides of leaves weekly. Early detection means a simple wipe-down rather than a full treatment.
Seasonal Care Summary
| Season | Watering | Fertilising | Notes |
|---|---|---|---|
| Spring | Resume normal schedule | Resume monthly feeding | Good time to repot or propagate |
| Summer | Every 3–5 days as needed | Every 3–4 weeks | Peak growth; watch humidity |
| Autumn | Reduce gradually | Stop feeding | Prepare for slower growth |
| Winter | Every 10–14 days | None | Keep away from cold drafts; growth may pause entirely |
Quick-Reference Care Card
| Care factor | Requirement |
|---|---|
| Light | Bright indirect, 4–6 hrs/day (east window ideal) |
| Water | When top 2–3 cm of soil is dry |
| Humidity | 50–70% preferred |
| Temperature | 18–30°C (65–86°F) |
| Soil | Well-draining: potting mix + perlite + coco coir |
| Fertiliser | Balanced liquid, half strength, monthly (spring–summer only) |
| Repotting | Every 1–2 years, one pot size up |
| Propagation | Stem cuttings or seed |
Christia obcordata rewards the gardener who pays attention. Once the light, humidity, and drainage are dialled in, the plant essentially tells you what it needs — the leaves droop when thirsty, lose colour when light is too low, and crisp at the edges when the air is too dry. Treat it as the feedback system it is, and you’ll have one of the most visually distinctive plants in any indoor space.
FAQS
FAQ 1: What are Swallowtail Butterfly Plants?
Swallowtail Butterfly Plants are unique ornamental plants known for attracting swallowtail butterflies. These plants provide nectar and host support, making gardens more vibrant and ecologically balanced. Swallowtail Butterfly Plants are often chosen by gardeners who want to support pollinators while enhancing visual appeal in outdoor or indoor garden spaces.
FAQ 2: How do Swallowtail Butterfly Plants attract butterflies?
Swallowtail Butterfly Plants attract butterflies through their nectar-rich flowers and aromatic foliage. The bright colours and natural scent act as strong signals for pollinators, especially swallowtail species seeking food sources. These plants help maintain a healthy butterfly population in home gardens and natural landscapes.
FAQ 3: Can Swallowtail Butterfly Plants grow indoors?
Yes, some Swallowtail Butterfly Plants can be grown indoors if they receive enough light. A sunny window or grow light helps maintain healthy growth. Proper humidity and well-draining soil are essential to keep Swallowtail Butterfly Plants thriving inside home environments.
FAQ 4: What is the ideal sunlight for Swallowtail Butterfly Plants?
Swallowtail Butterfly Plants generally prefer full sun to partial shade. At least 5–6 hours of sunlight daily ensures healthy foliage and strong flowering. Without adequate light, Swallowtail Butterfly Plants may grow weak and fail to attract butterflies effectively.
FAQ 5: How often should I water Swallowtail Butterfly Plants?
Watering depends on climate and soil type, but Swallowtail Butterfly Plants usually need moderate watering. Keep soil slightly moist but never soggy. Overwatering can lead to root rot, while underwatering may reduce flowering and butterfly attraction.
FAQ 6: Do Swallowtail Butterfly Plants need special soil?
Swallowtail Butterfly Plants grow best in well-draining, nutrient-rich soil. A mix of garden soil, compost, and sand works well. Proper soil structure supports root health and encourages strong flowering, which is essential for attracting butterflies.
FAQ 7: Are Swallowtail Butterfly Plants easy to grow?
Yes, Swallowtail Butterfly Plants are generally easy to grow with basic care. They are low-maintenance once established and adapt well to different environments. Regular watering, sunlight, and occasional fertilizing help maintain healthy growth throughout the year.
FAQ 8: Do Swallowtail Butterfly Plants require fertilizer?
Yes, light fertilizing supports healthy blooming in Swallowtail Butterfly Plants. A balanced liquid fertilizer applied once a month during the growing season improves flowering and overall plant strength, helping attract more butterflies to your garden.
FAQ 9: Can Swallowtail Butterfly Plants survive winter?
Swallowtail Butterfly Plants may go dormant or slow down during winter depending on climate. In colder regions, protection or indoor placement is recommended. Proper care ensures they regrow strongly in the next growing season.
FAQ 10: How fast do Swallowtail Butterfly Plants grow?
Swallowtail butterfly plants normally grow at a modest rate, though this depends on the circumstances. When given the right amount of sunlight, water, and nutrients for the soil, they immediately establish themselves and begin drawing butterflies.
FAQ 11: Do Swallowtail Butterfly Plants attract pests?
Like many garden plants, Swallowtail Butterfly Plants can occasionally attract pests such as aphids or caterpillars. Regular inspection and natural pest control methods help maintain plant health without harming beneficial insects like butterflies.
FAQ 12: Can Swallowtail Butterfly Plants be grown in pots?
Yes, Swallowtail Butterfly Plants grow well in pots if drainage is proper. Container gardening allows flexibility in placement, making it easier to move plants for sunlight exposure and seasonal protection.
FAQ 13: What is the best season to plant Swallowtail Butterfly Plants?
Spring is the best season to plant Swallowtail Butterfly Plants as the warm weather supports strong root development. Early planting ensures better flowering and a longer butterfly-attracting period throughout the year.
FAQ 14: Do Swallowtail Butterfly Plants need pruning?
Yes, light pruning helps maintain shape and encourages fresh growth in Swallowtail Butterfly Plants. Removing dead or weak stems improves air circulation and boosts flowering performance, which benefits butterfly attraction.
FAQ 15: Are Swallowtail Butterfly Plants toxic to pets?
Most Swallowtail Butterfly Plants are non-toxic, but it depends on the exact species. It is always recommended to check plant variety before placing them in pet-accessible areas to ensure safety.
FAQ 16: How long do Swallowtail Butterfly Plants live?
With proper care, Swallowtail Butterfly Plants can live for several years. Their lifespan depends on climate, maintenance, and growing conditions, with healthy plants producing flowers and attracting butterflies repeatedly each season.
FAQ 17: Can Swallowtail Butterfly Plants grow in shade?
Partial shade is acceptable, but Swallowtail Butterfly Plants perform best in sunlight. Too much shade may reduce flowering and limit butterfly attraction, making sunlight exposure an important factor for success.
FAQ 18: Which butterflies are drawn to plants with swallowtail butterflies?
Swallowtail Butterfly Plants primarily attract swallowtail species, along with other pollinators like bees. Their nectar-rich flowers make them an important part of butterfly-friendly garden ecosystems.
FAQ 19: How do I maintain Swallowtail Butterfly Plants in hot climates?
In hot climates, Swallowtail Butterfly Plants need regular watering and partial afternoon shade. Mulching helps retain soil moisture and protects roots from extreme heat, ensuring healthy plant growth.
FAQ 20: Why should I grow Swallowtail Butterfly Plants in my garden?
Growing Swallowtail Butterfly Plants enhances biodiversity, attracts beautiful butterflies, and improves garden aesthetics. They are an excellent choice for eco-friendly gardening and creating a lively, pollinator-friendly environment.
Hi, I’m Steve, an orchid grower with 30+ years of hands-on experience caring for indoor and outdoor plants. I share practical, tested tips and beginner-friendly guides to help plant enthusiasts nurture healthy, thriving plants.