Feel free to share!
Growing shallots is one of the easiest and most rewarding gardening experiences for new gardeners. These flavorful bulbs require minimal space, grow quickly, and provide a generous harvest with simple care. Whether you’re starting your first home garden or expanding your kitchen crops, these beginner-friendly tips will help you grow healthy, aromatic, and long-lasting shallots right from your backyard.
Table of Contents 👈 Tap Here

1. Choose the Right Shallot Variety
Selecting the right variety is the foundation of a successful harvest. Beginners should choose varieties known for reliability and disease tolerance, such as French Red or Dutch Yellow shallots. These types adapt well to different climates and grow consistently even with basic care. Picking a beginner-friendly type ensures strong growth and reduces your chances of facing early gardening problems.
2. Select Only High-Quality Planting Bulbs
Always start with healthy, certified seed bulbs rather than supermarket shallots. Store-bought bulbs may be treated to prevent sprouting, leading to weak or failed growth. High-quality bulbs should feel firm, free from mold, and have smooth skins. Planting strong bulbs helps your shallot plants produce larger clusters and ensures a disease-free start in your garden.
3. Plant at the Right Time
Timing is important for shallot success. Plant in early spring or late fall depending on your region’s climate. Shallots thrive in cool weather, allowing them to establish strong roots before the heat of summer. Proper timing ensures steady growth, reduces stress on the plants, and supports larger bulb formation as the season progresses.
4. Prepare Well-Draining Soil
Shallots grow best in loose, fertile, and well-draining soil. Heavy clay soils can trap moisture and encourage rot, while well-aerated soil supports healthy root development. Mix in compost, aged manure, or organic matter to improve texture and nutrient content. Healthy soil helps shallot bulbs expand easily and reduces the risk of fungal diseases common in wet environments.
5. Choose a Sunny Growing Location
A location with at least six to eight hours of sunlight per day is ideal for shallots. Sunlight fuels strong growth, enhances bulb size, and improves overall plant health. Avoid shaded or damp areas, which may lead to weak plants and slow development. Sunny spots allow shallots to grow vigorously, develop deeper colors, and produce richer, sweeter flavors.
6. Give Proper Spacing Between Bulbs
Shallots multiply by producing clusters, so spacing is key to preventing overcrowding. Plant bulbs about six inches apart to give each cluster enough room to expand. Proper spacing improves air circulation, reduces fungal risks, and ensures uniform growth. When bulbs have space, they develop bigger and more flavorful clusters that store well after harvest.
7. Plant Bulbs at the Correct Depth
Plant each bulb with the pointed end facing upward and leave the top slightly above soil level. Burying bulbs too deep can delay sprouting, while shallow planting exposes them to weather stress. The correct depth helps keep bulbs stable, protects them from pests, and ensures they receive the right balance of moisture and oxygen in the soil.
8. Water Wisely and Avoid Overwatering
Shallots need consistent moisture but dislike soggy conditions. Water deeply once or twice a week depending on your climate. Overwatering can cause rot, while underwatering slows bulb development. Maintaining a balanced watering schedule encourages strong roots and helps bulbs form evenly. Check the top inch of soil and water only when it begins to dry.
9. Use Mulch for Moisture Control
Adding mulch around your shallot plants helps maintain soil moisture, steady soil temperature, and prevent weed growth. Organic mulches like straw or dry leaves also enrich the soil as they decompose. Mulching keeps the growing environment stable, reduces water stress on plants, and protects young bulbs from heat or sudden temperature changes.
10. Apply Fertilizer at the Right Time
Shallots are light feeders but still benefit from the right nutrients. Apply a balanced, organic fertilizer or compost during planting and again mid-season. Avoid excessive nitrogen, as it promotes leafy growth instead of bulb development. A moderate feeding schedule ensures strong, steady growth and encourages larger, more flavorful bulbs at harvest time.
11. Keep Weeds Away
Weeds compete with shallots for nutrients, water, and sunlight. Regularly remove weeds by hand to avoid damaging shallow shallot roots. A clean growing area promotes stronger plants, better airflow, and healthier bulb development. Maintaining a weed-free bed also reduces the risk of pests and fungal issues that thrive in crowded or untidy spaces.
12. Protect Your Plants From Pests
Shallots are relatively resistant, but pests like onion thrips, aphids, and nematodes can still appear. Use natural pest control methods such as neem oil, insecticidal soap, or companion plants like marigolds. Monitoring plants early prevents small infestations from becoming serious problems. Healthy, pest-free plants produce larger bulbs and more reliable yields.
13. Prevent Common Diseases
Fungal diseases like downy mildew or white rot can damage shallot crops. Ensure good airflow, avoid wet foliage, and rotate planting areas each year. Healthy soil and proper spacing greatly reduce the risk of disease. Practicing preventive care instead of waiting for problems protects your plants and ensures a clean, abundant harvest.
14. Maintain Ideal Temperature Conditions
Shallots prefer cool weather during early growth and warm weather during bulb formation. Protect young plants from frost with light coverings if necessary. Steady temperatures reduce plant stress, promoting stronger and more predictable growth. Understanding your region’s seasonal patterns helps you protect your plants and improve the final size of the bulbs.
15. Try Companion Planting for Healthy Growth
Companion planting enhances shallot growth naturally. Growing shallots near carrots, lettuce, and beets encourages healthy soil and reduces pest risks. Avoid planting near peas or beans, which may slow growth. Smart companion choices create a balanced environment where shallots can grow more vigorously without needing chemical support.
16. Support Bigger Bulb Formation
Larger bulbs develop when plants receive balanced nutrients, moderate watering, and enough space. Removing flower stalks as soon as they appear keeps energy focused on bulb formation. Ensuring good soil fertility and maintaining regular care throughout the season helps each cluster grow fuller, denser, and more flavorful by harvest time.
17. Watch for Signs of Healthy Growth
Healthy shallot plants produce strong green leaves with upright growth. Slow or yellowing leaves may indicate nutrient issues, poor drainage, or pests. Monitoring your plants weekly helps catch problems early and correct them quickly. Recognizing signs of healthy progress ensures your plants stay on track for plump, high-quality bulbs.
18. Remove Weaker Plants Early
Thinning out weak seedlings or stunted plants helps the remaining ones grow stronger. Crowded shallots experience stress and reduced airflow, which leads to smaller bulbs. Removing weak plants early ensures every bulb receives enough light, nutrients, and room to expand. This simple step often makes a noticeable difference in overall harvest quality.
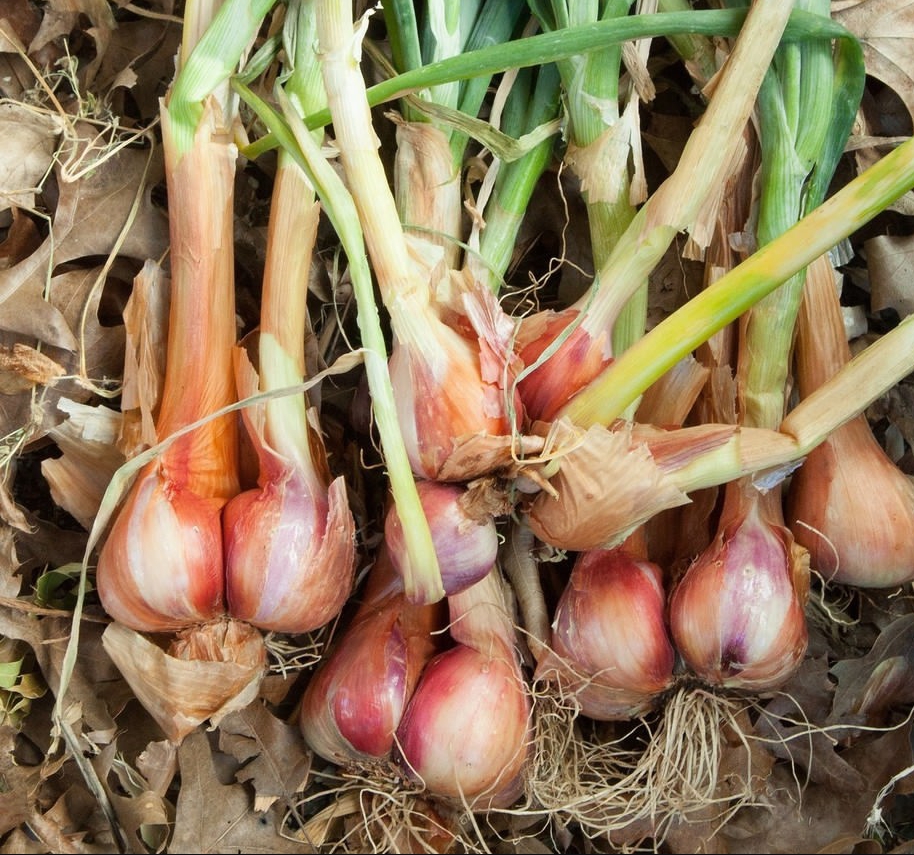
19. Harvest Shallots at the Right Time
Shallots are ready to harvest when their tops turn yellow and begin to fall over. Waiting for the right moment allows bulbs to fully mature and develop their characteristic flavor. Gently loosen the soil and lift the clusters by hand. Proper timing ensures maximum size, sweetness, and storage potential for your shallots.
20. Cure and Store Shallots Properly
After harvesting, cure shallots in a warm, dry place for one to two weeks. This process toughens the outer skin and extends shelf life. Store fully dried shallots in mesh bags or open baskets in a cool location. Proper curing and storage keep your bulbs fresh for months and prevent mold or early sprouting.