Repotting and Dividing Orchids: 8 Expert Tips for Success
Orchids are among the most captivating and rewarding plants to grow. But to keep them thriving, repotting and dividing them at the right time is essential. This process encourages new growth, prevents root rot, and ensures your orchid continues producing stunning blooms for years to come.
Table of Contents 👈 Tap Here
In this guide, you’ll learn exactly when and how to repot and divide orchids — with clear step-by-step instructions and 8 expert tips to make the process smooth and stress-free.
Repotting and Dividing Orchids

When Should You Repot an Orchid?
Over time, orchid potting mix breaks down, leading to poor drainage and restricted airflow. This causes root rot and stunts growth. Knowing the right moment to repot helps you act before damage sets in.
Signs Your Orchid Needs Repotting
Watch for these warning signs:
- The potting mix looks mushy, decomposed, or no longer drains properly.
- Roots are spilling out of the pot or coiling tightly inside it.
- You spot brown, mushy roots or notice a foul smell — signs of root rot.
- The plant is top-heavy, leaning, or wobbling in its container.
- Pests or fungal growth appear in the growing media.
Best Time to Repot
The ideal time is right after your orchid finishes flowering, when new root growth begins. This allows the plant to recover quickly and settle into fresh media. Avoid repotting while the plant is in full bloom — it can cause stress and premature flower loss.
When Should You Divide an Orchid?
Not all orchids need dividing. But for those that grow in clumps or produce multiple pseudobulbs, division is a great way to propagate new plants and rejuvenate older ones.
Signs Your Orchid Is Ready for Division
- The orchid has a large clump of pseudobulbs or multiple growths.
- New shoots are appearing outside the container.
- Each potential division has at least 3–4 healthy pseudobulbs.
Never divide too soon. Without enough pseudobulbs, the new divisions won’t have the strength to establish themselves.
Which Orchids Can Be Divided?
Sympodial Orchids (Can Be Divided)
Sympodial orchids grow horizontally along a rhizome and produce multiple growths that can be separated. These varieties are suitable for division:
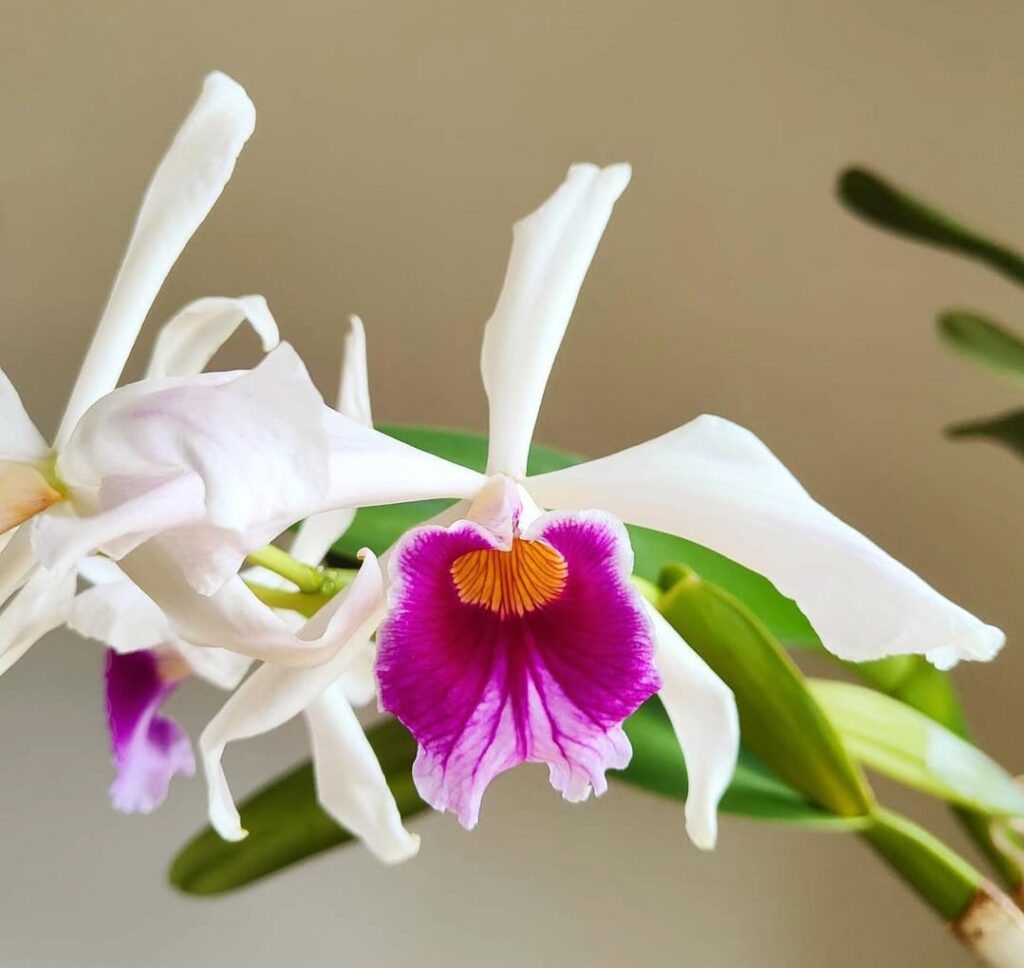
- Cattleya – Large, fragrant flowers with a classic pseudobulb growth habit.
- Dendrobium (some species) – Form dense clumps that respond well to division.
- Oncidium – Multiple pseudobulbs make propagation through division straightforward.
- Miltonia – Delicate orchids that benefit from periodic division to stay healthy.
- Cymbidium – Large growers that need division when they become overcrowded.
- Paphiopedilum (multifloral types) – Certain multi-growth species can be divided.
Monopodial Orchids (Cannot Be Divided)
Monopodial orchids grow from a single stem and cannot be divided. They can be propagated in other ways:
- Phalaenopsis – Propagated from keikis (baby plants) that develop on flower spikes.
- Vanda – Can be propagated from top cuttings that carry aerial roots.
8 Expert Tips: Step-by-Step Guide to Repotting and Dividing Orchids
Tip 1: Gather Your Supplies First
Before you start, collect everything you need: a fresh pot with drainage holes (1–2 inches larger than the old one), fresh orchid potting mix (bark, sphagnum moss, or a blend), sterilized scissors or pruning shears, hydrogen peroxide for disinfecting cuts, and a small stake with ties for support if needed.
Tip 2: Remove the Orchid Carefully
Gently squeeze the sides of the pot to loosen the roots. If the plant is stuck, soak the pot in water for a few minutes to help release it. Handle the roots carefully — unnecessary tearing damages healthy tissue and slows recovery.
Tip 3: Inspect and Trim the Roots
Remove all the old potting mix and examine each root closely. Cut away any that are dead, brown, or mushy using sterilized scissors. Healthy roots are firm and white or green. Always sterilize your tools between cuts to avoid spreading infection.
Tip 4: Divide the Orchid (If Applicable)
Find the rhizome connecting the pseudobulbs and use a sterilized knife to cut between sections. Make sure each division has at least 3–4 healthy pseudobulbs. Immediately dust the cut areas with cinnamon or fungicide powder to prevent infection and speed up healing.
Tip 5: Prepare the New Pot and Media
Add a layer of fresh orchid potting mix to the bottom of the new pot. Position the orchid so its base sits slightly above the media level — this allows good airflow around the roots. Avoid burying the base too deeply, which traps moisture and encourages rot.
Tip 6: Repot and Secure the Orchid
Gently fill potting mix around the roots. It should cover them without being packed too tightly — roots need room to breathe. If the plant is top-heavy or unsteady, insert a small stake and loosely tie the stem for support until new roots anchor it naturally.
Tip 7: Wait Before Watering
After repotting, wait 3–5 days before watering. This gives any trimmed or cut roots time to callous and heal, significantly reducing the risk of rot. Place the orchid in a shaded, humid spot for the first few weeks to help it settle in without added stress.
Tip 8: Monitor and Care Post-Repotting
Keep the orchid in indirect light and maintain good humidity while it adjusts. Resume a normal watering schedule only once you see signs of new root or leaf growth. Avoid fertilizing for the first 4–6 weeks — fresh potting mix contains enough nutrients to start.
Common Mistakes to Avoid
- Repotting while blooming – Always wait until flowering is done.
- Using the wrong potting medium – Use bark for epiphytic orchids, sphagnum moss for moisture-loving types.
- Watering too soon – Wait 3–5 days for cut roots to callous and heal.
- Using unsterilized tools – Dirty blades spread fungal infections and bacteria.
- Choosing a pot that is too large – Excess media retains moisture and promotes root rot.
- Dividing with too few pseudobulbs – Each division needs at least 3–4 to survive and grow.
Conclusion
Repotting and dividing orchids may feel intimidating at first, but with the right timing and tools, it becomes a rewarding part of orchid care. Follow these 8 expert tips, pay attention to your plant’s signals, and your orchids will reward you with healthy roots and vibrant blooms season after season.
FAQs: Repotting and Dividing Orchids
1. When is the best time for repotting and dividing orchids?
The best time for repotting and dividing orchids is right after the plant finishes flowering. This is when new root growth naturally begins, giving the plant the best chance to recover quickly. Repotting during active blooming causes unnecessary stress and often leads to premature bud or flower drop. Aim to repot every 1–2 years to keep your orchid healthy and thriving.
2. How do I know if my orchid needs repotting?
There are several clear signs that repotting and dividing orchids is overdue. Look for roots spilling out of the pot, a potting mix that looks mushy or decomposed, or a plant that wobbles and leans in its container. A foul smell coming from the pot is another strong indicator of root rot. Acting early prevents serious damage to the root system.
3. How often should orchids be repotted?
Most orchids benefit from repotting and dividing orchids every 1–2 years. The potting mix breaks down over time, losing its ability to drain properly and allow airflow around the roots. Some fast-growing varieties may need repotting sooner if they outgrow their containers quickly. Always check the roots and media condition rather than repotting on a fixed schedule alone.
4. What potting mix should I use when repotting orchids?
When repotting and dividing orchids, choose a mix that matches your orchid type. Bark chips work well for epiphytic orchids like Phalaenopsis and Cattleya because they allow excellent airflow and drainage. Sphagnum moss suits moisture-loving types that prefer slightly more humidity around their roots. A blend of bark, perlite, and sphagnum moss is a versatile option that works for most common orchid varieties.
5. Can I repot my orchid while it is blooming?
It is strongly advised to avoid repotting and dividing orchids while the plant is actively flowering. The process causes physical stress that the plant has to manage while simultaneously supporting its blooms. This often results in premature flower drop and bud loss. Wait until the last bloom fades and the flower spike begins to die back before beginning the repotting process.
6. What size pot should I use when repotting an orchid?
When repotting and dividing orchids, choose a new pot that is only 1–2 inches larger than the previous one. Going too large is a common mistake — excess potting media holds more moisture than the roots can absorb, which leads to rot. Clear plastic pots with drainage holes are a great choice because they allow you to monitor root health and moisture levels easily.
7. How do I divide an orchid without damaging it?
Successful repotting and dividing orchids requires a clean, sharp, sterilized knife or pruning shears. Locate the rhizome connecting the pseudobulbs and make a firm, single cut rather than sawing back and forth. Each division must have at least 3–4 healthy pseudobulbs to survive on its own. After cutting, dust the exposed areas immediately with cinnamon or a fungicide powder to prevent infection from entering the wound.
8. How many pseudobulbs does each division need?
When repotting and dividing orchids, each new section should have a minimum of 3–4 healthy pseudobulbs. This ensures the division has enough stored energy to produce new roots and leaves after being separated. Divisions with fewer pseudobulbs are too weak and often fail to establish themselves. Prioritize quality over quantity — it is better to have two strong divisions than three weak ones.
9. Should I water my orchid immediately after repotting?
After repotting and dividing orchids, wait 3–5 days before watering. Any roots that were trimmed or accidentally torn during the process need time to callous over and heal. Watering too soon introduces moisture to open wounds, creating the perfect conditions for bacterial rot and fungal infections. Once the waiting period is over, water lightly and monitor the plant closely for the first few weeks.
10. What tools do I need for repotting and dividing orchids?
Having the right tools makes repotting and dividing orchids much easier and safer for the plant. You will need sterilized pruning shears or a sharp knife, hydrogen peroxide for disinfecting cuts, fresh orchid potting mix, a new pot with drainage holes, and cinnamon or fungicide powder to seal cut surfaces. A small stake and soft ties are also useful for supporting top-heavy plants after repotting.
11. Which orchids can be divided?
Only sympodial orchids are suitable for repotting and dividing orchids through division. These include Cattleya, Cymbidium, Dendrobium, Oncidium, Miltonia, and certain Paphiopedilum species. Sympodial orchids grow horizontally along a rhizome and naturally produce multiple growths that can be safely separated. Monopodial orchids like Phalaenopsis and Vanda grow from a single stem and cannot be divided — they must be propagated differently.
12. How do I prevent infection after dividing an orchid?
Preventing infection is one of the most important steps in repotting and dividing orchids. Always use sterilized cutting tools — wipe blades with hydrogen peroxide or rubbing alcohol between each cut. After separating divisions, dust all exposed cut surfaces with ground cinnamon or a horticultural fungicide powder. This creates a protective barrier that prevents bacteria and fungal spores from entering the plant through fresh wounds while it heals.
13. Why are my orchid’s roots growing outside the pot?
Roots escaping over the rim or sides of the pot are a strong sign that repotting and dividing orchids is needed. As the plant grows, it produces more roots than the container can accommodate. Some aerial root growth is normal for epiphytic orchids, but when roots are tightly coiled or escaping in large numbers, the plant has outgrown its space and needs a fresh, larger container with new media.
14. How do I prevent transplant shock after repotting?
To minimize stress during repotting and dividing orchids, keep conditions as stable as possible afterward. Place the plant in bright, indirect light — avoid direct sun, which can scorch stressed roots and leaves. Maintain higher humidity levels by misting around the plant or using a humidity tray. Hold off on fertilizing for 4–6 weeks, and water sparingly at first until you see signs of new growth resuming.
15. Can I reuse the old potting mix when repotting?
Never reuse old potting media when repotting and dividing orchids. Over time, bark and moss break down into fine particles that compact around the roots, blocking airflow and trapping excess moisture. Old media can also harbor fungal spores, bacteria, and pests that will reinfect the plant. Always start fresh with a sterile, high-quality orchid potting mix every time you repot to give your plant the cleanest possible environment.
16. How long does it take an orchid to recover after repotting?
Recovery time after repotting and dividing orchids typically ranges from 2–8 weeks, depending on the orchid variety and how much root trimming was required. During this period, the plant focuses its energy on producing new roots rather than new leaves or flowers. Keep it in a warm, humid, shaded spot and resist the urge to over-water or fertilize. New root tips appearing are a reliable sign that recovery is progressing well.
17. Should I fertilize my orchid after repotting?
Avoid fertilizing for at least 4–6 weeks after repotting and dividing orchids. Fresh potting mix contains enough nutrients to support the plant during its initial recovery period. Applying fertilizer too soon can chemically burn fragile new roots that are still healing and establishing themselves. Once you see active new growth — new leaves or root tips — you can gradually reintroduce a diluted, balanced orchid fertilizer on a regular schedule.
18. What happens if I repot my orchid too often?
Repotting and dividing orchids too frequently causes unnecessary stress that interrupts the plant’s natural growth cycle. Each repotting disturbs the root system, and the plant must spend energy recovering rather than growing or flowering. Unless there is a clear problem — such as root rot, decomposed media, or severe overcrowding — stick to a schedule of once every 1–2 years. Stability in the growing environment encourages better blooming over time.
19. Can I repot an orchid in winter?
It is generally best to avoid repotting and dividing orchids during winter if possible. Most orchids grow more slowly in cooler months with reduced light, which makes recovery from repotting slower and more difficult. The risk of root rot also increases when temperatures are low and the media stays wet for longer. If repotting is urgently needed due to root rot or pest infestation, do so carefully and reduce watering frequency afterward.
20. What are the most common mistakes when repotting orchids?
The most frequent errors during repotting and dividing orchids include repotting while the plant is in bloom, using unsterilized tools, choosing a pot that is too large, watering immediately after repotting, and reusing old potting media. Another common mistake is dividing the plant into sections with too few pseudobulbs, leaving each division too weak to survive. Taking a careful, patient approach and following each step correctly dramatically improves your success rate.
Hi, I’m Steve, an orchid grower with 30+ years of hands-on experience caring for indoor and outdoor plants. I share practical, tested tips and beginner-friendly guides to help plant enthusiasts nurture healthy, thriving plants.