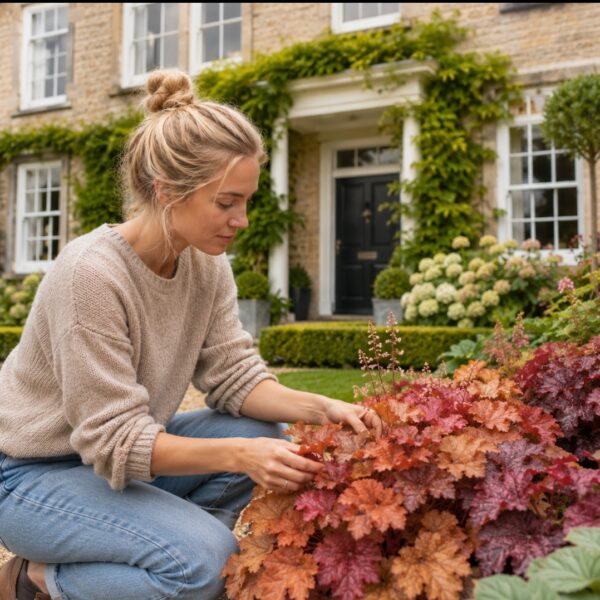
Caramel Coral Bells: 10 Expert Tips for Growing Vibrant Heuchera
Caramel Coral Bells, scientifically known as Heuchera, are charming and versatile plants that can add a pop of color and texture to any garden. With their vibrant foliage and delicate flowers, they are a favorite among gardeners of all levels. However, for beginners, cultivating and caring for Caramel Coral Bells may seem daunting at first. Fear not! This comprehensive 10-step guide is designed to help beginners master the art of growing Caramel Coral Bells and unleash the full potential of these beautiful plants.
Table of Contents 👈 Tap Here
Caramel coral bells
Common Coral Bells varieties
Common Coral Bells varieties offer a wide array of colors, textures, and sizes, making them versatile options for any garden. Here are some popular cultivars that are beloved by gardeners:
Heuchera ‘Palace Purple‘: This classic variety features deep purple foliage that adds a dramatic flair to garden beds and containers. Its rich color contrasts beautifully with lighter-hued plants.
Heuchera ‘Caramel‘: With its warm caramel-colored leaves that deepen to bronze in the fall, ‘Caramel’ adds a touch of warmth and elegance to any garden setting. Its compact size makes it ideal for borders and edging.
Heuchera ‘Electric Lime‘: As the name suggests, ‘Electric Lime’ boasts vibrant lime-green foliage that electrifies the garden. Its compact habit and heat tolerance make it a great choice for containers and rock gardens.
Heuchera ‘Obsidian‘: This striking variety features nearly black foliage that provides a bold contrast in garden beds and mixed plantings. ‘Obsidian’ is prized for its dramatic color and compact growth habit.
Heuchera ‘Fire Alarm‘: ‘Fire Alarm’ lives up to its name with fiery red foliage that intensifies in color as the season progresses. Its vigorous growth habit and heat tolerance make it a standout performer in the garden.
Heuchera ‘Berry Smoothie‘: Delicate pink foliage with silver veining gives ‘Berry Smoothie’ a soft, romantic appeal. This variety adds a touch of whimsy to borders, containers, and woodland gardens.
Heuchera ‘Lime Rickey‘: ‘Lime Rickey’ features bright chartreuse foliage that lights up shady corners of the garden. Its compact size and tolerance to heat and humidity make it a versatile choice for landscapes.
Heuchera ‘Plum Pudding‘: With its rich plum-colored leaves and silver veining, ‘Plum Pudding’ adds a touch of sophistication to garden beds and borders. Its compact habit and tolerance to heat and humidity make it a reliable performer.
These are just a few examples of the many Coral Bells varieties available to gardeners. Whether you’re looking for bold colors, delicate foliage, or compact growth habits, there’s a Coral Bells cultivar to suit every taste and garden style.
Choosing the Right Variety
Choosing the right variety of Coral Bells (Heuchera) for your garden involves considering several factors such as color preference, size, foliage texture, and environmental conditions. Here are some tips to help you select the perfect Coral Bells variety:
Color: Coral Bells come in a wide range of colors, including shades of green, purple, red, bronze, and even variegated combinations. Consider the color scheme of your garden and choose a variety that complements or contrasts with existing plants for visual impact.
Size: Coral Bells varieties vary in size, from compact miniatures to larger specimens. Take into account the available space in your garden and choose a variety that fits the desired location without overcrowding or overshadowing other plants.
Foliage Texture: Pay attention to the texture of the foliage, as some varieties have smooth leaves while others may be ruffled, scalloped, or heavily veined. Texture adds interest and dimension to garden beds and containers, so select a variety that enhances your overall design.
Sunlight Requirements: While most Coral Bells prefer partial shade to full sun, some varieties tolerate more sun exposure than others. Assess the sunlight conditions in your garden and choose a variety that matches the available light levels for optimal growth and performance.
Soil and Climate Adaptability: Consider the soil type and climate conditions in your region when selecting a Coral Bells variety. Some varieties are more drought-tolerant or cold-hardy than others, so choose a variety that suits your local climate and soil conditions for easier maintenance.
Purpose: Determine the intended purpose of the Coral Bells in your garden, whether it’s as a focal point, border plant, ground cover, or container specimen. Choose a variety that aligns with your garden design goals and meets the specific requirements of its intended use.
Personal Preference: Ultimately, choose a Coral Bells variety that speaks to your personal taste and gardening style. Whether you prefer bold and vibrant colors or subtle and delicate foliage, there’s a variety out there to suit every gardener’s preferences.
By considering these factors, you can confidently choose the right variety of Coral Bells to enhance your garden and create a stunning landscape that you’ll enjoy for years to come.
Selecting the Ideal Location
Selecting the ideal location for planting Coral Bells (Heuchera) is crucial for ensuring their health, growth, and overall performance in your garden. Here are some factors to consider when choosing the perfect spot for your Coral Bells:
Light Exposure: Coral Bells thrive in partial shade to full sun, depending on the variety. However, in regions with hot summers, they generally prefer partial shade to protect them from intense sunlight and heat stress. Choose a location that receives the appropriate amount of sunlight based on the specific requirements of your chosen variety.
Soil Drainage: Coral Bells prefer well-draining soil to prevent waterlogging and root rot. Avoid planting them in areas with poor drainage, such as low-lying or compacted soil. If your soil tends to retain water, amend it with organic matter like compost or peat moss to improve drainage before planting.
Soil pH: While Coral Bells are adaptable to a wide range of soil pH levels, they generally prefer slightly acidic to neutral soil with a pH of 6.0 to 7.0. Test the soil pH in your chosen location and amend it if necessary to create an optimal growing environment for your Coral Bells.
Air Circulation: Good air circulation is essential for preventing fungal diseases and promoting healthy growth in Coral Bells. Avoid planting them in overly crowded or enclosed areas where air circulation may be limited. Instead, choose a location with adequate spacing between plants and good airflow to minimize the risk of disease.
Protection from Elements: Consider the exposure of your chosen location to strong winds, frost, and other environmental elements. While Coral Bells are generally hardy plants, they may benefit from some protection against harsh weather conditions, especially during extreme heat or cold. Planting them near larger plants or structures can provide natural protection from the elements.
Aesthetic Considerations: Think about the overall aesthetic of your garden and how Coral Bells will contribute to the landscape. Consider their size, color, and foliage texture when choosing a location to ensure they complement existing plants and enhance the visual appeal of your garden.
By carefully selecting the ideal location for planting your Coral Bells based on these factors, you can create an optimal growing environment that promotes healthy growth and ensures the long-term success of these beautiful plants in your garden.
Preparing the Soil
Preparing the soil is a crucial step in successfully growing Coral Bells (Heuchera) and ensuring they thrive in your garden. Here’s a comprehensive guide to preparing the soil for planting Coral Bells:
Assess Soil Quality: Start by evaluating your soil’s quality. Rich in organic content and with good drainage, coral bells favour this type of soil. Make sure the soil drains properly by excavating a hole and adding water to it. Good drainage is present in the soil if the water evaporates in a few hours. You might need to enhance drainage if it sits for a long time.
Amend Soil Texture: If your soil is heavy or compacted, amend it with organic matter to improve texture and drainage. Incorporate compost, peat moss, or aged manure into the soil to loosen it and promote better drainage. Aim for a soil texture that is loose, friable, and well-draining.
Adjust Soil pH: Coral Bells prefer slightly acidic to neutral soil with a pH between 6.0 and 7.0. Test the soil pH using a soil testing kit and adjust it if necessary. If the pH is too high (alkaline), amend the soil with sulfur or acidic organic matter such as pine needles or coffee grounds to lower the pH.
Provide Nutrients: Coral Bells benefit from a rich soil high in organic matter. Incorporate a balanced, slow-release fertilizer into the soil before planting to provide essential nutrients for healthy growth. Choose a fertilizer with equal parts nitrogen, phosphorus, and potassium, and follow the recommended application rates.
Mix and Incorporate: Once you’ve added amendments and nutrients, thoroughly mix them into the soil to ensure even distribution. Use a garden fork or tiller to incorporate the amendments to a depth of at least 6-8 inches. This helps create a fertile, well-draining root zone for your Coral Bells.
Level and Smooth: After amending and mixing the soil, level and smooth the surface to create a uniform planting bed. Remove any rocks, debris, or large clumps of soil to provide a clean, even surface for planting.
Mulch: Consider adding a layer of mulch around the base of your Coral Bells after planting. Mulch helps retain soil moisture, suppresses weed growth, and regulates soil temperature, creating an optimal growing environment for your plants.
By following these steps to prepare the soil before planting your Coral Bells, you can create an ideal growing environment that promotes healthy root development and vigorous growth, ensuring the long-term success of these beautiful plants in your garden.
when to plant coral bells
Planting Coral Bells (Heuchera) is a straightforward process, but it’s important to follow a few key steps to ensure the best results. Here’s a guide to planting Coral Bells in your garden:
Choose the Right Time: Plant Coral Bells in the spring or fall when temperatures are mild. The plants may get stressed if you plant during periods of excessive heat or cold.
Select a Location: Choose a location in your garden that receives partial shade to full sun, depending on the variety of Coral Bells you’re planting. Ensure the soil has good drainage and is amended with organic matter if necessary.
Prepare the Soil: Before planting, prepare the soil by loosening it to a depth of at least 6-8 inches. Increase the fertility and structure of your soil by adding organic matter, such as old manure or compost.
Dig the Planting Hole: Dig a hole slightly larger and deeper than the root ball of the Coral Bells plant. Make sure the hole is wide enough to accommodate the roots without bending or crowding them.
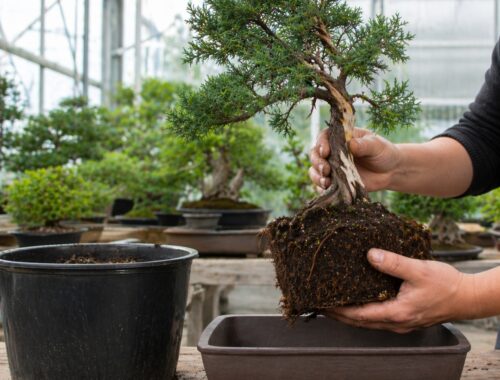
Remove the Plant from the Container: Gently remove the Coral Bells plant from its container, taking care not to disturb the roots.To promote outward development, carefully peel away any firmly connected roots.
Plant the Coral Bells: Place the plant in the center of the planting hole, making sure the top of the root ball is level with the surrounding soil. Backfill the hole with soil, gently pressing down to remove air pockets.
Water Thoroughly: After planting, water the Coral Bells thoroughly to settle the soil and ensure good root-to-soil contact. Maintain a regularly damp but not soggy soil, particularly when the plant is establishing itself.
Mulch: Consider applying a layer of mulch around the base of the plant to help retain soil moisture, suppress weed growth, and regulate soil temperature. Leave a small gap between the mulch and the stem of the plant to prevent rotting.
Provide Care: Monitor the Coral Bells regularly for signs of stress, pests, or diseases. Water as needed to keep the soil evenly moist, especially during periods of hot, dry weather. Use a balanced, slow-releasing fertiliser to apply a light spring fertilisation.
Space Properly: If planting multiple Coral Bells, space them according to their mature size to allow for adequate airflow and prevent overcrowding. Follow spacing recommendations provided on plant tags or nursery labels.
By following these steps, you can plant Coral Bells with confidence and ensure they establish well in your garden, providing years of beauty and enjoyment.
Watering and Mulching
Watering and mulching are essential components of caring for Coral Bells (Heuchera) and maintaining their health and vigor. Here’s a guide on how to water and mulch your Coral Bells effectively:
Watering:
Monitor Soil Moisture: Particularly in hot, dry weather, be sure to often check the moisture content of the soil surrounding your coral bells. To check the moisture content of the soil around a plant, stab a finger into it. Water when the soil’s top inch appears dry to the touch.
Water Deeply and Infrequently: When watering, apply water deeply to encourage deep root growth. Water at the base of the plant rather than overhead to avoid wetting the foliage, which can increase the risk of fungal diseases. Aim to provide enough water to moisten the entire root zone.
Avoid Overwatering: To promote deep root growth, use a lot of water when watering. Instead of soaking the leaves, which might raise the risk of fungal diseases, water the base of the plant. Make sure you provide the root zone adequate moisture.
Mulch:Spread a layer of mulch around the base of your Coral Bells to help control soil temperature and retain moisture. This lessens the need for frequent watering by preventing water evaporation from the soil surface. Make use of organic mulches like compost, wood chips, or shreds of bark.
Watering Schedule: During the plant’s establishment period, typically the first year after planting, water regularly to ensure adequate moisture for root development. Once established, gradually reduce watering frequency but continue to monitor soil moisture to prevent drought stress.
Mulching:
Apply Mulch: Spread a 2-3 inch layer of mulch evenly around the base of your Coral Bells, taking care not to pile it up against the stem. Leave a small gap between the mulch and the plant to prevent moisture-related issues such as rotting or crown rot.
Benefits of Mulch: Mulching offers several benefits, including moisture retention, weed suppression, and soil insulation. Mulch helps keep the soil consistently moist by reducing water evaporation from the soil surface. It also prevents weeds from competing with Coral Bells for water and nutrients and regulates soil temperature, protecting the roots from extreme heat or cold.
Renew Mulch Annually: Replenish the mulch layer annually to maintain its effectiveness and appearance. Remove any old, decomposed mulch before applying fresh mulch to prevent buildup and improve air circulation around the plants.
By following these watering and mulching practices, you can provide optimal growing conditions for your Coral Bells, promoting healthy growth and vibrant foliage throughout the growing season.
Fertilizing requirements
Fertilizing Coral Bells (Heuchera) is important for maintaining their health, vigor, and vibrant foliage. Here are some guidelines for meeting their fertilizing requirements:
Timing: Fertilize Coral Bells in the early spring, just as new growth begins to emerge. This timing coincides with the start of the growing season when plants require a nutrient boost to support healthy growth.
Type of Fertilizer: Use a balanced, slow-release fertilizer specifically formulated for flowering perennials or acid-loving plants. Look for fertilizers with an N-P-K ratio (nitrogen, phosphorus, potassium) of around 10-10-10 or similar. These formulations provide a balanced blend of essential nutrients for Coral Bells.
Application Rate: Follow the manufacturer’s instructions for the recommended application rate on the fertilizer packaging. Generally, apply fertilizer at a rate of about 1 tablespoon per square foot of planting area. Avoid over-fertilizing, as excessive nutrients can lead to lush foliage growth at the expense of flowering.
Method of Application: Scatter the fertilizer evenly around the base of the Coral Bells, taking care to avoid direct contact with the foliage. Water the plants thoroughly after fertilizing to help dissolve the fertilizer and carry nutrients down to the roots.
Frequency: Fertilize Coral Bells once a year in the spring, just before new growth begins. Avoid fertilizing late in the growing season, as this can stimulate new growth that may be susceptible to frost damage in colder climates.
Organic Alternatives: If you prefer organic gardening methods, consider using organic fertilizers such as compost, aged manure, or fish emulsion. These natural fertilizers provide a slow release of nutrients and help improve soil structure and fertility over time.
Monitor Plant Response: Keep an eye on your Coral Bells after fertilizing to monitor their response. Healthy plants will exhibit vigorous growth, vibrant foliage, and abundant flowering. If you notice any signs of nutrient deficiencies or excessive growth, adjust your fertilizing regimen accordingly.
By providing the right type and amount of fertilizer at the appropriate time, you can ensure that your Coral Bells receive the nutrients they need to thrive and reward you with beautiful foliage and flowers throughout the growing season.
Pruning and Deadheading
Pruning and deadheading Coral Bells (Heuchera) are essential maintenance tasks that help promote healthy growth, maintain plant shape, and encourage continuous blooming. Here’s how to effectively prune and deadhead your Coral Bells:
Pruning:
Remove Dead or Damaged Foliage: Regularly inspect your Coral Bells for any dead, yellowing, or damaged foliage. Use clean, sharp pruning shears to carefully remove these unwanted leaves at their base. Removing dead or damaged foliage not only improves the plant’s appearance but also reduces the risk of disease and pest infestations.
Thin Out Overcrowded Growth: If your Coral Bells become overcrowded or leggy, consider thinning out the growth to improve air circulation and promote better light penetration. Use pruning shears to selectively remove overcrowded stems or branches, focusing on opening up the center of the plant and encouraging outward growth.
Shape and Maintain Size: Coral Bells have a mounding growth habit, but their foliage can become dense and unkempt over time. To maintain a tidy appearance and prevent the plant from becoming too large or sprawling, lightly trim back the outermost branches to shape the plant as desired. Avoid cutting back more than one-third of the plant’s overall size at once to prevent stress.
Prune After Flowering: If your Coral Bells produce tall flower stalks, you can prune them back after flowering to tidy up the plant and encourage additional blooms. Use pruning shears to cut the flower stalks down to the base of the plant, taking care not to damage any emerging foliage or buds.
Deadheading:
Remove Spent Flowers: Deadheading refers to the removal of spent or faded flowers from the plant. As Coral Bells produce delicate bell-shaped flowers on slender stalks, they benefit from regular deadheading to prolong the blooming period and maintain a neat appearance. Use your fingers or sharp scissors to snip off the faded flowers at their base, just above the foliage.
Encourage Repeat Blooms: Deadheading Coral Bells prompts the plant to redirect its energy from seed production back into flower production, resulting in additional blooms throughout the growing season. By removing spent flowers promptly, you can encourage your Coral Bells to continue blooming profusely and enhance the overall display of color in your garden.
Monitor Regularly: Make deadheading a regular part of your gardening routine, especially during the peak flowering season. Check your Coral Bells regularly for faded blooms and remove them promptly to prevent seed formation and encourage continuous flowering.
By incorporating pruning and deadheading into your Coral Bells maintenance routine, you can help keep your plants healthy, vibrant, and blooming beautifully throughout the growing season.
Pest and Disease and fix
Pests and diseases can occasionally affect Coral Bells (Heuchera), but with proper care and attention, you can prevent and manage these issues effectively. Here are some common pests and diseases that may affect Coral Bells, along with tips on how to identify, prevent, and fix them:
Pests:
Aphids: These small, soft-bodied insects feed on plant sap and can cause distorted growth and yellowing of leaves. To control aphids, spray the affected plants with a strong stream of water to dislodge them, or treat with insecticidal soap or neem oil according to label instructions.
Spider Mites: Spider mites are tiny arachnids that suck sap from the leaves, causing stippling, webbing, and leaf yellowing. Increase humidity around the plants by misting them regularly and remove heavily infested leaves. Treat with insecticidal soap or horticultural oil to control spider mites.
Slugs and Snails: These nocturnal pests feed on the foliage of Coral Bells, leaving behind ragged edges and holes. Handpick slugs and snails in the evening or set up beer traps to attract and drown them. Apply diatomaceous earth or iron phosphate-based slug baits around the base of plants as a deterrent.
Diseases:
Powdery Mildew: Powdery mildew appears as a white, powdery coating on the leaves of Coral Bells, especially in humid conditions. Improve air circulation around the plants by thinning out overcrowded growth and spacing them properly. Treat with fungicidal sprays containing sulfur or potassium bicarbonate to control powdery mildew.
Leaf Spot: Leaf spot diseases cause dark lesions or spots to form on the foliage of Coral Bells, leading to leaf yellowing and premature defoliation. Remove and destroy infected leaves promptly to prevent the spread of the disease. Avoid overhead watering and apply fungicidal sprays containing copper or chlorothalonil to control leaf spot.
Root Rot: Root rot is caused by fungal pathogens that thrive in poorly drained soil, leading to root damage and plant decline. Improve soil drainage by amending with organic matter and avoid overwatering. Remove and discard severely affected plants, and replant in a well-draining location.
Prevention Tips:
Plant Selection: Choose disease-resistant varieties of Coral Bells and inspect new plants for signs of pests or diseases before introducing them to your garden.
Proper Watering: Water Coral Bells at the base of the plants to avoid wetting the foliage, which can create conditions conducive to fungal diseases.
Sanitation:To lessen pests’ and diseases’ hiding places, keep the garden tidy and debris-free. To stop the disease from spreading, quickly remove and destroy any contaminated plant material.
Healthy Soil: Maintain soil fertility and structure by regularly amending with organic matter and practicing crop rotation to reduce the buildup of pathogens in the soil.
By implementing these pest and disease prevention strategies and taking prompt action to address any issues that arise, you can keep your Coral Bells healthy and thriving in your garden. If problems persist, consider consulting with a local extension service or garden center for further assistance.
Winter Care
Winter care for Coral Bells (Heuchera) is essential to ensure their survival and health during the colder months. While Coral Bells are generally hardy plants, providing some extra care can help them withstand harsh wintercircumstances and flourish in the spring. Some winter care advice is provided here.
Mulching: Apply a layer of organic mulch, such as shredded bark or straw, around the base of your Coral Bells to insulate the soil and protect the roots from freezing temperatures. Mulch also helps retain soil moisture and prevents rapid temperature fluctuations that can damage plants.
Watering: Before the ground freezes, give your coral bells a good watering to make sure they have a well-hydrated winter. But be careful—overwatering might cause root rot in wet soil. Keep an eye on the soil’s moisture content during the winter and apply water sparingly when it’s dry outside.
Protect from Frost: In regions with severe winters, consider covering your Coral Bells with a layer of frost cloth or burlap to protect them from freezing temperatures and frost damage. Alternatively, transplant container-grown Coral Bells into larger pots and move them to a sheltered location, such as a garage or cold frame, for added protection.
Pruning: Remove any dead or damaged foliage from your Coral Bells before winter sets in. Pruning helps improve air circulation around the plants and reduces the risk of fungal diseases. Avoid heavy pruning, as Coral Bells prefer minimal disturbance during the winter months.
Winterizing Pots: If growing Coral Bells in containers, consider insulating the pots with bubble wrap or moving them to a sheltered location, such as a porch or patio, to protect them from freezing temperatures and frost. Pots grouped together might also offer more insulation.
Monitor for Pests and Diseases: Keep an eye out for signs of pests or diseases on your Coral Bells during the winter months. Treat any infestations or infections promptly to prevent them from spreading and causing further damage.
Spring Cleanup: In early spring, once the threat of frost has passed, remove any remaining winter mulch from around your Coral Bells and prune away any dead or damaged foliage. This allows new growth to emerge freely and helps rejuvenate the plants for the upcoming growing season.
By providing proper winter care for your Coral Bells, you can help them survive the colder months and thrive once warmer weather returns. With a little extra attention and protection, your Coral Bells will reward you with their beautiful foliage and flowers year after year.
By following these ten steps, beginners can confidently cultivate and care for Coral Bells in their garden. With their stunning foliage and easygoing nature, these versatile plants are sure to become a beloved addition to any landscape. So roll up your sleeves, grab your gardening tools, and embark on the journey to mastering Coral Bells!
FAQ
Q1. What are Caramel Coral Bells and why are they so popular among gardeners?
Caramel Coral Bells (Heuchera ‘Caramel’) is a stunning perennial plant prized for its warm, amber-toned foliage that shifts between golden caramel, peach, and bronze hues through the seasons. Gardeners love Caramel Coral Bells for their year-round color, low maintenance, and versatility in borders, containers, and shade gardens. Their unique leaf coloration makes them a standout choice for adding warmth and depth to any landscape design.
Q2. Where is the best location to plant Caramel Coral Bells in my garden?
Caramel Coral Bells thrive in partially shaded spots that receive morning sun and afternoon shade, especially in warmer climates. They can tolerate more sun in cooler northern regions. Avoid deep, dense shade, as this causes the foliage of Caramel Coral Bells to lose its vibrant caramel coloring. A sheltered garden bed beneath a deciduous tree or along a north-facing wall provides ideal growing conditions for healthy, colorful growth.
Q3. What type of soil do Caramel Coral Bells prefer for optimal growth?
Caramel Coral Bells grow best in well-draining, slightly acidic to neutral soil with a pH between 6.0 and 7.0. They dislike heavy clay or waterlogged conditions, which can lead to crown rot. Amending your garden bed with compost or organic matter improves drainage and soil structure. Raised beds and container plantings with quality potting mix also work excellently for establishing healthy, thriving Caramel Coral Bells in a variety of garden settings.
Q4. How often should I water my Caramel Coral Bells plants?
Caramel Coral Bells prefer consistently moist soil but are sensitive to overwatering. Water deeply once or twice a week during the growing season, allowing the top inch of soil to dry slightly between waterings. During hot summer months, monitor moisture levels more frequently. Mulching around the base of Caramel Coral Bells helps retain soil moisture and regulate temperature, reducing the need for frequent irrigation while keeping the roots cool and hydrated throughout summer.
Q5. Do Caramel Coral Bells require fertilization, and if so, how frequently?
Caramel Coral Bells benefit from light feeding in early spring as new growth emerges. Apply a balanced, slow-release granular fertilizer or a diluted liquid fertilizer once per season. Avoid over-fertilizing Caramel Coral Bells, as excessive nitrogen encourages lush green foliage at the expense of the signature caramel and amber tones that make this plant so visually appealing. A single spring application is typically sufficient to support healthy flowering and vibrant foliage throughout the growing season.
Q6. Are Caramel Coral Bells deer-resistant plants?
Yes, Caramel Coral Bells are generally considered deer-resistant, making them an excellent choice for gardens in regions where deer browsing is a common problem. While no plant is entirely deer-proof, the texture and taste of Caramel Coral Bells foliage are not particularly appealing to deer. Planting them alongside other deer-resistant perennials such as lavender, salvia, and ornamental grasses can create a beautiful, low-maintenance garden bed that remains largely protected from wildlife damage throughout the year.
Q7. How tall and wide do Caramel Coral Bells typically grow?
Caramel Coral Bells form a compact mound of foliage reaching approximately 8 to 12 inches in height, with a spread of 18 to 24 inches at full maturity. During the blooming season, slender flower stalks rise above the foliage of Caramel Coral Bells, extending the overall height to around 24 to 30 inches. This moderate size makes them perfect for edging garden borders, filling container arrangements, and providing mid-layer interest in mixed perennial beds and woodland-style gardens.
Q8. When do Caramel Coral Bells bloom, and what do the flowers look like?
Caramel Coral Bells produce delicate, tiny bell-shaped flowers in shades of soft pink and white, held on tall, airy wands that rise gracefully above the foliage. The blooming period for Caramel Coral Bells typically runs from late spring through early summer, usually between May and July depending on your climate zone. These dainty blooms attract pollinators like hummingbirds and bees and add a light, airy texture to garden compositions without overpowering the striking caramel foliage below.
Q9. How do I propagate Caramel Coral Bells successfully?
Caramel Coral Bells can be propagated through crown division, which is the most reliable and commonly used method. In early spring or fall, carefully lift the plant, divide the root crown into sections, and replant each division at the same depth. Caramel Coral Bells can also be propagated through stem cuttings taken in late spring. While seed propagation is possible, seedlings may not retain the characteristic caramel foliage color, so division is strongly recommended for maintaining true-to-type plants.
Q10. Are Caramel Coral Bells evergreen or deciduous plants?
Caramel Coral Bells are semi-evergreen to evergreen perennials in mild climates, retaining much of their foliage throughout winter. In colder regions with harsh winters, Caramel Coral Bells may lose some leaves but typically bounce back vigorously in spring. The foliage often takes on deeper, richer bronze tones during winter months, adding off-season interest to the garden. In USDA zones 4 through 9, this plant performs reliably year-round, making it a valuable four-season performer in diverse garden landscapes.
Q11. What are common pests and diseases that affect Caramel Coral Bells?
Caramel Coral Bells are relatively pest-resistant but can occasionally be affected by vine weevils, foliar nematodes, and powdery mildew. Vine weevil larvae damage roots and can cause wilting. Ensuring proper air circulation and avoiding overhead watering helps prevent fungal diseases in Caramel Coral Bells. Inspect plants regularly and treat infestations early with appropriate organic or chemical controls. Well-draining soil and avoiding waterlogged conditions are the most effective preventive measures against most diseases and root-related problems in these plants.
Q12. Can Caramel Coral Bells be grown successfully in containers?
Absolutely! Caramel Coral Bells thrive in containers and are a popular choice for patio and balcony gardens. Use a well-draining potting mix and ensure the container has adequate drainage holes. Container-grown Caramel Coral Bells may require more frequent watering and feeding than those planted in-ground. Choose a pot at least 12 inches in diameter to give the roots sufficient room to develop. They look stunning when paired with trailing plants like sweet potato vine or creeping Jenny in decorative mixed planters.
Q13. What USDA hardiness zones are suitable for growing Caramel Coral Bells?
Caramel Coral Bells are hardy in USDA zones 4 through 9, making them adaptable to a wide range of climates across North America and beyond. In zone 4, some winter protection such as a layer of mulch over the crown helps ensure plant survival. In hotter zones 8 and 9, Caramel Coral Bells prefer more shade to protect foliage from scorching. Understanding your local hardiness zone helps determine the best planting time, care routine, and winter preparation strategies for these beautiful perennials.
Q14. How do I prevent Caramel Coral Bells from heaving out of the ground in winter?
Winter heaving, caused by repeated freeze-thaw cycles, is a common challenge for Caramel Coral Bells growers in colder climates. The expanding and contracting soil can push the plant’s crown out of the ground, exposing roots to damaging cold. To prevent this, apply a 2 to 3-inch layer of mulch around the base of Caramel Coral Bells after the ground freezes in fall. Check plants each spring and gently re-firm any heaved crowns back into the soil before new growth begins.
Q15. How do I divide and rejuvenate older Caramel Coral Bells plants?
Over time, Caramel Coral Bells can become woody and develop an unsightly raised crown. Dividing them every 3 to 4 years helps rejuvenate the plant and maintain vigorous, healthy growth. In spring or early fall, dig up the entire clump of Caramel Coral Bells, remove any woody central portions, and replant the younger, outer sections with fresh roots at the correct soil depth. This simple process reinvigorates the plant and encourages fresh, colorful foliage and better flowering performance in the seasons ahead.
Q16. Do Caramel Coral Bells attract pollinators to the garden?
Yes, Caramel Coral Bells are wonderful pollinator-friendly plants. Their slender, bell-shaped flowers are particularly attractive to hummingbirds, who love sipping nectar from the delicate blooms. Native bees and butterflies are also drawn to Caramel Coral Bells during their blooming season. Planting them alongside other nectar-rich perennials creates a supportive habitat for pollinators throughout spring and summer. This makes Caramel Coral Bells an excellent choice for gardeners who want to support local ecosystems while maintaining a visually beautiful and colorful outdoor space.
Q17. Can Caramel Coral Bells be used as ground cover in shaded areas?
Caramel Coral Bells make a superb ground cover for partially shaded areas, where grass often struggles to grow. Their dense, mounding foliage effectively suppresses weeds while providing year-round color and texture. Mass plantings of Caramel Coral Bells create a stunning tapestry of warm caramel and bronze tones beneath trees or along shaded pathways. Spacing plants approximately 18 inches apart ensures they fill in evenly over time. This versatile plant offers both practical weed control and exceptional ornamental value in challenging low-light garden areas.
Q18. How do I care for Caramel Coral Bells during extreme summer heat?
During periods of intense summer heat, Caramel Coral Bells may experience leaf scorch or temporary wilting, particularly in full sun exposures. Providing afternoon shade, maintaining consistent soil moisture, and applying a layer of organic mulch significantly reduces heat stress in Caramel Coral Bells. Avoid fertilizing during heat waves, as this can stress the plant further. Deep, infrequent watering encourages deeper root growth, improving drought tolerance. In USDA zones 8 and 9, choosing a sheltered spot with morning sun and consistent shade helps protect plants during the hottest summer months.
Q19. What companion plants pair well with Caramel Coral Bells in garden beds?
Caramel Coral Bells pair beautifully with a wide range of companion plants that complement their warm, amber foliage. Hostas, ferns, and astilbes make excellent shade-loving companions that contrast with the bronze tones of Caramel Coral Bells. For sunnier spots, black-eyed Susans, ornamental grasses, and purple coneflowers create a vibrant color combination. Combining Caramel Coral Bells with blue or purple flowering plants such as salvia or veronica produces a striking complementary color scheme that elevates the overall visual impact of mixed perennial garden beds.
Q20. Is Caramel Coral Bells toxic to pets or children?
Caramel Coral Bells are considered non-toxic to humans, dogs, and cats, according to most horticultural and veterinary references. This makes them a safe and family-friendly choice for gardens frequented by children and pets. While Caramel Coral Bells are not poisonous, it is always wise to discourage pets and young children from chewing or ingesting any garden plant as a general precaution. Their non-toxic nature, combined with their stunning foliage and adaptability, makes Caramel Coral Bells one of the most all-around safe and attractive perennials available for home gardeners today.
Hi, I’m Steve, an orchid grower with 30+ years of hands-on experience caring for indoor and outdoor plants. I share practical, tested tips and beginner-friendly guides to help plant enthusiasts nurture healthy, thriving plants.